Leases
Ad Manager maintains a database of all leases that structures are assigned to. The lease information is used in a number of areas of the software. Additional information can be entered.
In Ad Manager you can track all types of information pertaining to a Lease; from the Lease number, to the terms, to which Sites/Faces are attached to it. With accurate and up-to-the minute data entry, you can have the entire history of the Lease; and, with the use of some saved Finders, you can work with your Leases in a timely organized manner.
You can enter Payment Schedules and track Payments in addition to the standard leasing functionality.
Adding a New Lease
If you are on a Site Window and want to enter Lease information, you can either enter the new lease number in the Lease Number field on the Site Details page and hit the Tab key on your keyboard, or you can go click on the arrow beside the New icon () for a list of items you can add. Select OTHER, and then select Lease. The Lease - Details Window will appear, and a new Lease can be entered.
To add a Lease into Ad Manager from the main Ad Manager Window, click the File - New - Other menu item and select Lease. The new Lease window will appear.
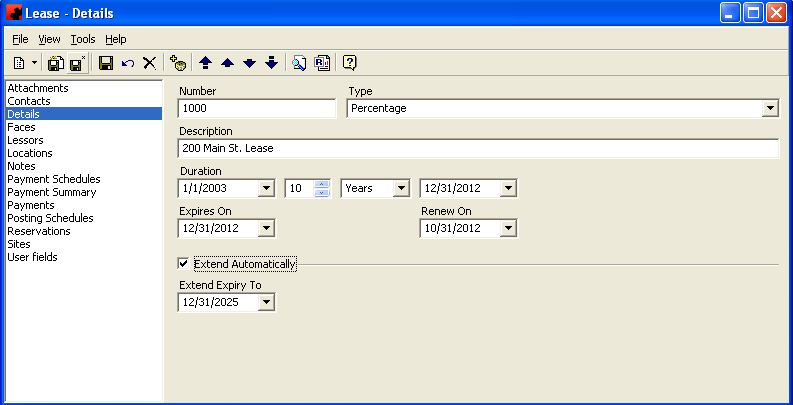
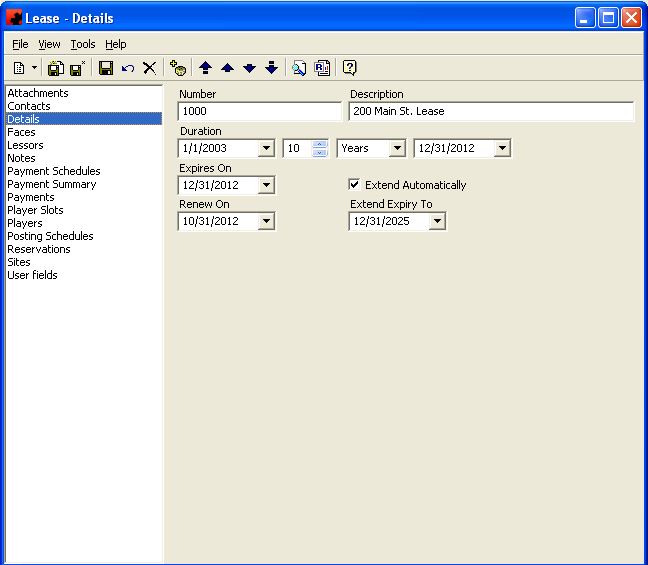
On this screen, basic information about the Lease can be entered on the Details Page. This information includes the Lease Number, any description you may wish to give for the Lease, type, the start and end dates of the Lease, and any renewal information you may wish to enter. Usually the renewal information will be dependent upon how you wish to track your Leases and when to address renewals. NOTE: Information you put on this page does not affect your Lease Payment Schedule(s). If you make changes to the dates, you will still have to edit the Payments, as necessary, to reflect these changes.
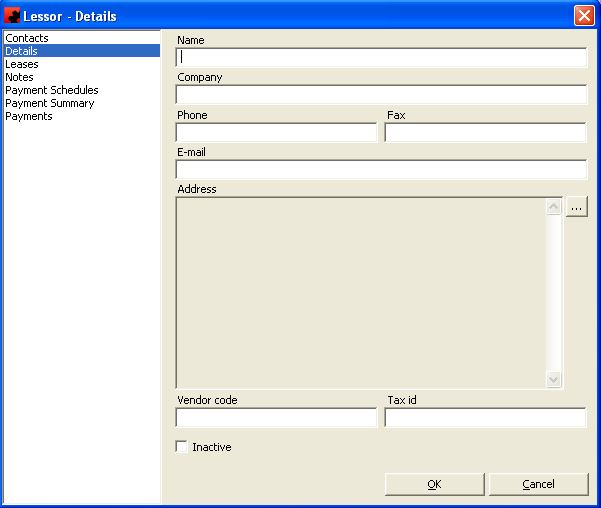
On the Lessors Page you can add Lessor information. To add a new Lessor, click the New () button to the right and you can either select an existing name or create a new one by choosing <New>. If you choose <New> the following window will appear:
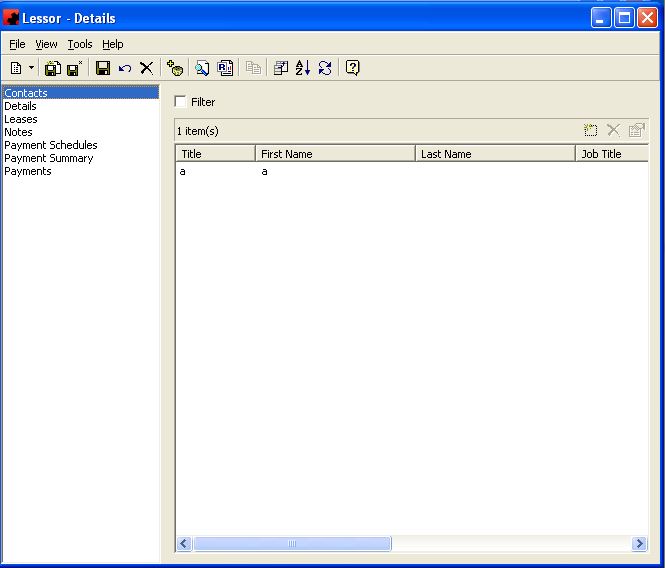
Complete the necessary data such as name, phone numbers, address, etc. NOTE: Vendor Code is a required field and must be filled in. You may also want to complete the Tax Id box if you are providing your Lessor with Government income statements. Perhaps you may wish to add a contact name if the Lessor is a Company rather than a person. To add the Contact person, click the Contacts Page, click the New button, either choose a name already existing from the list or choose <New> to add a new one and enter the detail. NOTE: You can have as many Lessors on a Lease as necessary.
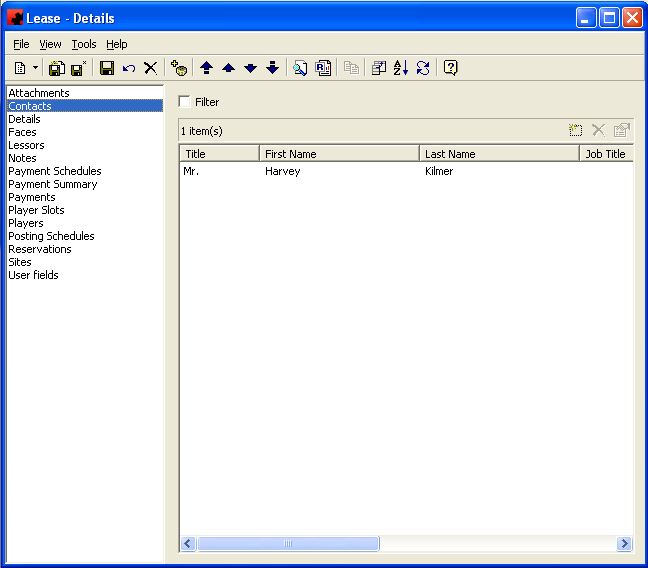
On the Contacts Page, any contact people that are related to this Lease can be added. To add a Contact person, click on the New ( ) button on the page. From here you can select a Contact from the list, or add one by clicking on <New...> at the top of the list. Once you have finished adding Contacts to the Lease, click on the Save button to save the Lease.
Modifying a Lease
To modify a Lease, simply click the database from the OTHER folder, then double click the desired item and make the change(s) necessary. Once you have finished, click the Save () button.
Deleting a Lease
To delete a Lease, there must be no sites associated with it. Select the database from the OTHER folder, then double click the desired item. Select the Delete button () for the record. Ad Manager will ask you for confirmation to delete the lease.
Lease Pages
Attachments Page
For more information on the Attachments page, click here.
Contacts Page
The Contacts Page is used to enter information referring to all Contact people for a Lease.
Tool buttons specific to the Contacts Page:
- Customize Current View allows you to select the columns to display and the order to display them in.
- Order allows you to sort the list of Contacts on the Lease in the desired order.
- The Refresh button will reload the list of Contacts, in the event changes to the number of Contacts has occurred since you visited this page.
The pane in the window shows a listing of all Contacts that are assigned to this Lease. The functions available through the buttons immediately above the pane are:
- Add a new Contact to the Lease. Click on this button and either select an existing Name from the list or create a new record by choosing < New >.
- Delete the highlighted Contact from the Lease.
- Edit the information for the highlighted Contact.
For additional information on buttons that appear at the top of the window, click here. For information on the menu items that appear under the Tools menu, click here.
The Filter check box allows you to filter the listing of Contacts to show only those that meet a certain criteria. When selected, a filter screen will appear, allowing you to choose to see Contacts with a certain Name, Phone number, or Address. When a filter is active, a check mark will appear in the filter box. To clear the filter and see all records, click on Filter, then the Clear button on the Filter screen, followed by the OK button.
Details Page
The Details Page is where information about the Lease agreement is displayed. Information on the terms of the Lease, and whether the Lease can be automatically extended.
For information on the buttons that appear at the top of the window, click here. For information on the menu items that appear under the Tools menu, click here.
Fill in the appropriate information for each field. Select the appropriate item from any of the drop down lists (in the boxes) or type in the information if it is not present.
Fields
Description: This is a quick description of what this Lease pertains to. This description allows the users to be able to recognize the Lease among a long list of Leases.
Duration: This is the date range for the Lease. You can enter the date or select the date from the dropdown calendar, and enter in the duration or the end date. Ad Manager will automatically calculate the third value.
Expires On: The date when the Lease will expire. If you are extending the lease automatically, this date should always reflect the newest expiry date.
Extend Automatically: This check box should be checked if you lease agreement allows you to automatically extend the it without signing a new Lease agreement.
Extend Expiry To: If your Lease agreement allows for the automatic extension of the Lease, the expiry date of the extension should be entered here.
Number: This is the unique Lease number.
Renew On: This is an arbitrary date, chosen to flag your Leasing department that its time to go out and renew the Lease.
Type: This is where you can specify what type of lease this is (percentage, flat rate, step/escalator, etc). The default value for a lease is <Unspecified>.
Faces Page
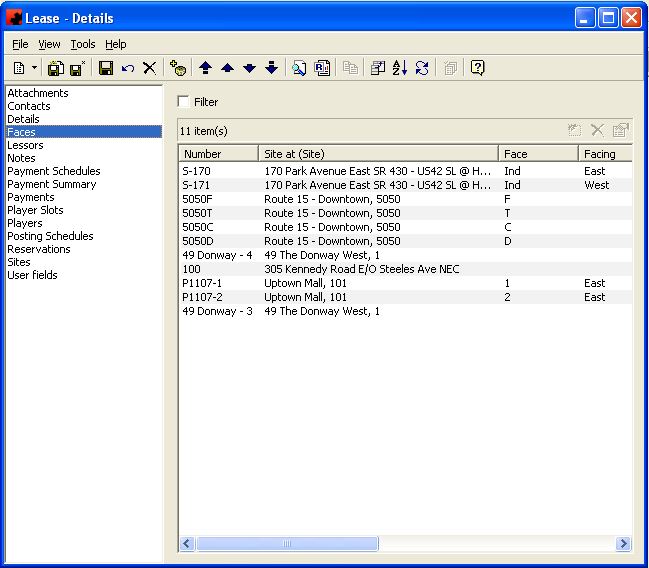
The Faces Page lists all Faces that have been attached to the Lease.
Tool buttons specific to the Faces Page:
- Customize Current View allows you to select the columns to display and the order to display them in.
- Order allows you to sort the list of Faces on the Lease in the desired order.
- The Refresh button will reload the list of Faces, in the event changes to the number of Faces has occurred since you visited this page.
- The Update button allows you to highlight multiple Faces and apply the same properties to them.
The pane in the window shows a listing of all Faces that are assigned to this Lease. The functions available through the buttons immediately above the pane are:
- Delete the highlighted Face from the Lease.
- Edit the information for the highlighted Face.
For additional information on buttons that appear at the top of the window, click here. For information on the menu items that appear under the Tools menu, click here.
The Filter check box allows you to filter the listing of Faces to show only those that meet a certain criteria. When selected, a filter screen will appear, allowing you to choose to see Faces of a certain media type, facing a particular direction, of a particular size, etc. When a filter is active, a check mark will appear in the filter box. To clear the filter and see all records, click on Filter, then the Clear button on the Filter screen, followed by the OK button.
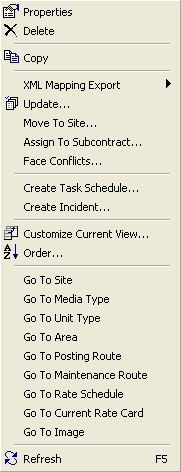
Right clicking on the list of Faces will display this menu. From here you can move the selected Face to a different Site, chart/schedule the Face to a Subcontract, or Update a property (or properties) for one or more highlighted Face(s).
To change the information being viewed in the list, simply right click in the list, and choose Customize Current View. To change the sort order, simply right click in the list, and choose Order.
Update - The Update menu item allows you to modify a property (or properties) for one or more highlighted Faces.
Move To Site - The Move To Site menu item allows you to move highlighted Faces from this Site to another Site in the inventory. A filter will appear to assist you in selecting the appropriate Site.
Assign To Subcontract - The Assign To Subcontract menu item allows you to highlight a Face and assign it directly to a Subcontract. A filter will appear to assist you in selecting the appropriate Subcontract.
Face Conflicts - The Face Conflicts menu item allows you to view all conflicts that exist for the highlighted Face . You can specify what conditions are considered to be a Conflict prior to clicking OK. The subsequent list is all scheduling that has generated a conflict.
Go To - The Go To feature allows you to open a window for the appropriate item for the highlighted record.
Lessors Page
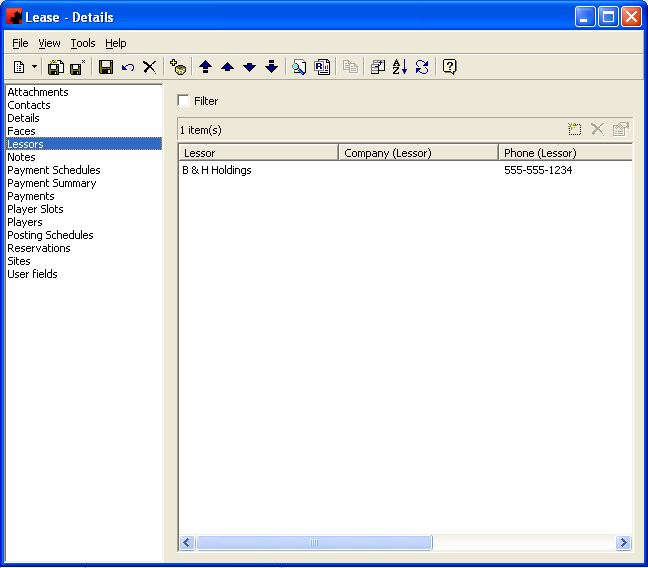
The Lessors Page is used to enter Lessor/Payee information for a Lease.
Tool buttons specific to the Lessors Page:
- Customize Current View allows you to select the columns to display and the order to display them in.
- Order allows you to sort the list of Lessors on the Lease in the desired order.
- The Refresh button will reload the list of Lessors, in the event changes to the number of Lessors has occurred since you visited this page.
The pane in the window shows a listing of all Lessors that are assigned to this Lease. The functions available through the buttons immediately above the pane are:
- Add a new Lessor to the Lease. Click on this button and either select an existing Name from the list or create a new record by choosing < New >.
- Delete the highlighted Lessor from the Lease.
- Edit the information for the highlighted Lessor.
For additional information on buttons that appear at the top of the window, click here. For information on the menu items that appear under the Tools menu, click here.
The Filter check box allows you to filter the listing of Lessors to show only those that meet a certain criteria. When selected, a filter screen will appear, allowing you to choose to see Lessors with a certain Name, Vendor Code, etc. When a filter is active, a check mark will appear in the filter box. To clear the filter and see all records, click on Filter, then the Clear button on the Filter screen, followed by the OK button.
Locations Page
The Locations Page lists all Digital (2) Locations that are associated with this Lease.
Notes Page
For more information on the Notes page, click here.
Payment Schedules
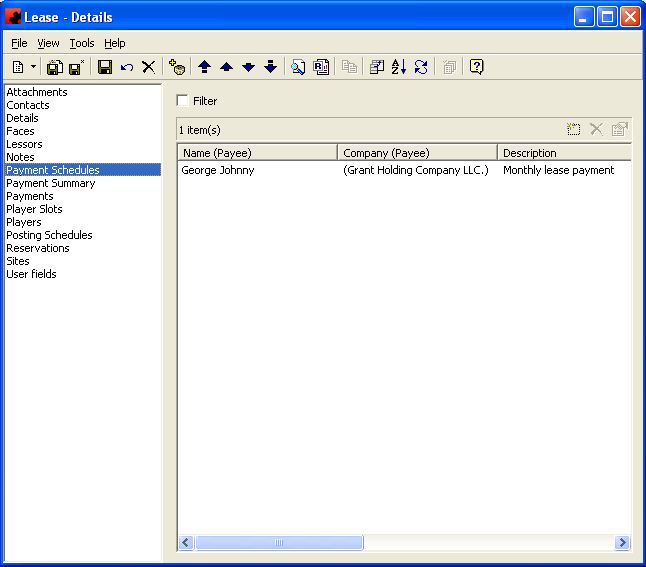
The Payment Schedules Page provides a financial history for this Lease by showing a listing of all payment schedules that have been set up.
Tool buttons found at the top of the Lease - Details screen when you are on the Payment Schedules Page:
- Customize Current View allows you to select the columns to display and the order to display them in.
- Order allows you to sort the Payment Schedules in the desired order.
- The Refresh button will reload the list of Payment Schedules, in the event changes to the Payment Schedules have occurred since you visited this page.
- The Update button allows you to select one or more Payment Schedules and change information on them. All highlighted Schedules will be changed to reflect the items selected.
The functions available through the buttons immediately above the Payment Schedules pane are:
- Add a new Payment Schedule for this Lease. The New Lease Payment Schedule - Details window will open where you can create a new Lease Payment Schedule.
- Delete the highlighted Payment Schedule from this Lease. Highlight the item and click the Delete button.
- Opens the Lease Payment Schedule - Details window to allow you to review or change any information related to the Lease Payment.
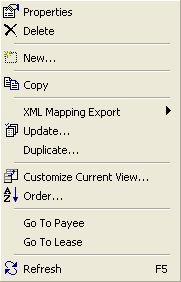
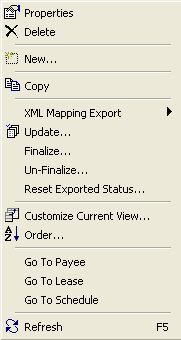
Right clicking on the list of Payment Schedules will display this menu. From here you can duplicate the Payment Schedule, change the status of a Payment Schedule as well as any line items by using the Update option.
To change the information being viewed in the list, simply right click in the list, and choose Customize Current View. To change the sort order, simply right click in the list, and choose Order.
Update - The Update menu item allows you to to modify a property (or properties) for one or more highlighted Payment Schedules.
Duplicate - The Duplicate menu item allows you to create a new Payment Schedule with the same Line item configuration as the current Payment Schedule.
Go To - The Go To feature allows you to open a window for the appropriate item for the highlighted record.
For additional information on the buttons that appear at the top of the window, click here. For information on the menu items that appear under the Tools menu, click here.
The Filter check box allows you to filter the listing of Payment Schedules to show only those that meet a certain criteria. When selected, a filter screen will appear, allowing you to choose to see Payment Schedules with certain recurrence patterns, for specific Payees, etc. When a filter is active, a check mark will appear in the Filter box. To clear the filter and see all records, click on Filter, then the Clear button the Filter screen, followed by the OK button.
Payment Summary Page
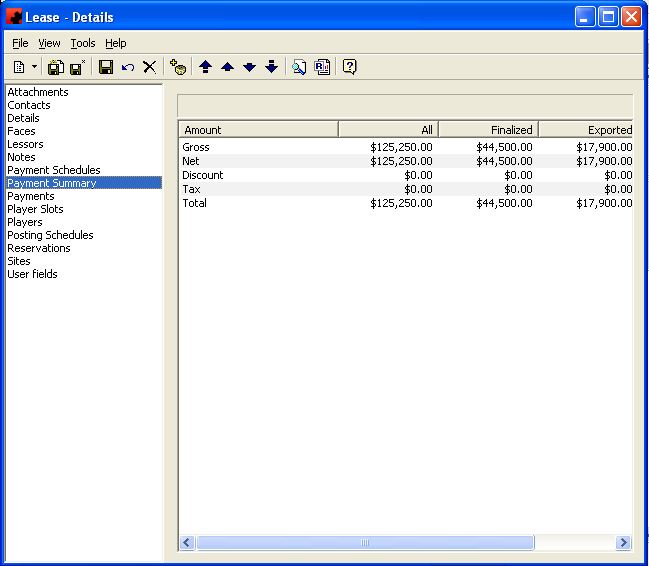
The Payment Summary Page allows you to identify how well you have reached your Payment requirements. From this screen you can see how much money has been Paid, Finalized, Exported, Sent, and the Current Balance Owing.
For information on the buttons that appear at the top of the window, click here. For information on the menu items that appear under the Tools menu, click here.
Payments Page
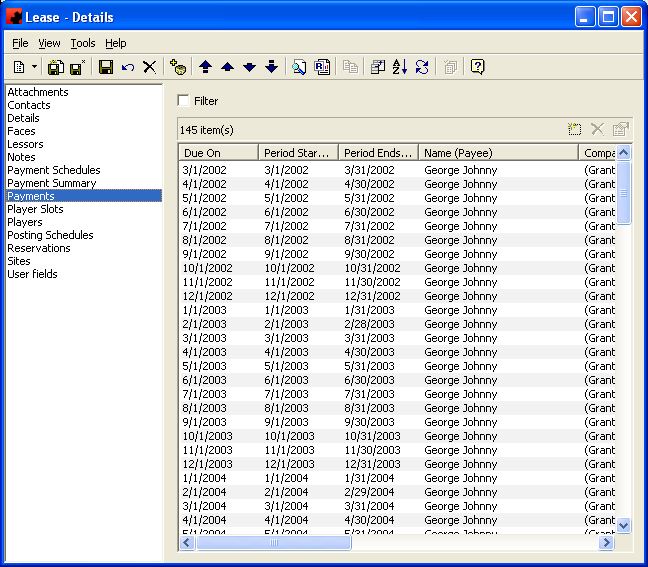
The Payments Page provides a listing of all payments that have been scheduled to be payed for this Lease.
Tool buttons found at the top of the Lease - Details screen when you are on the Payments Page:
- Customize Current View allows you to select the columns to display and the order to display them in.
- Order allows you to sort the Payments in the desired order.
- The Refresh button will reload the list of Payments, in the event changes to the Payments have occurred since you visited this page.
- The Update button allows you to select one or more Payments and change information on them. All highlighted Payments will be changed to reflect the items selected.
The functions available through the buttons immediately above the Payments pane are:
- Create a new Lease Payment Schedule for this Lease. The New Lease Payment Schedule - Details window will open where you can create a new Lease Payment Schedule.
- Delete the highlighted Payment from this Lease. Highlight the item and click the Delete button.
- Opens the Payment - Details window to allow you to review or change any information related to the payment.
Right clicking on the list of Payments will display this menu. From here you can change the due date of a payment, the status of a payment as well as any line items by using the Update option, as well as, finalize, un-finalize, and reset the exported status of a payment or group of highlighted payments.
To change the information being viewed in the list, simply right click in the list, and choose Customize Current View. To change the sort order, simply right click in the list, and choose Order.
Update - The Update menu item allows you to to modify a property (or properties) for one or more highlighted Payments.
Finalize - Finalizing a Payment will prevent you from making additional changes to it. This can be done manually prior to a Payment Export, by using this tool, or it will automatically occur during the Export. If you wish to finalize payments using this tool, highlight them first, then right-click to get this menu option. Once finalized, the Payment is marked as Finalized and will display a unique Transaction ID as well as an Check Number.
Un-Finalize - If a Payment has incorrectly been marked as Finalized, this tool allows you to un-finalize it. Ad Manager will remove the Finalized status of the Payment, but will still show a unique Transaction ID, indicating this Payment was Finalized at one time.
Reset Exported Status - If a Payment has been Exported incorrectly, this tool allows you to mark it as un-exported, so that you may Export it again at a later date.
Go To - The Go To feature allows you to open a window for the appropriate item for the highlighted record.
For additional information on the buttons that appear at the top of the window, click here. For information on the menu items that appear under the Tools menu, click here.
The Filter check box allows you to filter the listing of Payments to show only those that meet a certain criteria. When selected, a filter screen will appear, allowing you to choose to see Payments that are due on a certain date, finalized or exported on a certain date, etc. When a filter is active, a check mark will appear in the Filter box. To clear the filter and see all records, click on Filter, then the Clear button the Filter screen, followed by the OK button.
Player Slots page
The Player Slots page shows you a listing of all Digital (1) Player Slots associated with this lease.
Players Page
The Players page shows you a listing of all Digital (1) Players associated with this lease.
Posting Schedules Page
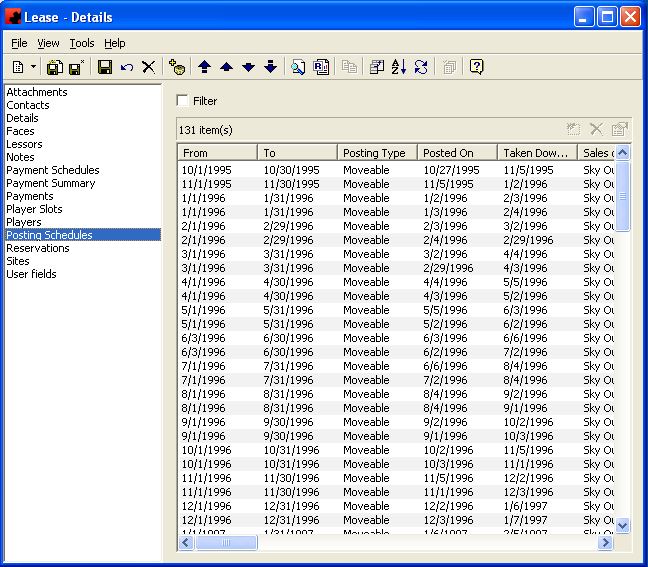
The Posting Schedules Page shows you a listing of all past, present, and future postings for all Faces that are attached to a particular Lease. This is useful in determining how often the Faces have been sold, if you anticipate any difficulties renewing the Lease, or what effect cancelling the Lease will have on any planned or posted Schedules.
Tool buttons found on the top of the screen when you are the Posting Schedules Page:
- Customize Current View allows you to select the columns to display and the order to display them in.
- The Order button allows you to sort the activities in the desired order.
- The Refresh button will reload the list of activities, in the event changes to the activities have occurred since you visited this page.
The functions available through the buttons immediately above the Posting Schedules pane are:
- Allows you to delete a scheduled item. When you delete scheduling from this page, Ad Manager automatically updates your Subcontract charting information for you.
- Allows you to modify or review information related to the highlighted posting schedules. If you modify any information (dates, posting type, design), Ad Manager will check for any scheduling or location related conflicts and inform you of any problems. Ad Manager automatically updates your Subcontract charting information for you.
For additional information on the buttons that appear at the top of the window, click here. For information on the menu items that appear under the Tools menu, click here.
The Filter check box allows you to filter the listing of Posting schedules to show only those that meet a certain criteria. When selected, a filter screen will appear, allowing you to choose to see schedules (charting) related to a particular contract, subcontract, advertiser, etc. When a filter is active, a check mark will appear in the Filter box. To clear the filter and see all records, click on Filter, then the Clear button on the Filter screen, followed by the OK button.
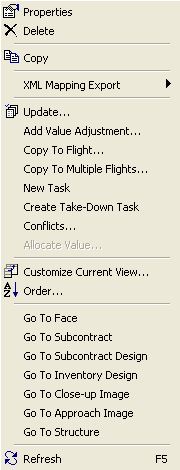
Right clicking on the list of assigned Faces will display this menu. From here you can alter the assignment's duration, copy to another flight, create a new task (e.g. repost), create a Take-Down task, or Update a property (or properties) for one or more highlighted schedule(s).
To change the information being viewed in the list, simply right click in the list, and choose Customize Current View. To change the sort order, simply right click in the list, and choose Order.
Copy To Flight - This will allow you to copy (transcribe) the highlighted Faces from this Subcontract flight to any other flight for any Subcontract. Ad Manager will check to ensure the Face is available and suitable on the new Subcontract flight.
Copy to Multiple Flights - This will allow you to copy (transcribe) the highlighted Faces from this Subcontract flight to other flights for other Subcontracts (instead of copying them one at a time). Ad Manager will check to ensure the Face(s) is/are available and suitable on the new Subcontract flights.
Create Take-Down Task - This feature allows you to inform Ad Manager to create a task that will generate a Posting Card/Instruction that will remove the existing copy and not replace it with new copy. You can specify the date that this Take-Down will occur.
Go To - The Go To feature allows you to open a window for the appropriate item for the highlighted record.
New Task - This will allow you to create a new posting of the same copy on a different date for this Subcontract or create a take down record for the highlighted Face(s).
Update - The Update menu item allows you to to modify a property (or properties) for one or more highlighted schedule.
Reservations Page
The Reservations page shows you a listing of all reservations that are associated with the Lease.
Sites Page
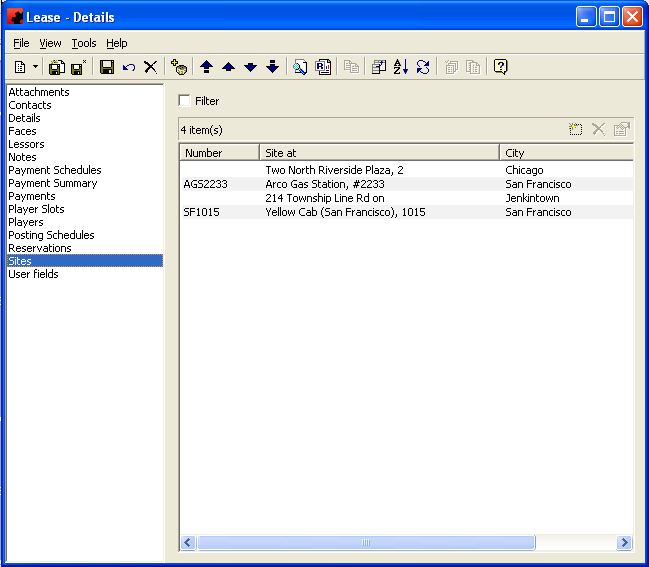
The Sites Page lists all Sites that have been attached to the Lease.
Tool buttons specific to the Sites Page:
- Customize Current View allows you to select the columns to display and the order to display them in.
- Order allows you to sort the list of Sites on the Lease in the desired order.
- The Refresh button will reload the list of Sites, in the event changes to the number of Sites has occurred since you visited this page.
- The Update button allows you to highlight multiple Sites and apply the same properties to them.
- The Duplicate button allows you highlight a Site from the list and create a new Site with the same Face configuration as the highlighted one.
The pane in the window shows a listing of all Sites that are assigned to this Lease. The functions available through the buttons immediately above the pane are:
- Add a new Site to the Lease.
- Delete the highlighted Site from the Lease.
- Edit the information for the highlighted Site.
In addition, while you are in the pane, you can double click on a Site to see details about the Site. You can also right click in the pane and select "New", "Customize Current View" , "Order" or "Refresh" (see above).
For additional information on buttons that appear at the top of the window, click here. For information on the menu items that appear under the Tools menu, click here.
The Filter check box allows you to filter the listing of Sites to show only those that meet a certain criteria. When selected, a filter screen will appear, allowing you to choose to see Sites in a certain city, state, zip code, on a certain street, etc. When a filter is active, a check mark will appear in the filter box. To clear the filter and see all records, click on Filter, then the Clear button on the Filter screen, followed by the OK button.
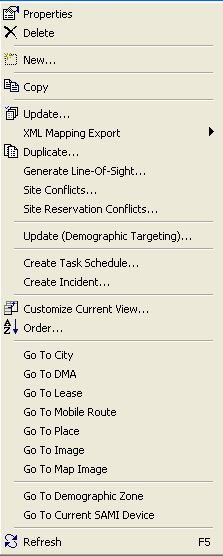
Right clicking on the list of Sites will display this menu. From here you can create a new Site and add it to the Lease, duplicate a Site, Generate Line-of-Site conflicts between Sites, or Update a property (or properties) for one or more highlighted Site(s).
To change the information being viewed in the list, simply right click in the list, and choose Customize Current View. To change the sort order, simply right click in the list, and choose Order.
Duplicate - The Duplicate menu item allows you to create a new Site with the same Face configuration as the current Site.
Generate Line-Of-Sight - the Generate Line-Of-Sight menu item allows you to create line of sight conflicts between Faces on a Site, based on their direction facing or virtual Face configuration.
Go To - The Go To feature allows you to open a window for the appropriate item for the highlighted record.
Site Conflicts - The Site Conflicts menu item allows you to view all conflicts that exist on any Face for this Site. You can specify what conditions are considered to be a Conflict prior to clicking OK. The subsequent list is all scheduling that has generated a conflict.
Update - The Update menu item allows you to to modify a property (or properties) for one or more highlighted Sites.
User Fields Page
For more information on the User fields page, click here.
