Design How To
How To Page for Design.
Contents |
Add a Design
One of Ad Manager's most powerful features is that it allows you to track your Design inventory. This allows you to ensure that there is always sufficient quantities of each copy prior to posting.
Adding a Design
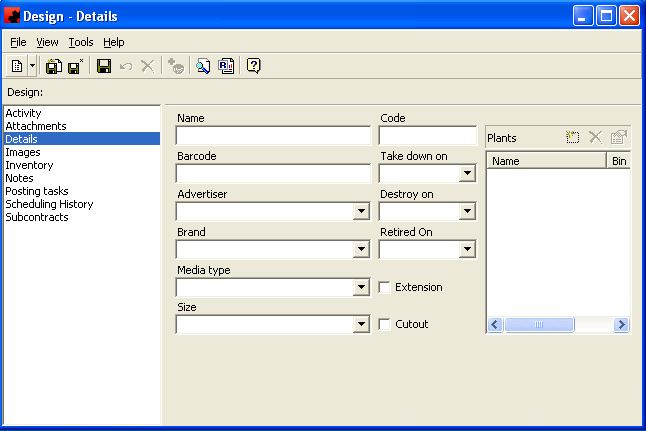
To add a Design into Ad Manager, click the New icon from the Design window () and a new Design window will appear. Alternately, click on the arrow next to the new icon (
) from any window and select Design. The new Design window will appear. Add the appropriate information in for each field and click on the Save icon (
). If you wish to save this Design and add another, click on the Save and New icon(
).
Details Page
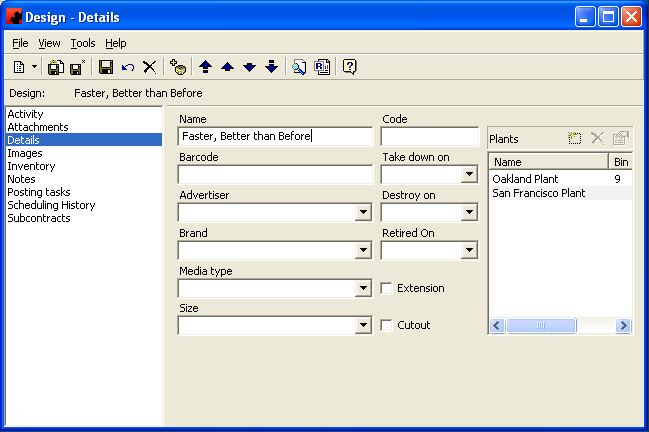
In the Details Page, general information about the Design can be entered and viewed. For more information on adding information to this Page, see the Design Details Page.
Activity Page
The Activity Page provides information on any activity (Received, Stored, Shipped, Destroyed) associated with this Design.
To add a Design Received activity, select the New button () and the Design Activity window will appear.
For information on adding Design activity, see Recording Design Activity.
Inventory Page
The Inventory Page provides information on how many of each Design will be in inventory on any given date, based on the Designs received and scheduling information entered.
For information, see the Inventory Page.
Images Page
The Images Page allows you to add any photographs, video or Surround View images for the Design. These can later be used for a variety of purposes.
For information on how to add Images to a Design, see the Images Page.
Attachments Page
The Attachments Page allows you to attach any documents or files to a Design. These can be files of type XLS, DOC, PDF, etc. about the Design.
For information on how to attach documents to a Design, see the Attachment Page.
Scheduling History Page
The Scheduling History Page allows you to view what Faces are scheduled to contain this Design and on which dates. For more information on this Page, see the Scheduling History Page.
Posting Tasks Page
The Posting Tasks Page allows you to view when Faces have been posted with this Design on which dates. For more information on this Page, see the Posting Tasks Page.
Notes Page
The Notes Page allows you to store additional information specific to the Design. The Notes section allows you to store notes that are not printed on any reports.
All Designs
Designs can be added in three ways. You can add (assign) a design to a Subcontract, you can add a design to the Design Inventory, or you can add received design information to the Design Inventory. If you are interested in adding (assigning) a design to a Subcontract, click here. If you are adding received designs date information, click here.
Adding a Design to the Inventory Database
To add a design to the Inventory database, click on the arrow beside the New icon () for a list of items you can add. Select OTHER, and then select Design. The Designs window will appear, and a new Design can be entered.
From this screen you can enter in all the relevant Design information available. Ad Manager also allows you to track the Take down date for a design (the date the design must be covered or taken down, due to time sensitive copy) and the Destroy date (the date any remaining copies in inventory can be thrown out). Once you have entered the desired information, click the Save button ().
Editing a Design
To edit a design, go to the Ad Manager Explorer window or use Find () to locate the Design you wish to modify. Double click to see the design information. Make any changes as necessary and click the Save button (
).
Deleting a Design
To delete a Design, there must be no postings associated with it. Select the database from the OTHER folder, then double click the desired item, or use Find () to locate the Design. Select the Delete button (
) for the record. Ad Manager will ask you for confirmation to delete the Design.
Associate Subcontract Designs and Inventory Designs
Ad Manager allows users to add Designs to a Subcontract and work with these items without worrying about maintaining a Design inventory. However, if you are interested in using Ad Manager to maintain your Design inventory, you will want to link your Subcontract Design with an Inventory Design. This can be done at any stage of the process.
If you wish to track the inventory of Designs, you can link the Subcontract Design to a particular Design in the Designs Database. This can be done while adding a Subcontract Design, or by highlighting the appropriate Design on the Subcontract Designs Page and double clicking or by clicking the Properties () button when you are ready to link them.
To link a Design, click the Inventory Design New () button. Use the Select a Design window to obtain a listing of Designs to select from. The desired Inventory Design can be filtered using the Advertiser, Brand, Media Type, Size or Name. After you click OK, a list of Designs meeting this criteria will appear, allowing you to select the correct one. If only one Design meets your search criteria, it will automatically fill in the information in the Inventory Design box.
If no Designs are found, it is possible that your search criteria has excluded the Design you are looking for, it has not yet been entered, or it has been entered into the Designs database incorrectly. If you do not wish to link to the Designs Database for Design inventory tracking, you do not need to Link to the Inventory Design.
The Subcontract Design name can automatically be renamed by highlighting the Design on the Subcontract Design Page, right-clicking and selecting Rename Using Inventory Design Name.
Overlays
Type topic text here.
Recording Design Activity
When Designs come into, or leave, the plant, Ad Manager allows you to track when and how many, providing you with an accurate picture of how many of each Design is available at any given time. You can enter information on received, destroyed, stored, shipped and returned Designs into the Designs database.
Adding Design Activity to Inventory
To add Design activity to inventory, select the appropriate Design from the Find () Tool or the Ad Manager Explorer window and open it in the Designs Window. Select the Activity Page, and click on the New (
) button. This will open a window where you can enter in details about the Design.
Edit Design Activity in Inventory
To modify information about Design activity in the Designs inventory, select the appropriate Design and open it in the Designs Window. Go to the Activity Page, select the appropriate entry, and double click, or click on the Properties () button. This will open the Design Activity - Details window where you can modify details about the Design received. Note that you cannot edit information related to Posting, Pending Postings, or Returned Designs from this screen. To edit these quantities, you must go back to the appropriate Subcontract and change the information there.
Delete Design Activity from Inventory
To delete a Design activity record from the Designs inventory, select the appropriate Design and open it in the Designs Window. Go to the Activity Page, select the appropriate entry, and click on the Delete () button. Note that you cannot delete information related to Posting, Pending Postings, or Returned Designs from this screen.
Updating Information on Multiple Designs
Ad Manager provides the ability to update information for multiple items (Faces, Sites, Contracts, Subcontracts, Designs, Advertisers, etc.) quickly and easily. For example, if there are several Designs that need to be changed to the correct media type, this can be done through the Update window one time, instead of having to change each Design individually.
In the Ad Manager Explorer window or in a Filter, highlight all the Designs you wish to update with the same information. You can highlight multiple Designs by holding either the SHIFT key down (for all items in a range) or the CTRL key down (for specific items) while clicking with the mouse. Once all the desired items have been selected, go to TOOLS-UPDATE.
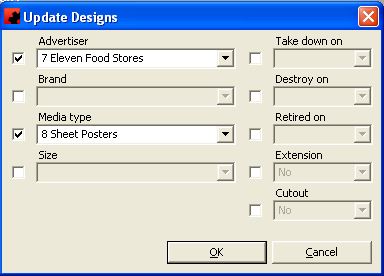
The screen that will appear allows users to set values for fields related to the items selected. By entering a value into one of these fields, Ad Manager will change each of the selected items to have that value in that field. To select a field, you must first activate it by putting a checkmark next to the field name. If you do not wish to update a field, make sure you "uncheck" the checkbox prior to running the tool.
Please Note: If you activate a field and leave it blank, the current values will be deleted and left blank for all selected items.
To run the tool, simply click OK.


