Design
The Design database allows you to track the physical inventory of Designs that are received by your company. These Designs are then linked to your Subcontract's Designs, allowing you to see how many of each design has been committed or posted to campaigns, and to allow you to find the location of Designs when it is time to prepare them for posting.
Contents |
Activity
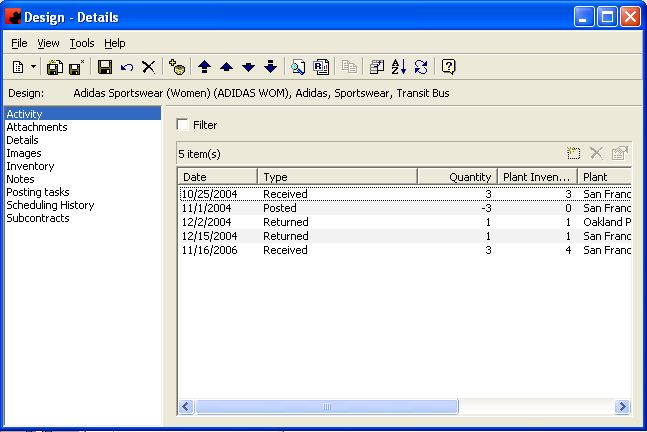
The Design Activity Page allows you to view any activity related to Designs arriving or leaving the Plants, including scheduled removals.
Tool buttons on the top of the Design - Details Screen:
- Customize Current View allows you to select the columns to display and the order to display them in.
- Order allows you to sort the activities in the desired order.
- The Refresh button will reload the list of activities, in the event changes to the activities have occurred since you visited this page.
The functions available through the buttons immediately above the Activity pane are:
() - Allows you to enter Received, Shipped, Stored or Destroyed Design Activities.
()- Allows you to delete Received, Shipped, Stored or Destroyed Design Activities.
() - Allows you to modify Received, Shipped, Stored or Destroyed Design Activities.
For additional information on the buttons that appear at the top of the window, click here. For information on the menu items that appear under the Tools menu, click here.
The Filter check box allows you to filter the listing of Design Activities to show only those that meet a certain criteria. When selected, a filter screen will appear, allowing you to choose to see Design Activities for a certain date, a certain plant, a certain supplier, etc. When a filter is active, a check mark will appear in the Filter box. To clear the filter and see all records, click on Filter, then the Clear button on the Filter screen, followed by the OK button.
Right Click
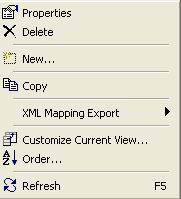
- Right clicking on the list of Design activities will display this menu. From here you can make changes to the activity records, or change the view parameters.
To change the information being viewed in the list, simply right click in the list, and choose Customize Current View. To change the sort order, simply right click in the list, and choose Order.
Attachments
For more information on the Attachments page, click here.
Details
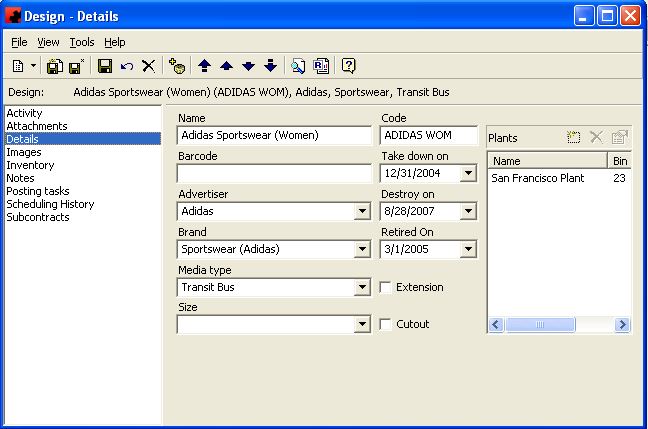
The Details Page is where information about the Design is stored. Information on the Design name, where to find it and how to use it are kept on this page.
Buttons on the Details Page specific to the Plants:
() - Allows you to enter/select the Plant where this Design is stored and the Bin information for that Plant where this Design is stored.
()- Allows you to delete the highlighted Plant from this Design.
() - Allows you to modify the Bin information for the highlighted Plant.
For additional information on the buttons that appear at the top of the window, click here. For information on the menu items that appear under the Tools menu, click here.
Fill in the appropriate information for each field. Select the appropriate item from any of the drop down lists (in the boxes) or type in the information if it is not present.
Fields
Advertiser - This is the advertiser that this particular Design belongs to.
Barcode - If the Design has a barcode associated with it, this barcode value can be entered here.
Brand - If the Design is for a specific brand for the advertiser (e.g. Ford can have multiple brands, Mustang, Explorer, etc.), this information can be recorded.
Code - The Code allows you to have a "short form" name for the Design, to be used throughout the software.
Cutout - If the Design is accompanied by a cutout, this can be identified here.
Destroy On - This is the date you wish to remove all remaining copies of this Design from your Plants.
Extension - If the Design is accompanied by an extension, this can be identified here.
Media Type - This allows you to specify which media type this Design is for.
Name - This is the name or description of the Design. This will be printed on posting cards/instruction lists and is used elsewhere throughout the software to identify what Design is being used.
Plants - In this pane you can identify the Plant and which Bin (storage area) this Design resides in. In the example above, the "Adidas Sportswear (Women)" Design can be found in Bin "23" in the "San Francisco" Plant.
Retired On - If you do not destroy your Designs but return them to your client, you can enter that date here. You can then filter this Design out of your current inventory.
Size - This allows you to specify the size of the Design. This is especially useful if the Design is an odd or irregular size.
Take Down On - This allows you to enter the date that time sensitive copy must be covered or removed. Typical applications include any time a special sale is being promoted by a client, or when a major event that is being advertised has concluded. Filters can be created to identify any currently posted copy that has an upcoming take down date.
Images
For more information on the Images page, click here.
Inventory
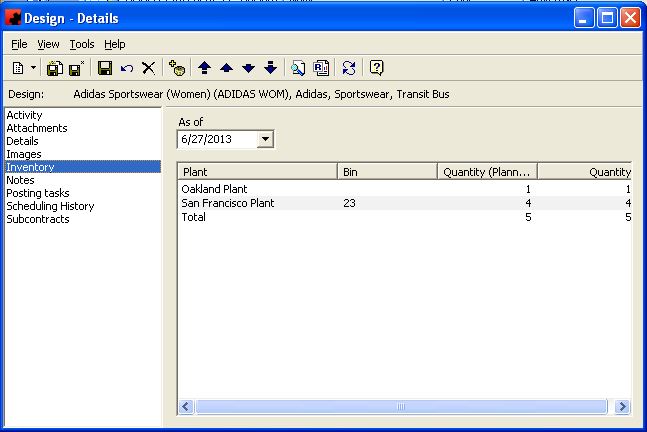
The Design Inventory Page provides information on the quantities that should have been and actually are available for any given date. This allows you to forecast whether you have a sufficient quantity of copy available for upcoming campaigns.
- The Refresh button will reload the inventory counts, in the event changes to the planned and actual inventory have occured since you visited this page.
For additional information on the buttons that appear at the top of the window, click here. For information on the menu items that appear under the Tools menu, click here.
Fields
As of - The As of date allows you to select any date to see expected inventory quantities. Ad Manager will determine the number of copies that will be used by that date, and determine the number still available, by Plant as well as the total number available. Select the desired date and Ad Manager will update the numbers automatically.
Notes
For more information on the Notes page, click here.
Posting Task
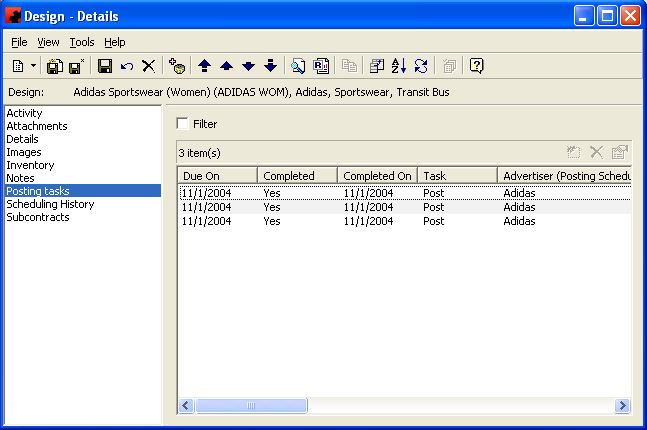
The Design Posting Tasks Page provides users with the ability to see a listing of all Posting Tasks that are related to this Design.
Tool buttons on the main Design - Details Screen:
- The Update button allows you to select one or more Posting Tasks and update the Posting Task information for them. For more information on using the Update button, see Change or Remove Posting Information.
- Allows you to delete the highlighted Posting Task(s).
- To enter or modify posting completion information from this window, highlight the desired posting task and select the properties button. From the Posting Task Details window you can enter the posting information as appropriate. If you want to enter multiple Posting Tasks for this Subcontract, use the SHIFT or CTRL key while selecting the desired Posting Tasks. Right click and select "Update". From this screen you can enter the information that you want to apply to all selected Posting Tasks.
For additional information on the buttons that appear at the top of the window, click here. For information on the menu items that appear under the Tools menu, click here.
To filter for specific Posting Tasks or Faces, click on Filter and select your criteria. If the list is filtered, a check mark will appear in the Filter box. To clear the filter and see all records, click on Filter, then the Clear button on the Filter screen, followed by the OK button.
Right Click
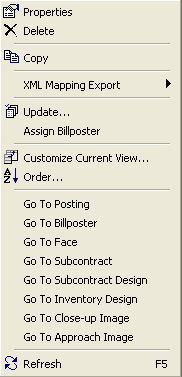
- Right clicking on the list of Posting Tasks will display this menu. From here you can update posting information for the specified Face(s), or go to the appropriate item.
To change the information being viewed in the list, simply right click in the list, and choose Customize Current View. To change the sort order, simply right click in the list, and choose Order.
Update - This allows you to enter posting related information (including Completion information) for the highlighted Faces.
Assign Billposter - Allows you to identify the Billposter who will be responsible for posting the copy. When producing posting cards/instructions, you can filter to find only those items that have been scheduled for a particular Billposter.
Go To - The Go To feature allows you to open a window for the appropriate item for the highlighted record.
Scheduling History
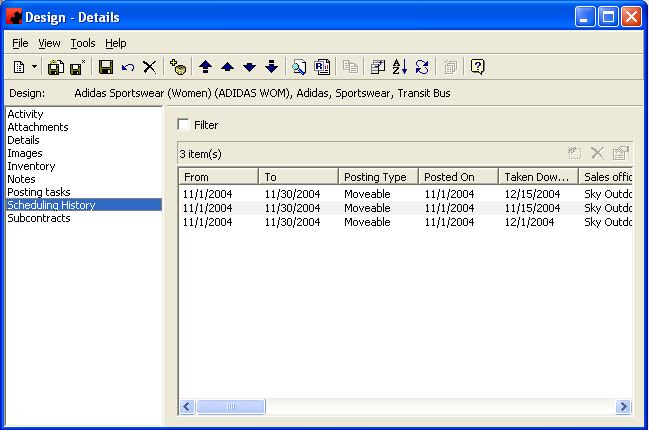
The Scheduling History Page provides information on when and where this Design is scheduled to be posted.
Tool buttons on the Design - Details Screen:
- Customize Current View allows you to select the columns to display and the order to display them in.
- Order allows you to sort the activities in the desired order.
- The Refresh button will reload the list of activities, in the event changes to the activities have occurred since you visited this page.
For additional information on the buttons that appear at the top of the window, click here. For information on the menu items that appear under the Tools menu, click here.
The pane will display all Face schedules that will occur for this Design (unless this list has been filtered).
From this screen you can use Filter to display only Face schedules that meet a certain criteria. If the list is filtered, a check mark will appear in the Filter box.To clear the filter and see all records, click on Filter, then the Clear button on the Filter screen, followed by the OK button.
Right Click
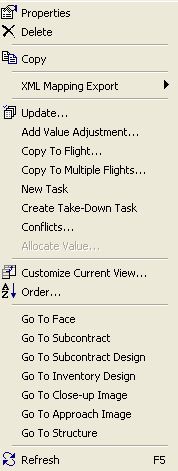
- When you right click in the pane, Ad Manager allows you to undertake various functions related to scheduling.
To change the information being viewed in the list, simply right click in the list, and choose Customize Current View. To change the sort order, simply right click in the list, and choose Order.
Update - The Update menu item allows you to to modify a property (or properties) for one or more highlighted schedules.
Copy To Flight - This will allow you to copy (transcribe) the highlighted schedules from this Subcontract flight to any other flight for any Subcontract. Ad Manager will check to ensure the Face(s) is/are available and suitable on the new Subcontract flight.
Copy to Multiple Flights - This will allow you to copy (transcribe) the highlighted schedules from this Subcontract flight to other flights for other Subcontracts (instead of copying them one at a time). Ad Manager will check to ensure the Face(s) is/are available and suitable on the new Subcontract flights.
New Task - This will allow you to create a new posting of the same copy on a different date for this Subcontract or create a Take-Down record for the highlighted Face(s).
Create Take-Down Task - This feature allows you to inform Ad Manager to create a task that will generate a Posting Card/Instruction that will remove the existing copy and not replace it with new copy. You can specify the date that this Take-Down will occur.
Go To - The Go To feature allows you to open a window for the appropriate item for the highlighted record.
Subcontracts
This is a listing of all subcontracts this design is being used on. You can go to a subcontract by double clicking on it, or by right clicking and selecting Go To Subcontract
User Fields
For more information on the User fields page, click here.
