Subcontract (Static)
Page for Subcontract(Static).
Contents |
Counts
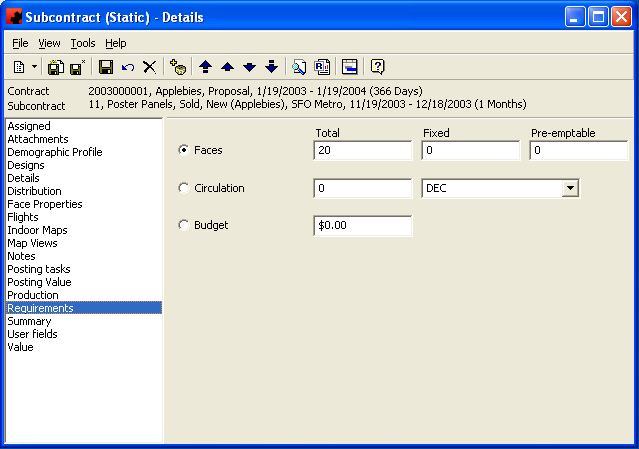
The Counts page is where you identify the number of Faces required for this Subcontract and the breakdown of Fixed, Movable and Preemptable, the required DEC/GRP, and how Ad Manager should fulfill these requirements when scheduling.
For information on the buttons that appear at the top of the window, click here. For information on the menu items that appear under the Tools menu, click here.
Fields
Circulation: This is where you identify the DEC, GRP or GRP (In-Market) level desired.
Faces - Fixed: This is the number of Faces that cannot be moved during the Subcontract duration. If certain Faces have been guaranteed to the client, this should be the total number of those Faces.
Faces - Movable: This number is calculated based on the number of Faces that have been identified as fixed and preemptable. This is the number of Faces that are on the showing that can be sold to other clients if necessary, as long as this client will be compensated with other Faces.
Faces - Preemptable: This is the number of Faces on the Subcontract which can be sold to other clients as necessary, where this client does not need to be compensated with other Faces.
Faces - Total: This is the total number of Faces that have been sold on this Subcontract.
Primary Requirement: When charting, Ad Manager can chart until a desired number of Faces or a specific Circulation is met. This is where you can identify which item you wish to chart towards.
Assigned
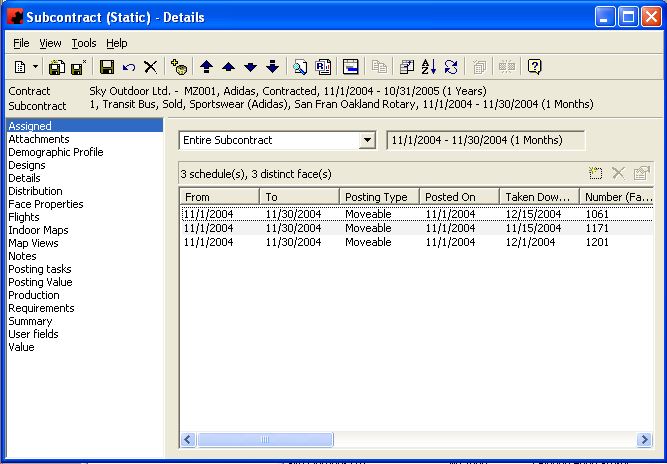
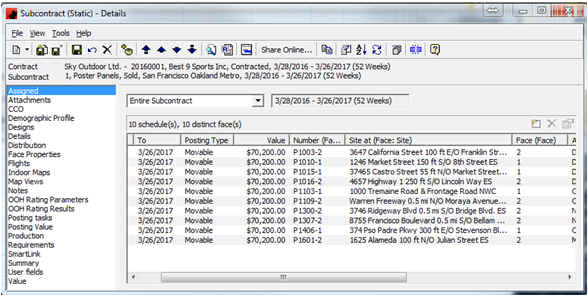
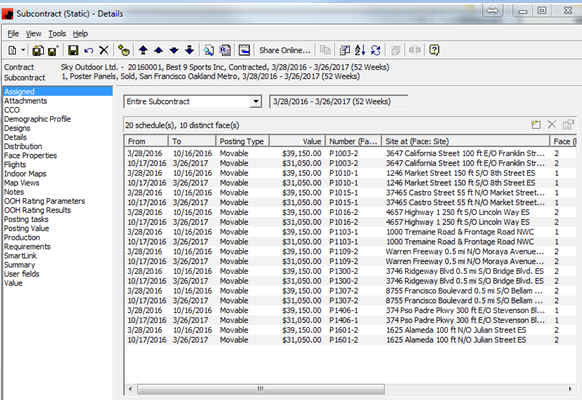
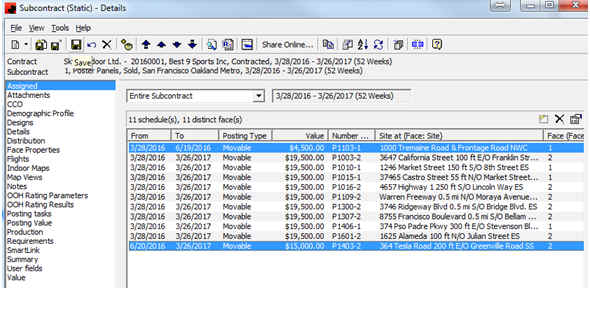
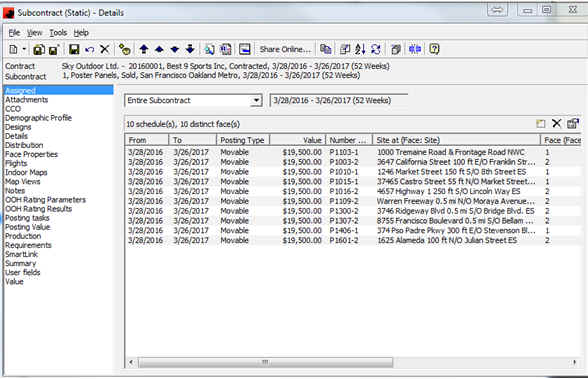
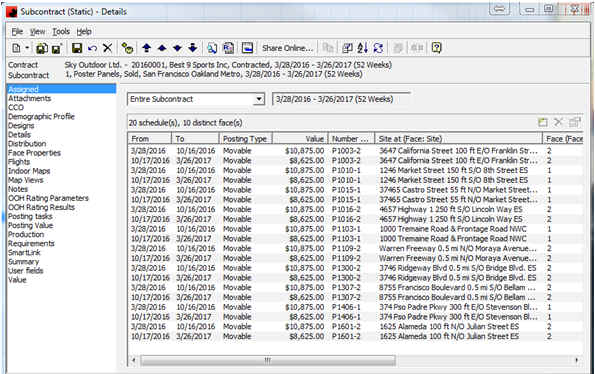
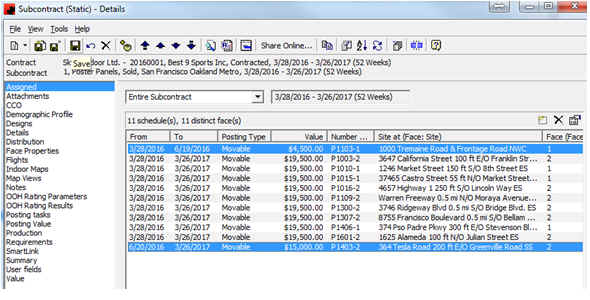
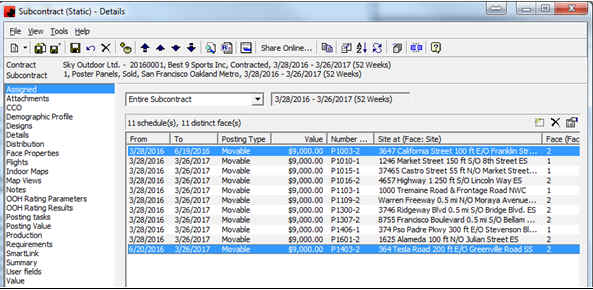
The Subcontract Assigned Page provides information on which Faces have been scheduled. Each occurrence of scheduling for a Face during the Subcontract is tracked here. This includes flight dates, design changes and posting types. Since a Face can be scheduled multiple times on a Subcontract, it can appear multiple times on the Assigned Page.
Buttons on the main toolbar of the Subcontract-Details Screen:
- The Design Change button allows you to select an assigned Face(s) and schedule design changes.
The functions available through the buttons immediately above the Assigned pane are:
- To assign a specific Face, select the desired flight (or leave it as "Entire Subcontract" to assign a Face to all flights), and click the New (
) button. Type in the desired Face number, or use the Find command to obtain a list of Faces meeting your criteria.
- To delete Faces from the Assigned Page (i.e. to unchart them), highlight the Face(s) using the CTRL or SHIFT keys as necessary when clicking the desired items. Once you have highlighted the desired Faces, click the Delete (
) button.
- The Properties button, allows you to change information about scheduling, or to view any conflicts this assignment may have. Once clicked, a window will appear allowing you to change the desired information, or to view the conflicts page.
For additional information on the buttons that appear at the top of the window, click here. For information on the menu items that appear under the Tools menu, click here.
To select a specific flight on the Subcontract, click on the drop down list, and select it. Only the Faces assigned to that flight will appear on the list.
To change the information being viewed in the assigned list, simply right click in the list, and choose Customize Current View. To change the sort order, simply right click in the list, and choose Order.
Right Click
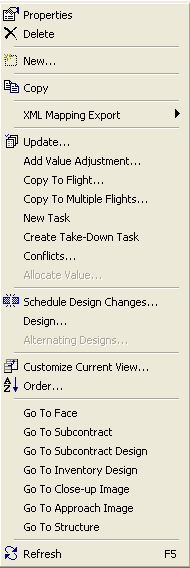
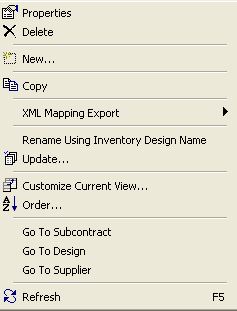
- Right clicking on the list of assigned Faces will display this menu. From here you can schedule design changes, select the design to be assigned, change posting type and alter the assignment's duration using the Update option, copy to another flight, create a new task (e.g. repost), or create a Take-Down task.
Update - The Update menu item allows you to to modify a property (or properties) for one or more highlighted schedules.
Copy To Flight - This will allow you to copy (transcribe) the highlighted Faces from this Subcontract flight to any other flight for any Subcontract. Ad Manager will check to ensure the Face(s) is/are available and suitable on the new Subcontract flight.
Copy to Multiple Flights - This will allow you to copy (transcribe) the highlighted Faces from this Subcontract flight to other flights for other Subcontracts (instead of copying them one at a time). Ad Manager will check to ensure the Face(s) is/are available and suitable on the new Subcontract flights.
New Task - This will allow you to create a new posting of the same copy on a different date for this Subcontract or create a Take-Down record for the highlighted Face(s).
Create Take-Down Task - This feature allows you to inform Ad Manager to create a task that will generate a Posting Card/Instruction that will remove the existing copy and not replace it with new copy. You can specify the date that this Take-Down will occur.
Design Change - This will allow you to select an assigned Face(s) and schedule design changes.
Design - This will allow you to specify which design to assign to the highlighted Face(s).
Alternating Designs - If you have highlighted multiple Face schedules, Ad Manager will allow you to assign designs in an alternating pattern. Selecting this will open a screen that will allow you to select which designs to assign.
Go To - The Go To feature allows you to open a window for the appropriate item for the highlighted record.
Attachments
For more information on the Attachments page, click here.
Designs
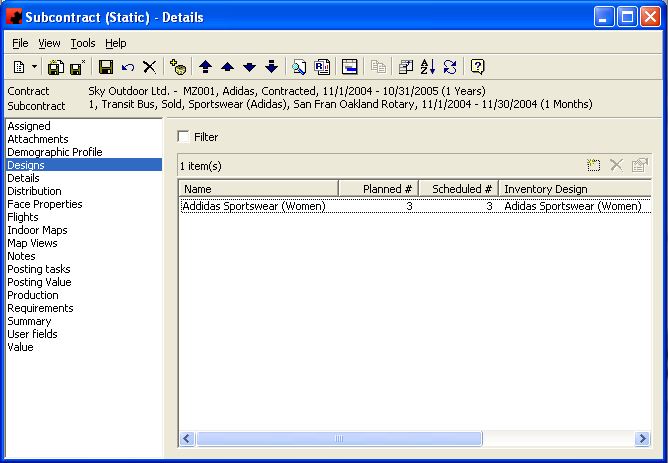
The Subcontract Designs Page is where Designs to be used on this Subcontract are added and linked (if desired) to the Design Inventory section of Ad Manager.
Buttons on the main toolbar on the Subcontract-Details screen:
- Customize Current View allows you to select the columns to display and the order to display them in.
- Order allows you to sort the Designs in the desired order.
- The Refresh button will reload the list of Designs, in the event changes to the Designs have occurred since you visited this page.
The functions available through the buttons immediately above the Designs pane are:
- Allows you to Add a Design to the Subcontract. When clicked, Ad Manager will open a window where you can specify a name (or just Design 1, etc), the desired number of each Design to be used on the Subcontract, any Face characteristics to put these Designs on, and link the Design to an actual one in your Design Inventory.
- Allows you to delete the highlighted Design(s) from the Subcontract. When you delete scheduling from this page, Ad Manager does not delete the actual Design from inventory if they are linked.
- Allows you to modify or review information related to the highlighted Design. This allows you to change the number of planned copies or link the Design to an actual Design in Inventory.
For additional information on the buttons that appear at the top of the window, click here. For information on the menu items that appear under the Tools menu, click here.
Right Click
-Right clicking on the list of Designs will display this menu.
To change the information being viewed in the list, simply right click in the list, and choose Customize Current View. To change the sort order, simply right click in the list, and choose Order.
Go To - The Go To feature allows you to open a window for the appropriate item pertaining to the highlighted record.
Rename Using Inventory Design Name - This allows you to rename a Subcontract Design to the same name as the Inventory Design that it is linked to. This allows you to take a generic "Design 1", "Design 2" that has been linked to an actual Design in inventory, and rename it.
Details
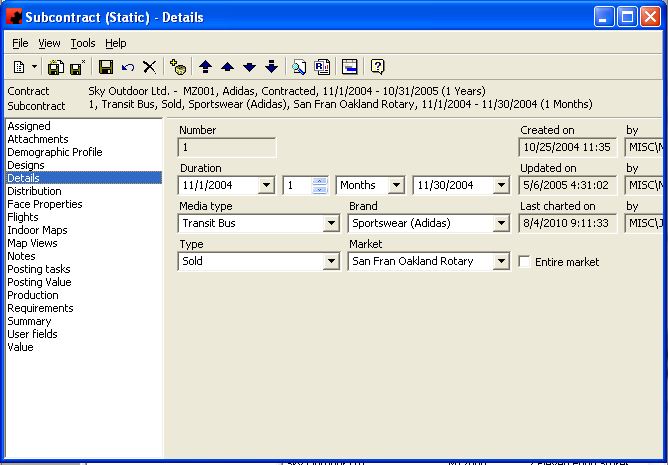
The Details Page is where information about the Subcontract is stored. Information on what market, media, brand and Subcontract posting type are kept on this page.
Tool buttons found on top of the Flights listing:
- Allows you to Add a flight to the Subcontract. A window will appear where each flight can be named as desired, and the flight dates can be entered.
- Allows you to delete the highlighted flight(s) from the Subcontract.
- Allows you to modify or review information related to the highlighted flight.
For information on the buttons that appear at the top of the window, click here. For information on the menu items that appear under the Tools menu, click here.
Fields
Brand: The brand information can be entered for an Advertiser with a number of different product lines. For example, Advertiser Ford would have brands such as Mustang, Probe, Explorer, Taurus and Windstar.
Created on/by: These two fields show you when this Subcontract was created and who created it.
Duration: This is the date range for the Subcontract. You can enter the date or select the date from the dropdown calendar, and enter in the duration or the end date. Ad Manager will automatically calculate the third value.
Entire Market: This allows you to tell Ad Manager that every single available Face in the Market definition is to be scheduled to this Subcontract The Entire Market feature should only be used if you are selling in networks.
Flights: Flights are the place where scheduling physically takes place. For information on when to add a flight and how to add a flight, click here.
Last Charted on/by: These two field show you when this Subcontract was last scheduled and by whom.
Market: The Market is what sales definition has been sold.
Media Type: The Media Type for this Subcontract.
Number: Each Subcontract on a Contract can be individually numbered to assist in finding it. Each Subcontract Number must be unique for the Contract with which it is associated.
Type: The Subcontract Type for this Subcontract. There are four possible choices; Sold, Bonus, Trade, and Public Service.
Updated on/by: These two fields show you when this Subcontract was last updated and by whom.
Distribution
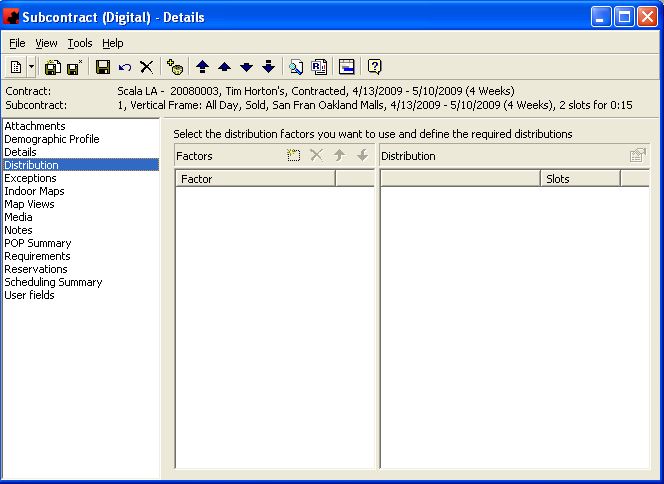
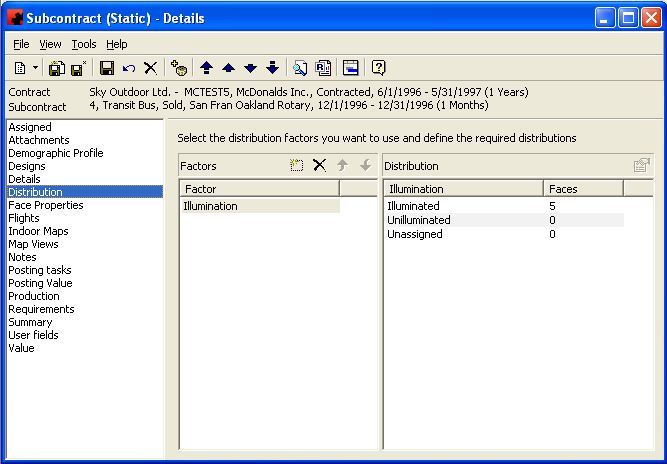
The Subcontract Distribution Page allows users to set the desired Distribution of Faces based on established criteria.
The functions available through the buttons immediately above the Distribution pane are:
- To add a Factor, select the New button and select the Factor to be used to distribute Faces during the scheduling process.
- To delete a Factor, highlight it and click the Delete button. Ad Manager will not use this Distribution Factor when charting (scheduling).
- The Move Up button allows you to move the highlighted Factor up the list of Factors.
- The Move Down button allows you to move the highlighted Factor down the list of Factors.
- After you have highlighted a Distribution item, you can change its number of Faces to be assigned by clicking the properties button, or by double clicking the Distribution item. Ad Manager allows you to enter the new number of Faces to be assigned.
For additional information on the buttons that appear at the top of the window, click here. For information on the menu items that appear under the Tools menu, click here.
There are 2 panes of information, a Factors pane and a Distribution pane. The Factors pane lists all Factors that have been added for use during the scheduling process. When scheduling, Ad Manager considers Factors in the order they appear and will attempt to assign Faces accordingly. A Factor higher on the list will be matched prior to a Factor lower on the list (which will be treated as a Factor within the higher Factor).
When a Factor is highlighted, the Distribution pane will display a listing of all valid items pertaining to that Factor. Each item can be assigned the desired number of Faces. Ad Manager will not allow you save the Subcontract until the Unassigned value is 0.
Map Views
The Subcontract Map Views Page allows users to retrieve previously saved maps of their Subcontracts.
The functions available through the buttons immediately above the Map Views pane are:
- Allows you to delete the highlighted Map View. This will not delete any of the mapping, or any information displayed on the maps, just this saved view of information.
For additional information on the buttons that appear at the top of the window, click here. For information on the menu items that appear under the Tools menu, click here.
To open a saved Map View, double click on the desired item.
Notes
For more information on the Notes page, click here.
Posting Task
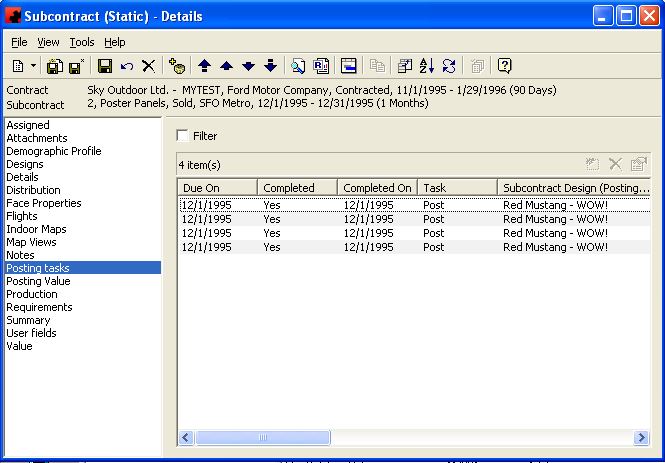
The Subcontract Posting Tasks Page provides users with the ability to see a listing of all Posting Tasks that are to be undertaken for this Subcontract.
Buttons on the main toolbar of the Subcontract-Details Screen:
- The Update button allows you to select one or more Posting Tasks and update the Posting Task information for them. For more information on using the Update button, see Change or Remove Posting Information.
The functions available through the buttons immediately above the Posting Tasks pane are:
- Allows you to delete the highlighted Posting Task(s).
- Allows you to modify or review information related to the highlighted Posting Task(s).
For additional information on the buttons that appear at the top of the window, click here. For information on the menu items that appear under the Tools menu, click here.
If you want to enter information for multiple Posting Tasks for this Subcontract, use the SHIFT or CTRL key while selecting the desired Posting Tasks. Right click and select "Update". From this screen you can enter the information that you want to apply to all selected Posting Tasks.
To filter for specific Posting Tasks or Faces, click on Filter and select your criteria.
Right Click
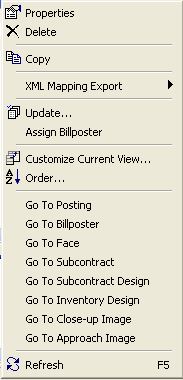
- Right clicking on the list of Posting Tasks will display this menu. From here you can update posting information for the specified Face(s), or go to the appropriate item.
To change the information being viewed in the list, simply right click in the list, and choose Customize Current View. To change the sort order, simply right click in the list, and choose Order.
Update - This allows you to enter posting related information (including Completion information) for the highlighted Faces.
Assign Billposter - Allows you to identify the Billposter who will be responsible for posting the copy. When producing posting cards/instructions, you can filter to find only those items that have been scheduled for a particular Billposter.
Go To - The Go To feature allows you to open a window for the appropriate item for the highlighted record.
Posting Value
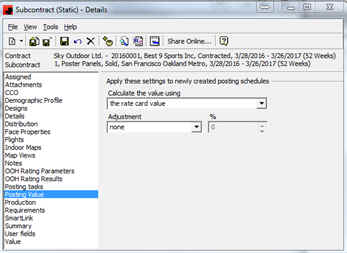
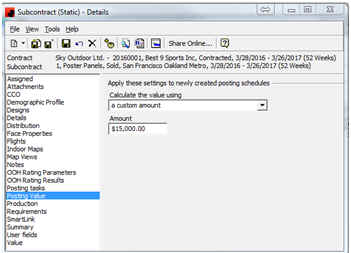
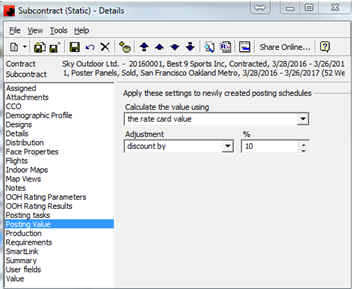
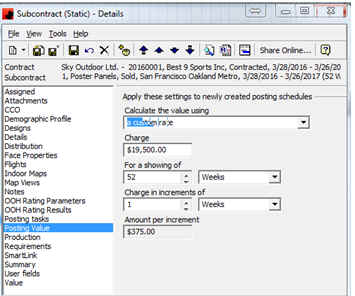
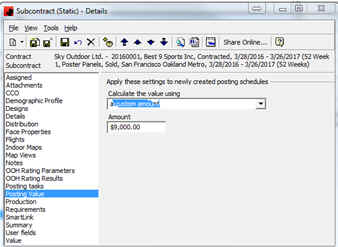
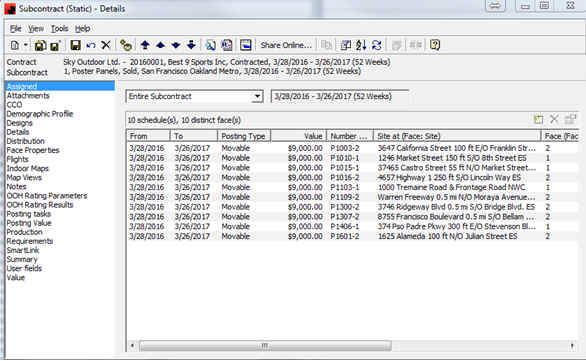
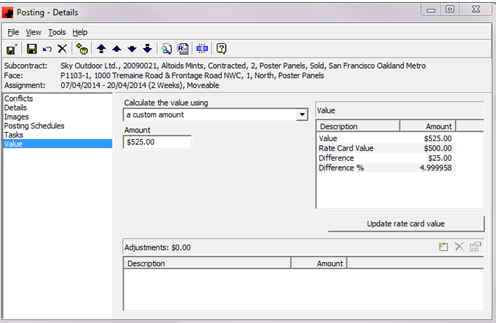
Users have the ability to specify Value that will be associated to newly created Posting Schedules. This is done on the Posting Value page of the Subcontract (Static). As Faces are scheduled to the Subcontract (Static), they will receive the Value that has been specified on this page. Regardless of the Value Calculation method, when users Schedule Design Changes using the Tool, Ad Manager will split the Posting Value accordingly. However, any other modifications to the duration of the Postings; and adding new Postings to existing Subcontracts(Static), Ad Manager will use the Posting Value entered on this page to calculate the Value on the Postings.
When it comes to Value, users should remember these points:-
• There are three (3) ways to specify the Posting Value:
o Use the Face's rate card value, specified as $$ per unit of time (+/- a premium or a discount %)
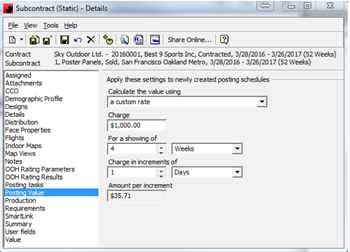
o Use a custom rate, specified as $$ per unit of time
o use a custom (i.e. fixed) value, specified as total $$ for the Posting
• Decide how the Value of new Postings should be computed and put that in the Subcontract's (Static) Posting Value page; newly created Postings will always inherit those settings.
• Users can also customize the value of individual Postings on that particular Posting's Value page (or the Value page of the Posting Update tool);
• Record any adjustments to the Posting Value on the Posting's Value page (or using the Add Value Adjustment... tool);
• If a Posting uses a rate (either rate card or custom), changing its duration will change its Value accordingly;
• If a Posting is given a custom (fixed) value, changing its duration will not change its Value - if that is required, users will need to do it manually.
SCENARIO #1
• The Value for the Postings is entered as Rate Card (with any adjustments as appropriate)
o As Faces are scheduled to the Subcontract (Static) they will receive Value, calculated using the current Rate Card (with any adjustments specified).
o If the Posting Schedule is split for a Design change, Ad Manager will recalculate the Posting Value accordingly.
o If a Posting Schedule’s dates are adjusted to shorten/lengthen and a new Face added to the Subcontract (Static) Ad Manager will recalculate the Posting Value accordingly.
SCENARIO #2
• The Value for the Postings is entered as a Custom Rate
o As Faces are scheduled to the Subcontract (Static) they will receive Value, calculated using the Custom Rate as specified.
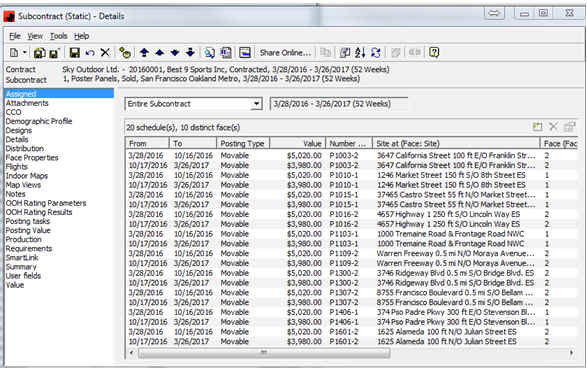
o If the Posting Schedule is split for a Design change, Ad Manager will recalculate the Posting Value accordingly.
o If a Posting Schedule’s dates are adjusted to shorten/lengthen and a new Face added to the Subcontract (Static) Ad Manager will recalculate the Posting Value accordingly.
SCENARIO #3
• The Value for the Postings is entered as a Custom Amount
o As Faces are scheduled to the Subcontract (Static) they will each receive this value.
o If the Posting Schedule is split for a Design change, Ad Manager will recalculate the Posting Value accordingly.
o When a Posting is shortened and a new one added, users will need to enter the “Custom Amount” for both Postings. If this is not calculated correctly the Postings will receive incorrect Posting Values.
• To correct the Posting Value for the affected Postings:-
1. Open the already scheduled Posting(s) and on the Value page, modify the Amount to the correct one.
2. Schedule the new Face for the balance of the duration. Go to the Value page of the new Posting and enter the Custom Amount.
3. Double check the Value page of the Subcontract to ensure that the amount is correct.
4. Make any adjustment to the Posting Value as necessary (usually for rounding) as per above instructions.
Users may find that when Postings are scheduled and/or modified, the Posting Values do not total the Value as expected. This is usually due to a rounding factor as these events happen due to what was entered on the Posting Value page. • If multiple Postings are affected:- 1. To modify/update the Value of multiple Postings at one time, users can use the Update tool.
2. To modify/update the Posting Value page of mutiple Subcontracts, users can also use an Update tool.
3. Users can also apply $$ adjustments (+/- extra charges or credits) to multiple Postings by clicking Tools>Add Value Adjustment.
o The Description field is used to identify the Value Adjustment (e.g. Adjustment for Rounding Factor). o The Amount can be entered as either a plus or minus amount.
• If the $$ Adjustment is for a single Posting, go to the Value Page of that Posting, click Tools>Adjustments>New. • To clear an $$ Adjustment, click Tools>Adjustment>Delete • If more than one $$ Adjustment is present and need to be removed, click Tools>Adjustment>Clear. ALLOCATING VALUE TO CURRENTLY SCHEDULED POSTINGS There may be a time that users decide that they want to add value to already scheduled postings. They have not previously entered Rate information of the Posting Value page and now would like to add monies after the fact. This option is also valuable for those users of Ad Manager who have not purchased the Financial Module but would like to account for $$ amounts against the Posting Schedules. • To do this, select the Posting Schedules to which you now need to add Value, then click Tools>Allocate Value.
o In the following window enter the total amount to be allocated; determine if the amount is to be added proportionally or equally; enter the period duration and finally, enter the number of digits to be calculated after the decimal.
o Based on the detail entered, Ad Manager will calculate and allocate Value to the selected Postings.
• If this method is used, and users schedule design changes to the Postings, Ad Manager will adjust the $$ amounts accordingly.
• However, if the duration of a Posting Schedule is changed and/or new ones added, these changes will not be reflected in the Value of the affected Posting Schedules.
o Users will need to re-run the Tool to allocate the Value again to all Posting Schedules using the same criteria as previous.
Production
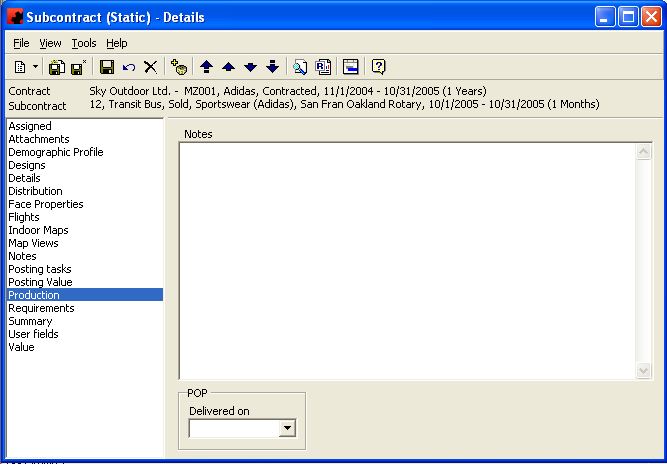
The Subcontract Production Page provides users with the ability to track all production related information that is to be undertaken for this Subcontract.
For information on the buttons that appear at the top of the window, click here. For information on the menu items that appear under the Tools menu, click here.
Fields
Supplier
In this section you would indicate where the creative is coming from. If you are producing the creative, choose your supplier's name in the pull-down field. If your client (the advertiser) is supplying the creative, click the Production supplied by client check box.
Artwork
The Artwork section of the Production Page allows you to track specific dates dealing with this Subcontract's artwork and its approval process.
Due on - The date the artwork is due to be sent to your office for approval.
Received on - The date you received the artwork for approval.
Delivered on - The date you sent artwork back to production house with approval or with changes.
Artwork Approval - If you require the artwork for this campaign to be approved by your client or by your office, click on the Required check box. Then enter the date it was approved on in the Approved on field.
Material
The Material section of the Production Page allows you to track specific dates dealing with this Subcontract's design/creative material.
Due on - The date the material is due to arrive at your plant.
Shipped on - The date the material was shipped from your production house to your plant or the date your plant shipped the material to your Billposter.
Received on - The date your plant received the material.
POP
The POP (Proof of Performance) section of the Production Page allows you to track when the Proof of Performance report was sent to your client for this Subcontract. Enter the date the POP was sent in the Delivered on field.
Notes
You can enter any notes regarding the Production of this Subcontract here.
Summary
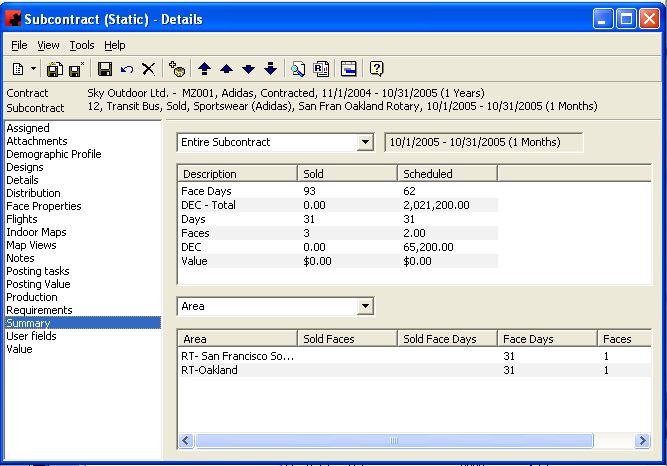
The Subcontract Summary Page allows you to identify how well you have reached your scheduling requirements. From this screen you can see whether you have reached the desired client thresholds, and how well you have met your Distribution criteria.
For information on the buttons that appear at the top of the window, click here. For information on the menu items that appear under the Tools menu, click here.
The top half of the screen provides users with a summary of the number of Faces, Face Days and Circulation/GRP sold on the Subcontract and scheduled so far. Users can view the information for the entire Subcontract, or can select a particular flight by clicking the dropdown combo box in the top half of the screen.
The bottom half of the screen provides users with the ability to examine the geographic distribution of the showing across Areas, (by selecting "Area" in the dropdown combo box in the lower half of the screen), or to see information based on the distributions they may have selected on the Distributions Page of this Subcontract.
Template
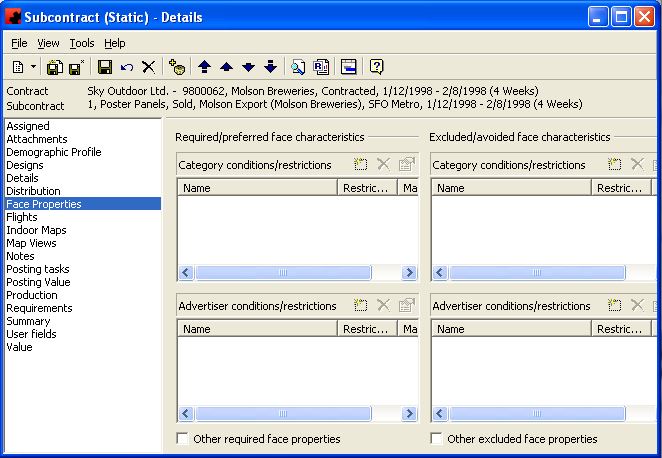
Ad Manager allows users to establish criteria that should/must be met by Faces to be assigned to a particular Subcontract. These criteria are identified in the Subcontract Template Page.
Tool buttons found on and are specific to the Template Page:
- Add a new item for the Condition/Restriction pane the icon is located in. Select the desired item, how it is recorded in Ad Manager and if it is mandatory.
- Delete the highlighted Condition/Restriction in the pane the icon is located in. Highlight the item and click the Delete button.
- Allows you to view/edit the information for the Condition/Restriction in the pane the icon is located in.
For additional information on the buttons that appear at the top of the window, click here. For information on the menu items that appear under the Tools menu, click here.
The Template Page is divided into four panes. The pane in the top left is where category conditions that you want to meet are entered. The pane in the bottom left is where advertiser conditions that you want to meet are entered. The pane in the top right is where category conditions you want to avoid are entered. The pane in the bottom right is where advertiser conditions you want to avoid are entered.
Ad Manager also allows you to set filters based on other criteria related to a Face (direction facing, in a particular city, etc). The "Other required Face properties" check box in the bottom left corner can be clicked when you want to set these conditions. A window will appear where you can identify all your criteria that a Face must meet. The "Other excluded Face properties" check box in the bottom right corner can be clicked when you want to set conditions to avoid. A window will appear where you can identify all the criteria that a Face must not meet. A check mark will appear in the appropriate box if there is a filter set.
User Fields
For more information on the User fields page, click here.
Value
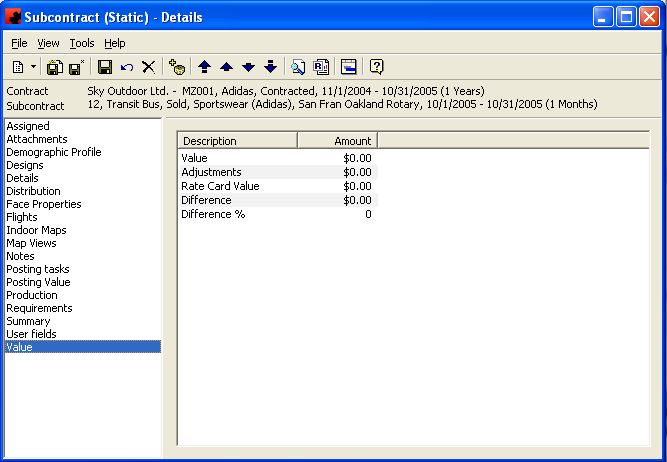
The Subcontract Value Page displays the total of all Posting Values for the entire Subcontract (Static)
Note that users cannot modify data on this page. It is for information only.
For information on the buttons that appear at the top of the window, click here. For information on the menu items that appear under the Tools menu, click here.
From this screen, values for this Subcontract can be entered. These values will automatically be added to the values of other Subcontracts on the same Contract to provide a total amount on the Contract Value Page.
