Difference between revisions of "Site"
(→User Fields) |
|||
| Line 1: | Line 1: | ||
| − | |||
| − | |||
| − | |||
== Attachments == | == Attachments == | ||
For more information on the Attachments page, [[Attachments page|click here]]. | For more information on the Attachments page, [[Attachments page|click here]]. | ||
Revision as of 09:09, 5 August 2015
Attachments
For more information on the Attachments page, click here.
Categories
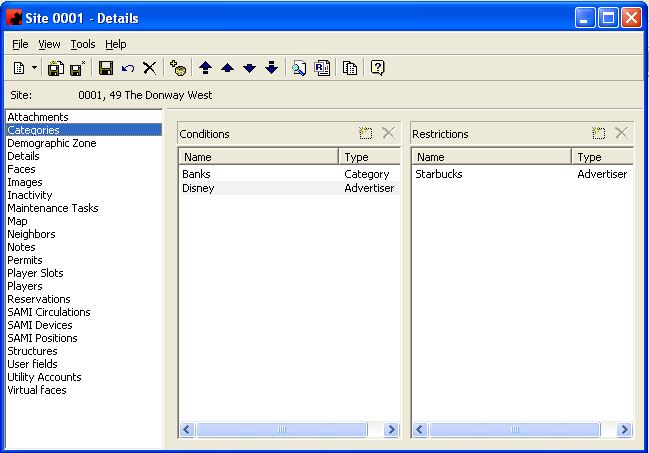
The Categories Page maintains a listing of all items that have been specified as positive conditions or restrictions at a Site. All Faces on this Site will inherit the conditions and restrictions specified in this window.
Items in the Conditions box on the left side of the screen are considered to be positive attributes for Faces on this Site. Items in the Restrictions box on the right side of the screen are considered to be negative attributes.
Tool buttons specific to the Categories Page:
- Add a new Condition or Restriction to the Site. If you are adding a new condition (positive attribute), select the above the left box. If you are adding a restriction (negative attribute), select the above the right box.
- Delete the highlighted Condition or Restriction from the Site. If you are removing a condition (positive attribute), select the above the left box. If you are removing a restriction (negative attribute), select the above the right box.
For additional information on the buttons that appear at the top of the window, click here. For information on the menu items that appear under the Tools menu, click here.
Details
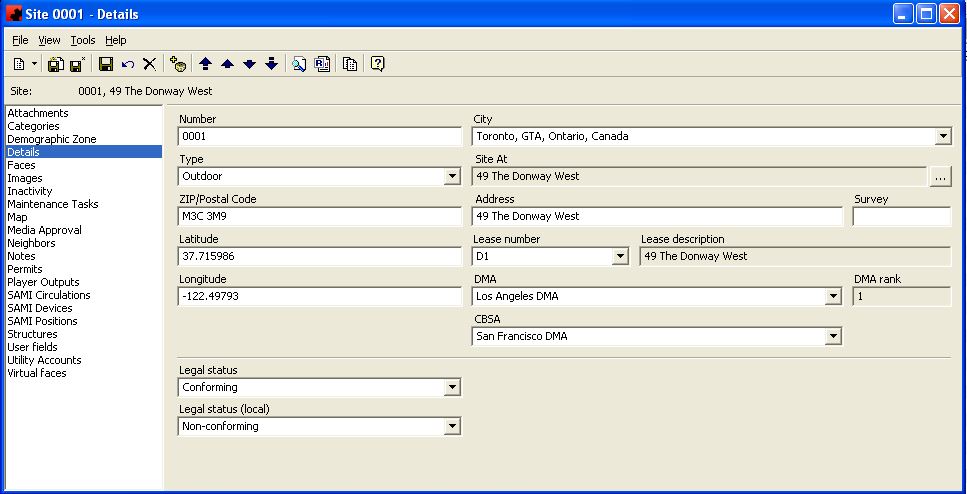
The Details Page is where information about the structure is displayed. Information on what type of structure it is (Indoor, Outdoor or Mobile), and whether the Structure is owned or leased. Site details are kept on this page.
For information on the buttons that appear at the top of the window, click here. For information on the menu items that appear under the Tools menu, click here.
Fill in the appropriate information for each field. Select the appropriate item from any of the drop down lists (in the boxes) or type in the information if it is not present.
Fields
Address: This is the actual physical location of the site, which may be different than the Site At description.
City: This is the City/Town where this Site is located.
DMA/DMA Rank: This is where The DMA this site is located in can be stored, allowing you to identify sites that are in the same predefined "market area".
Latitude: This is the Latitude of the Site. It is used whenever a map using faces from this site is produced. This value can be typed in, however, Ad Manager will fill in the Latitude and Longitude automatically when the site is positioned correctly on the Map page.
Lease Description: This is a quick description of what this Lease pertains to. This description allows the users to be able to recognize the Lease among a long list of Leases.
Lease Number: This is the lease number related to this site. You can select a lease number from the list. If the Lease is not listed, you can add it by typing the new number into the field. This will bring up the Lease Details window so you can fill in the Lease Information.
Longitude: This is the Longitude of the Site. It is used whenever a map using faces from this site is produced. This value can be typed in however, Ad Manager will fill in the Latitude and Longitude automatically when the site is positioned correctly on the Map page.
Number: This is the unique site (structure) number.
Site At: This is the description of the site. To add the SITE AT description, click on the ellipsis () for the Address Builder window and fill in the site information accordingly.
Survey: This field is used to enter your Outdoor DemoTrack survey number.
Type: Identify whether the site is an indoor site, outdoor site, or a mobile site
ZIP/Postal Code: This field is used to enter your ZIP or Postal Code.
From the Tools Menu, Ad Manager will allow you to Duplicate a Site, Generate line-of-sight conflicts, and check for any Site Conflicts.
Demographic Zone
Type topic text here.
Faces
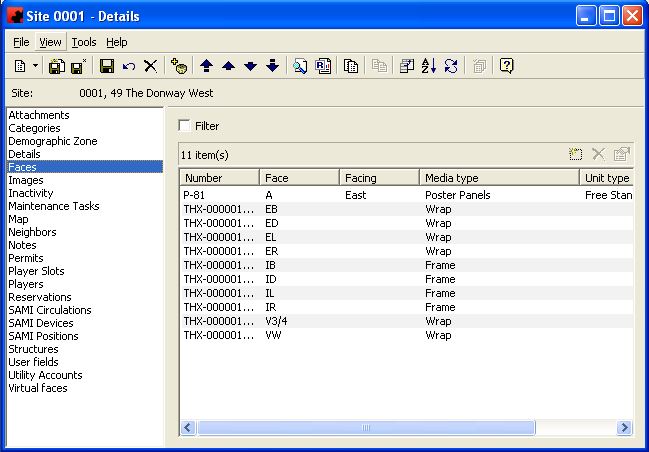
The Faces Page is used to enter Face information for a Site.
Tool buttons specific to the Faces Page:
- Customize Current View allows you to select the columns to display and the order to display them in.
- Order allows you to sort the list of Faces on the Site in the desired order.
- The Refresh button will reload the list of Faces, in the event changes to the number of Faces has occurred since you visited this page.
- The Update button allows you to highlight multiple Faces and apply the same properties to them.
The pane in the window shows a listing of all Faces that are assigned to this Site. The functions available through the buttons immediately above the pane are:
- Delete the highlighted Face from the Site.
- Edit the information for the highlighted Face.
In addition, while you are in the pane, you can double click on a Face to see details about the Face. You can also right click in the pane and select "New", "Customize Current View" , "Order" or "Refresh" (see above).
For additional information on buttons that appear at the top of the window, click here. For information on the menu items that appear under the Tools menu, click here.
The Filter check box allows you to filter the listing of Faces to show only those that meet a certain criteria. When selected, a filter screen will appear, allowing you to choose to see Faces of a certain media type, facing a particular direction, of a particular size, etc. When a filter is active, a check mark will appear in the filter box. To clear the filter and see all records, click on Filter, then the Clear button on the Filter screen, followed by the OK button.
Images
For more information on the Images page, click here.
Inactivity
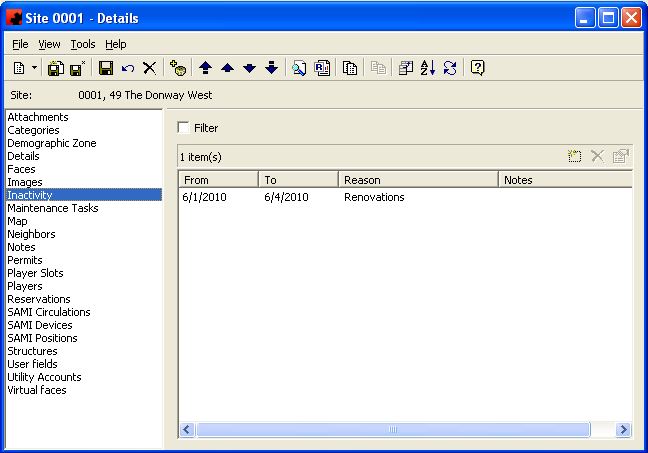
The Inactivity Page maintains a history of all dates that a Site or Face has been/will be inactive. If you are inactivating a Site, every Face on the Site will be considered unavailable during this time frame.
The functions available through the buttons immediately above the Inactivity pane are:
- To add an Inactivity, click the New button. When selected, a screen will appear asking for the reason for the Inactivity, the date range the Site or Face will be inactive, and any other notes you wish to maintain about this inactive time frame.
- To delete an Inactivity period from the list, highlight it and click on the Delete button.
- To modify an Inactivity period, highlight it and click the Properties button. Make the appropriate changes to the dates or notes, and click the Save (
) button.
For additional information on the buttons that appear at the top of the window, click here. For information on the menu items that appear under the Tools menu, click here.
The Filter check box allows you to filter the listing of Inactivity periods to show only those that meet a certain criteria. When selected, a filter screen will appear, allowing you to choose to see inactivity periods with particular start dates, end dates, durations, etc. When a filter is active, a check mark will appear in the filter box. To clear the filter and see all records, click on Filter, then the Clear button on the Filter screen, followed by the OK button.
Maintenance Tasks
Type topic text here.
Map
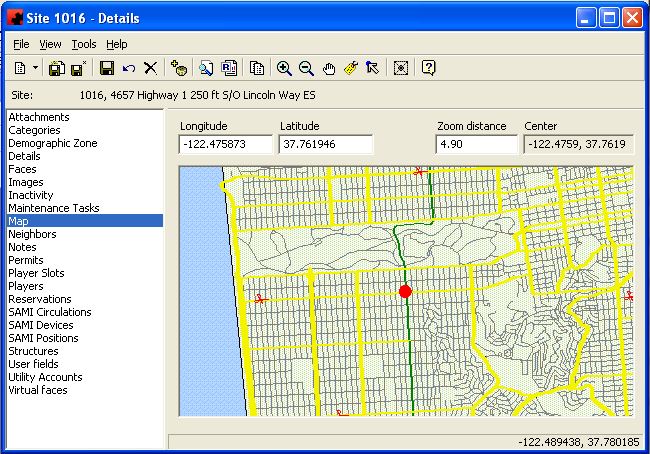
The Site Map Page provides you with the ability to view the Site on a map and to edit the latitude and longitude information for the Site (and all Faces associated with it) directly on the map.
Tool buttons specific to the Site Map Page:
- By placing the Zoom In tool over the map, you can click to see the map zoomed in twice as close as before, centered where you clicked. If you hold your left mouse button down and drag the mouse, you will see a box being drawn on the map. When you release the left mouse button, Ad Manager will zoom into the specified area.
- By placing the Zoom Out tool over the map, you can click to see the map zoomed out twice as much as before, centered where you clicked. If you hold your left mouse button down and drag the mouse, you will see a box being drawn on the map. When you release the left mouse button, Ad Manager will shrink the map to the size specified by the box.
- The Pan tool allows you to move the map to see different areas not visible on the screen. To use the Pan tool, put your mouse over the map, hold down the left mouse button and drag the mouse. The map will move with the Pan tool; when you release the mouse button, Ad Manager will draw the new area of the map.
- The Label Map Feature allows you to click on an item on the map, and have Ad Manager automatically label it for you.
- The Set the Latitude/Longitude of the Site tool allows you to geocode your Site quickly, easily and accurately. Using the other tools, find the correct location of this Site on your map, select this tool and click on the appropriate spot. Ad Manager will automatically update the latitude and longitude of this Site, and place a symbol there, indicating this is where the Site is.
- The Center the Map on this Site tool allows you to reposition the map with this Site centered.
For additional information on the buttons that appear at the top of the window, click here. For information on the menu items that appear under the Tools menu, click here.
Fields
Center - This displays the latitude and longitude co-ordinates at the center of the map currently visible.
Latitude - The latitude is how many degrees north (positive value) or south (negative value) of the equator the Site is.
Longitude - The longitude is how many degrees east (negative value) or west (positive value) of the Prime Meridian the Site is.
Zoom Distance - The zoom distance is the distance (in miles) across the width of the map.
Neighbours
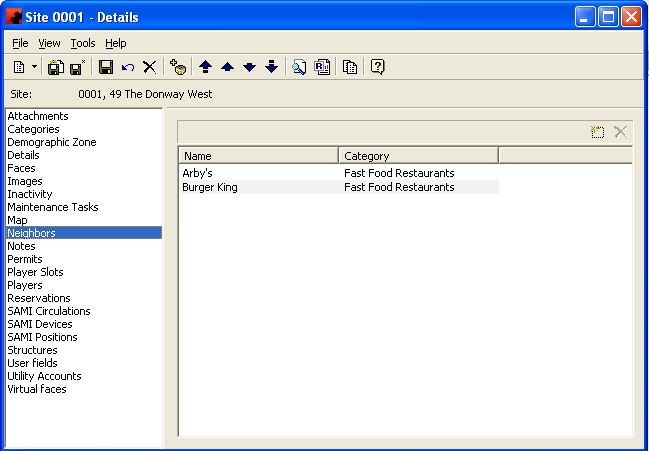
The Neighbors Page allows you to enter any Retail Establishment that exists close to this Site. This information can then be used when scheduling.
The functions available through the buttons immediately above the Neighbors pane are:
- The New button allows you to add a new Neighbor to this Site.
- The Delete button allows you to remove the highlighted Neighbor(s) from this Site.
For additional information on the buttons that appear at the top of the window, click here. For information on the menu items that appear under the Tools menu, click here.
Notes
For more information on the Notes page, click here.
Permits
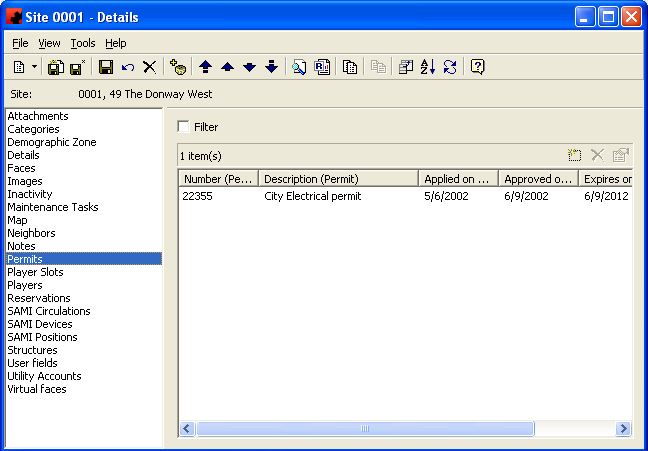
The Permits Page is used to enter Permit information for a Site.
Tool buttons specific to the Site - Permits Page:
- Customize Current View allows you to select the columns to display and the order to display them in.
- Order allows you to sort the list of Permits on the Site in the desired order.
- The Refresh button will reload the list of Permits, in the event changes to the number of Permits has occurred since you visited this page.
The pane in the window shows a listing of all Permits that are assigned to this Site. The functions available through the buttons immediately above the pane are:
- Add a new or select an existing Permit for this Site.
- Delete the highlighted Permit from the Site.
- Edit the information for the highlighted Permit.
In addition, while you are in the pane, you can double click on a Permit to see details about the Permit. You can also right click in the pane and select "New" to add a Permit to the Site, "Customize Current View" , "Order" or "Refresh" (see above).
For additional information on buttons that appear at the top of the window, click here. For information on the menu items that appear under the Tools menu, click here.
The Filter check box allows you to filter the listing of Permits to show only those that meet a certain criteria. When selected, a filter screen will appear, allowing you to choose to see Permits applied on certain dates, expiring on certain dates, etc. When a filter is active, a check mark will appear in the filter box. To clear the filter and see all records, click on Filter, then the Clear button on the Filter screen, followed by the OK button.
Player Slots
Type topic text here.
Players
Type topic text here.
Reservations
Type topic text here.
SAMI Circulations
Type topic text here.
SAMI Devices
Type topic text here.
SAMI Positions
Type topic text here.
Structures
Type topic text here.
User Fields
For more information on the User fields page, click here.
Utility Accounts
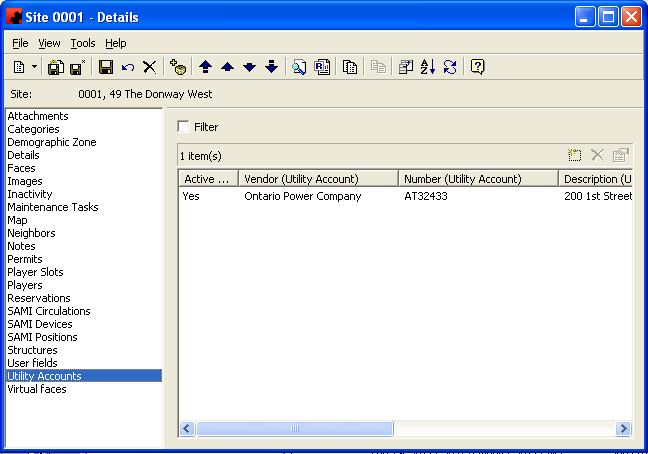
The Utility Accounts Page allows you to track your Utility Accounts for this Site, including meter readings. You can also track and export your Utility Payments.
The functions available through the buttons immediately above the Utility Accounts pane are:
- The New button allows you to add a new Utility Account to this Site.
- The Delete button allows you to remove the highlighted Utility Account(s) from this site.
- To modify a Utility Account, highlight it and click the Properties button. Make the appropriate changes, and click the Save (
) button.
For additional information on the buttons that appear at the top of the window, click here. For information on the menu items that appear under the Tools menu, click here.
The Filter check box allows you to filter the listing of Utility Accounts to show only those that meet a certain criteria. When selected, a filter screen will appear, allowing you to choose to see Utility Accounts related to a particular vendor, with certain meter readings, etc. When a filter is active, a check mark will appear in the filter box. To clear the filter and see all records, click on Filter, then the Clear button on the Filter screen, followed by the OK button.
Virtual Face
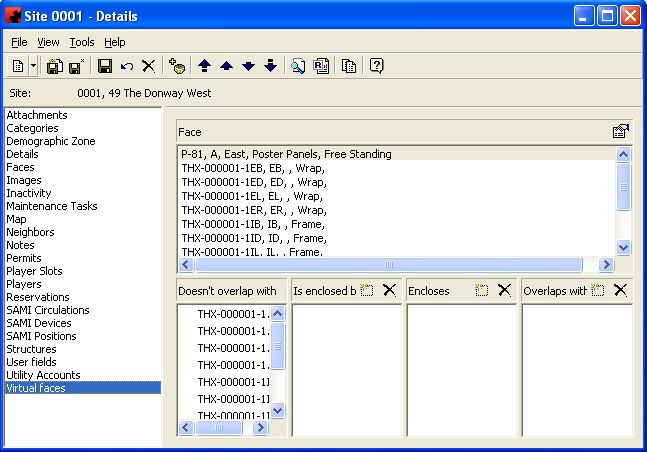
The Virtual faces Page allows users to specify relationships between overlapping saleable Faces on the same physical unit. For example, a bus can be sold as driver side, passenger side and tail; however the entire bus can be sold as a bus wrap as well. By using Virtual Faces, Ad Manager would be set up to show the wrap Face unavailable during a given timeframe if any of the driver, passenger or tail Faces were scheduled, and the 3 Faces would be unavailable if the bus was scheduled to be wrapped.
Within each pane there are 2 buttons related to activity in that pane.
- The New button allows you to add a new Virtual Face relationship between the selected Face and another.
- The Delete button allows you to highlight a Face and remove its relationship to the selected Face.
- The Properties button allows you to open the highlighted Face.
For additional information on the buttons that appear at the top of the window, click here. For information on the menu items that appear under the Tools menu, click here.
The top pane on the screen allows you to select the Face you wish to work with. Once selected, Ad Manager will display any existing Face relationships in the four panes below it.
Fields
Each of the lower panes shows a listing of Faces that have a particular relationship with the selected Face.
Doesn't overlap with - This is the default setting for all Faces on a Site. If a Face is listed in this pane, there is no relationship set between it and the highlighted Face in the top of the screen.
Is enclosed by - If a Face is listed in this pane, the Face you are working with is entirely within its confines. For example, if you are working with a Bus Passenger Face, then the Bus Wrap Face would be listed in the "Is enclosed by" pane.
Encloses - If a Face is listed in this pane, the Face you are working with completely covers that Face. For example, if you are working with a Bus Wrap, the Driver, Tail and Passenger Faces would be listed in the "Encloses" pane.
Overlaps with - If a Face is listed in this pane, the Face you are working with is partially affected by that Face. For example, a structure that is sold by the square foot can have several different combinations that overlap.
If a lock appears next to an item, it indicates that based on other relationships set up, this particular Face has to appear in this pane.
For more information on using Virtual Faces, click here.
If you wish to establish a relationship between Faces, select a Face to work with from the top of the screen. Find one of the Faces you wish to establish a relationship with in the "Doesn't overlap with" pane. Click and drag the Face from the "Doesn't overlap with" pane into the appropriate Virtual Face relationship pane. When you release the mouse button, Ad Manager will create that relationship.
