Difference between revisions of "Maintenance"
(→Attachments Page) |
(→Add a Task) |
||
| (3 intermediate revisions by 2 users not shown) | |||
| Line 1: | Line 1: | ||
| − | |||
| − | |||
| − | |||
== Add a Structure == | == Add a Structure == | ||
STRUCTURES are your true inventory, or your assets. A Structure can be an actual garbage can, or a specific shelter, or pole. It is usually associated with a Site and may contain one or more Faces. You will most likely have more Structures than you do Sites, seeing as they can be stored in a warehouse, in for repairs at the shop, or out in the field. As well, there may be more than one Structure at any given Site. | STRUCTURES are your true inventory, or your assets. A Structure can be an actual garbage can, or a specific shelter, or pole. It is usually associated with a Site and may contain one or more Faces. You will most likely have more Structures than you do Sites, seeing as they can be stored in a warehouse, in for repairs at the shop, or out in the field. As well, there may be more than one Structure at any given Site. | ||
| Line 39: | Line 36: | ||
[[File:New_Structure_Incidents.JPG]] | [[File:New_Structure_Incidents.JPG]] | ||
| − | When an Incident is entered into Ad Manager, it can be associated with a specific Structure. This page shows a history of all Incidents that have been reported to this particular one. You can also enter a new Incident from this page, by clicking the New ([[File:New_add_button.JPG]]) button. This will open the Incident - Details Screen, with the target already set to the Structure. For further details on how to add an Incident, click here. | + | When an Incident is entered into Ad Manager, it can be associated with a specific Structure. This page shows a history of all Incidents that have been reported to this particular one. You can also enter a new Incident from this page, by clicking the New ([[File:New_add_button.JPG]]) button. This will open the Incident - Details Screen, with the target already set to the Structure. For further details on how to add an Incident, [[Maintenance#Add an Incident|click here]]. |
Often a Structure will have several Incidents listed on the Incidents page. You can filter them to view only those Incidents that match your desired criteria. To do this, click the Filter box. The following screen will pop up where you can enter the criteria for those Incidents that you wish to be displayed on this page. | Often a Structure will have several Incidents listed on the Incidents page. You can filter them to view only those Incidents that match your desired criteria. To do this, click the Filter box. The following screen will pop up where you can enter the criteria for those Incidents that you wish to be displayed on this page. | ||
| Line 192: | Line 189: | ||
== Add a Task == | == Add a Task == | ||
| − | + | For information on adding tasks, please see the [[Tasks|Tasks]] page. | |
| − | + | ||
== Add an Incident == | == Add an Incident == | ||
| Line 258: | Line 254: | ||
[[File:New_Incident_Tasks.JPG]] | [[File:New_Incident_Tasks.JPG]] | ||
| − | Click on the New ([[File:New_add_button.JPG]]) button, and enter all the Task details as required (see Add a Task). Continue to add Tasks until all the Tasks required for this Incident have been entered. | + | Click on the New ([[File:New_add_button.JPG]]) button, and enter all the Task details as required (see [[Maintenance#Add a Task|Add a Task]]). Continue to add Tasks until all the Tasks required for this Incident have been entered. |
You can filter the listing of Tasks to only view those that match particular criteria. To do this, click in the Filter check box and specify your criteria in the following screen. | You can filter the listing of Tasks to only view those that match particular criteria. To do this, click in the Filter check box and specify your criteria in the following screen. | ||
Latest revision as of 05:12, 19 June 2015
Add a Structure
STRUCTURES are your true inventory, or your assets. A Structure can be an actual garbage can, or a specific shelter, or pole. It is usually associated with a Site and may contain one or more Faces. You will most likely have more Structures than you do Sites, seeing as they can be stored in a warehouse, in for repairs at the shop, or out in the field. As well, there may be more than one Structure at any given Site.
Details Page
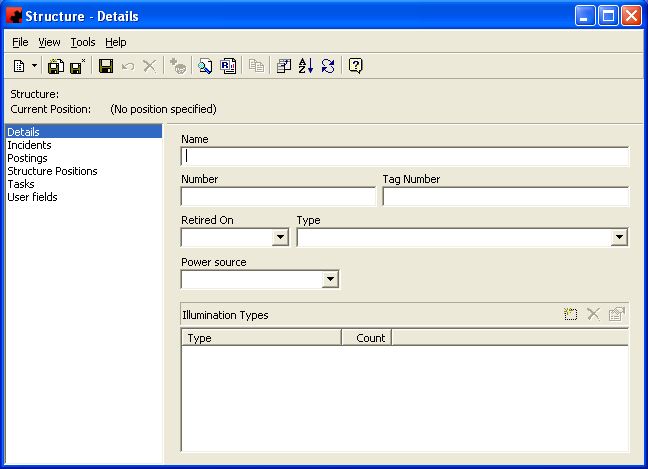
To add a new Structure, go to All Structures, under Maintenance in the Public Folders and click on the New () button. The following Structure - Details window will open:
First, enter the Name of the Structure. This should be a descriptive name so you can differentiate between Structures.
Next, assign the Structure a Number. It may be useful to follow a logical numbering system that identifies similar Structures - for example, begin the numbering sequence for chrome and glass bus shelters with CG and then a number. This will help you identify Structures by simply looking at the number. NOTE: The number is a required field and must be entered in order for the record to be saved.
The Tag Number can be used to identify the Structure. This number will appear in Ad Manager as well as on the physical Structure itself.
When a Structure is retired and no longer being used, enter the date in the Retirement Date box. This will remove the Structure from your active inventory. In the Type field, choose a Structure Type from the drop-down menu, or enter in a new Structure Type if it is not in the list.
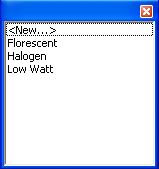
The Illumination Types field will list what type of lighting fixture(s) is on this particular Structure and how many. Click the New () button. Choose the Illumination Type from the list available
or choose <New> to add a new Illumination Type.
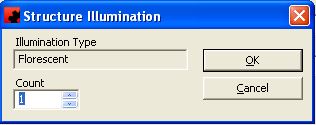
Then enter the Count - or the number of fixtures.
Incidents Page
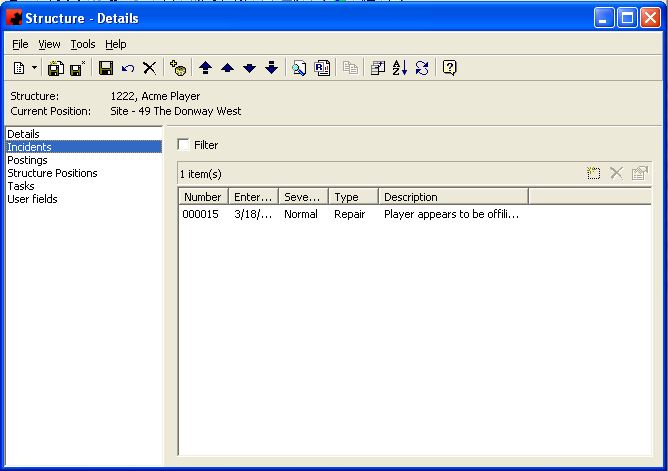
The next page on the Structure Details screen is Incidents.
When an Incident is entered into Ad Manager, it can be associated with a specific Structure. This page shows a history of all Incidents that have been reported to this particular one. You can also enter a new Incident from this page, by clicking the New () button. This will open the Incident - Details Screen, with the target already set to the Structure. For further details on how to add an Incident, click here.
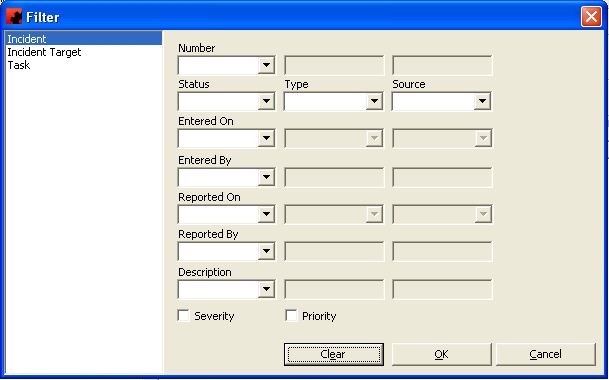
Often a Structure will have several Incidents listed on the Incidents page. You can filter them to view only those Incidents that match your desired criteria. To do this, click the Filter box. The following screen will pop up where you can enter the criteria for those Incidents that you wish to be displayed on this page.
Once you are done selecting your criteria, click OK. Only the Incidents that match your criteria will now be displayed on this page. To clear the filter and view all Incidents, click the Filter check box again, and choose Clear.
Tasks Page
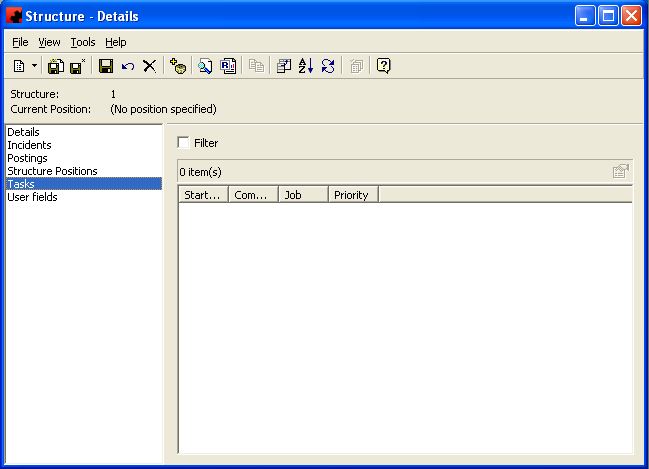
The next page on the Structure is Tasks.
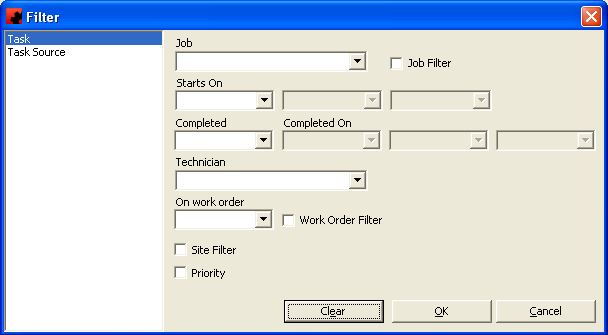
This page lists all Tasks that have been associated with the Structure, either through an Incident or a Scheduled Task. You cannot add nor delete Tasks from this list. You can filter the listing of Tasks to only view those that match particular criteria. To do this, click in the Filter check box and specify your criteria in the following screen:
Click OK and only those Tasks matching your criteria will appear in the list. To clear the filter and view all Tasks once again, click in the Filter check box, and choose Clear.
Structure Positions Page
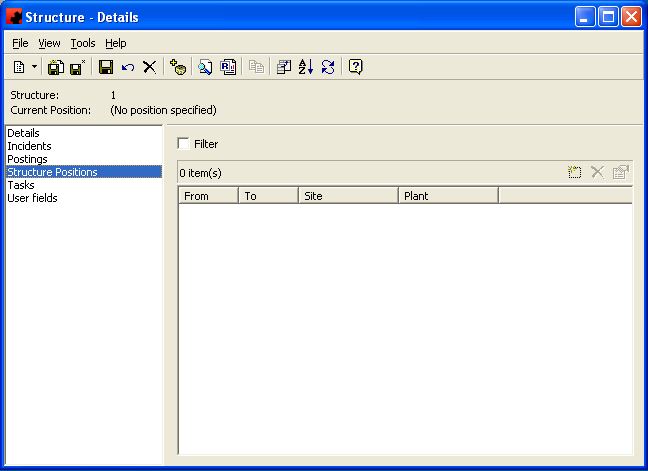
The next page is Structure Positions.
This is a list that displays the history of where the Structure has been located&ldots;either on a Site or in a Plant. Since Structures quite often move around, either to different Sites, to the shop etc, it is important to keep track of where this Structure has been, and for how long. To add a new position, click the New () button. Choose where the Structure is going - to a new Site or to a Plant.
Site
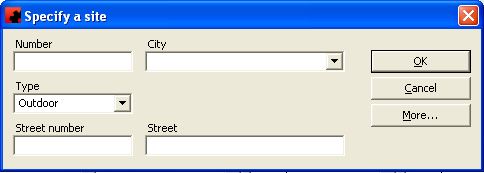
If you choose Site as the position location, the following screen will appear:
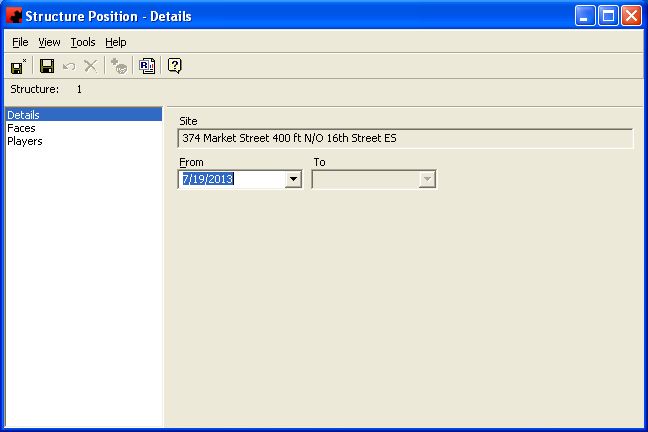
You can enter the Site information from this screen, click the "More..." button to add additional criteria or click OK to see a list of all Sites. Once you have chosen a Site, the following screen will appear:
Enter the date in the "From" field when the Structure will be at the selected Site... The "To" date will be automatically updated for the position when a new position is entered and saved.
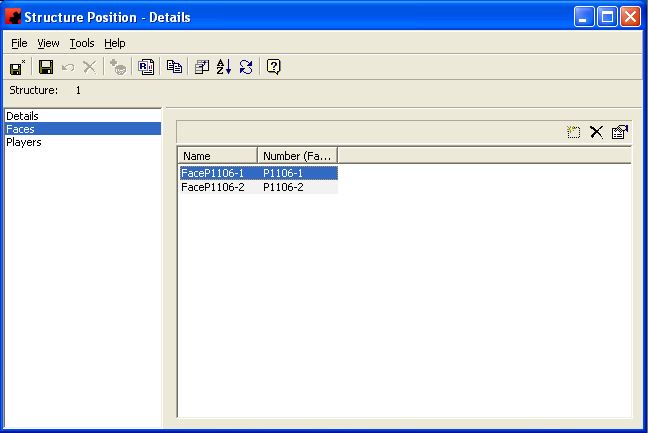
The Faces page will display all Faces associated with the selected Site. By default, all Faces will be assigned to the Structure. If not all Faces are to be assigned, select and delete the Faces that will not be on the Structure. This creates relationships between the Faces at the Site and Structure. These relationships are important if you wish to be able to associate postings with Structures.
Once you have selected the appropriate Site and/or Faces, if any, save the record. If there are any conflicts created by this change in position (e.g. The Faces are already associated with a different Structure for the same time period) the following screen will appear:
Click OK to open the Structure position in conflict and resolve it by either moving the conflicting Structure to a new Site or Plant, or removing the Face(s) in conflict.
The "To" Date will automatically update for the previous position and the new position is listed.
Plant
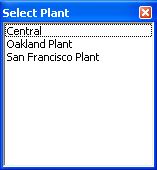
If you choose Plant as the position location, the following screen will appear:
Choose the Plant from the list provided.
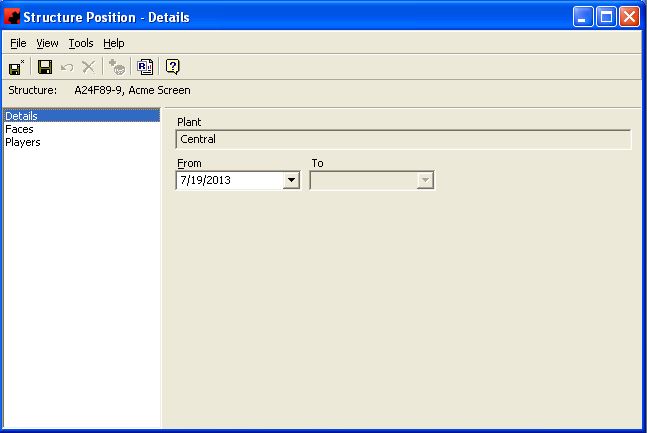
Enter the date in the "From" field when the Structure will be at this Plant. The "To" date will be automatically updated for the position when a new position is entered and saved. NOTE: When you select a Plant as the new Position, the Faces page will be blank.
Save the record and the "To" date will update for the previous position. The Plant name will now appear in the list on the Structure Positions page.
It should be noted that when Structures are moved from one Position to another, the move could affect Postings, depending upon the status of the Posting (current copy) and where the Structure is moved. The following are suggested procedures, based on these variables.
Structure Position changes with no existing Postings:
Market Scheduler: - no action is required, unless you are planning future Postings to the Face(s). You may decide that you want to schedule bonus or public service copy to the Face(s), creating a Posting Task for the posting crew to install the copy when the Structure is moved.
Operations (Maintenance): - Task is created to move the Structure and possibly to install copy in the Face(s). If the company wishes to track the design inventory and the posting, the Posting Task to install the copy will be the responsibility of the Market Scheduler. Also, new Position information needs to be added to the Structure.
Installing a new Structure at an Existing Site, keeping the copy in the Face(s):
Market Scheduler: - may need to create a Repost for the existing Advertiser(s) if copy is not reusable. This will create a Posting Task for the posting crew to install the copy when the Structure is installed.
Operations (Maintenance): - create Tasks to remove existing Structure and install the new one. If copy is reusable, a Task is created to install it in the new Structure and will appear on the Work Order to be completed. Also, new Position information needs to be added to the Structures.
Operations (Posting): - complete the Posting Task(s) and record the same as is appropriate, depending upon if you are tracking design inventory.
Structure moves to the Plant with existing Posting(s) (copy):
Market Scheduler: - create and complete Take Down on existing Posting(s).
Modify existing scheduling for duration of showing, creating Posting Task(s) for posting crew to install.
Create inactivity period or retire Face(s) as is appropriate.
Address any future Posting Schedule(s) as is appropriate.
Operations (Maintenance): - create Task to remove Structure and enter new Position information to show Structure coming to the Plant.
Operations (Posting): - complete the Posting Task(s) and record the same as is appropriate, depending upon if you are tracking design inventory.
Structure with Active Postings (copy) moves to a new Site and no new Structure is being placed at existing Site position:
Market Scheduler: - create and complete Take Down on existing Posting(s).
Schedule current Advertiser(s) to the new Site's Face(s), for duration of the current showing, creating Posting Task(s) for posting crew to install.
Create Inactivity period or retire Face(s) as is appropriate.
Address any future Posting Schedule(s) as is appropriate.
Operations (Maintenance): - create Task to move Structure and enter new Position information to show Structure moving to the new Site.
Operations (Posting): - complete the Posting Task(s) and record the same as is appropriate, depending upon if you are tracking design inventory.
Same as #4 (above), BUT existing advertiser(s) creates a conflict:
Market Scheduler: - create and complete Take Down on existing Posting(s).
Schedule current Advertiser(s) to new Face(s), for duration of the current showing, creating Posting Task(s) for posting crew to install.
Create Inactivity period or retire Face(s) as is appropriate.
Address any future Posting Schedule(s) as is appropriate.
Operations (Maintenance): - create Task to move Structure and enter new Position information to show Structure moving to the new Site.
Operations (Posting): - complete the Posting Task(s) and record the same as is appropriate, depending upon if you are tracking design inventory.
NOTE: If you are reposting reusable, existing copy, ensure that when you are entering the completion information, the "Return Current Copy" and "Get Copy From" fields are entered accordingly to show accurate Design Inventory.
User fields Page
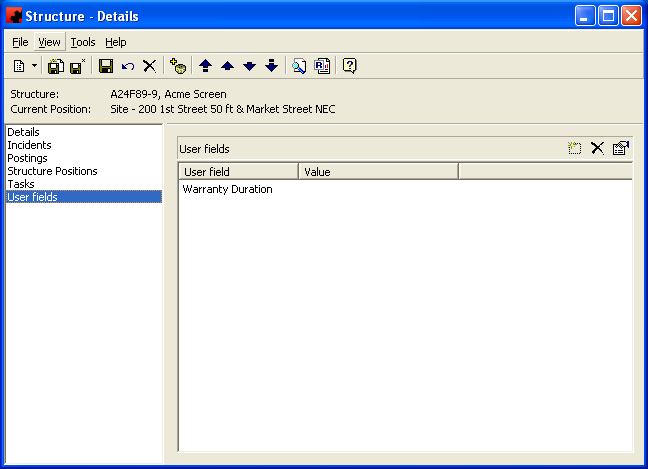
The final page on the Structure screen is User fields. Here you can add custom fields and their values as necessary. Remember, like all User fields, if you want to clear the Field, make sure you clear the Value. Do not delete the User field, as it will remove the Field from the database.
Add a Task
For information on adding tasks, please see the Tasks page.
Add an Incident
An Incident can be classified as something that has happened to a Site, Face or a Structure, and needs to be addressed. Incidents will require a Task or multiple Tasks, to resolve the issue. It is usually created from a received report (either external or internal) that something has happened and the Maintenance crew needs to be notified to go out and fix what might be damaged.
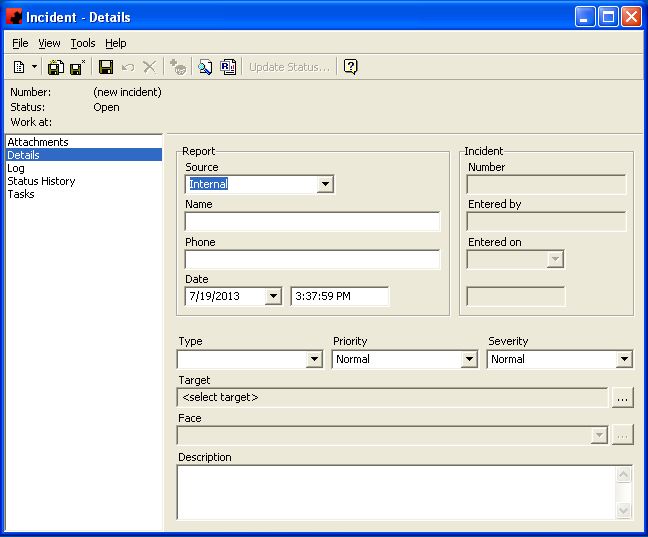
To create a new Incident in Ad Manager, select File from the menu items, then click New>Other>Incident and the following screen will appear:
Details Page
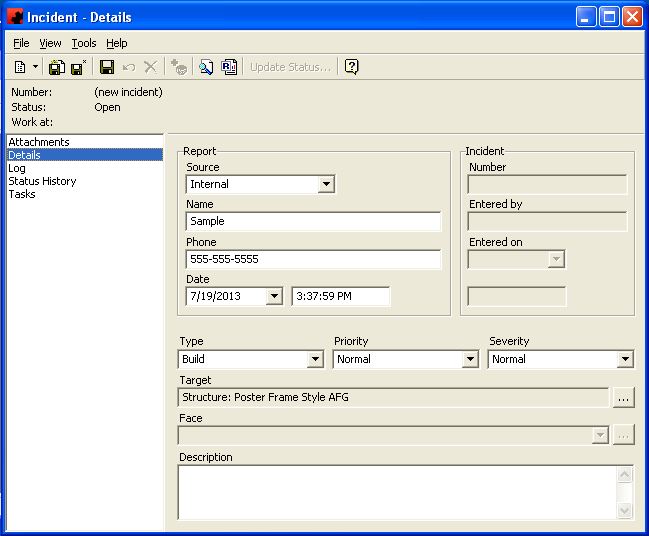
In the "Report" section, enter the details as to how the Incident was reported. The Source can be internal (a staff member for example) or external (someone who calls in to report an issue). Identify the name of the person who reported the Incident in the Name field. Enter that person's phone number in the Phone field for future reference. The Date and Time fields will automatically populate with the system date and time the Incident is being created and saved. If it is not "today's date and time", enter the correct information.
Information in the "Incident" section will be automatically generated when the Incident is saved. A sequential number will be assigned, according to the Incident Numbering options, along with the date/time of entry and User ID of the person who entered the Incident into Ad Manager.
The remaining fields provide details about the Incident. Enter the Incident Type, the Priority status for the Incident, and choose the Severity of it. Priority status will assist in determining if someone needs to be sent right away to fix the problem or if it can be addressed during routine maintenance. Setting Priority and Severity statuses also allows you to filter and sort Incidents, using these fields as criteria.
Next you assign a Target to the Incident. The Target can be a Site or a Structure. If a Site is selected as the Target, you may optionally target a specific Face. Choose the option that best suits the Incident and where the attention needs to be focused. (It is important to choose appropriately because if it is linked to a Structure and the Structure is moved after a Work Order has been issued, the information on the issued Work Order will show the current position of the Structure, not the new one.) Click the ellipsis () button, and choose whether you want to assign the Incident to a Site or a Structure.
Site
If you choose Site, the following screen will appear:
You can enter criteria in the fields to specify the search, or you can simply click OK, and a list of all Sites will appear and you can choose the Site from this list.
If you've chosen Site as your Target, the Face field on the Incidents Details screen will become active. If the Incident applies to only a specific Face at the Site, choose it from the drop down menu.
Structure
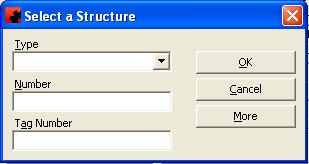
If you choose Structure from the Target menu, the following screen appears:
You can enter criteria information to identify a specific Structure, or simply click OK to see a list of all Structures and select the desired Structure from it.
The final field on the Incident Details page is the Description Field. Here, you can describe what has been reported as having happened, as well as any other pertinent details the Maintenance crew will need to know.
When the information is complete on the Incident Details screen, save the record. Below is an example of how an Incident Details screen might appear upon completion.
Status Page
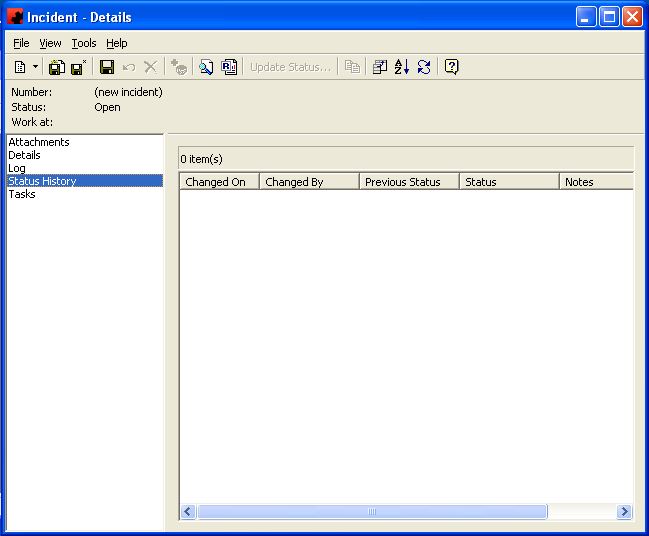
The Status page displays the current status of the Incident along with a history of its Status, if it has changed. The default Status of a new Incident will be "Open".
Once the Incident has been addressed and all Tasks have been set as Completed, the Status may then be changed to "Closed". When completing a Task or resolving a Work Order Task, you have the option of letting the system close the Incident automatically if all Tasks have been marked completed. If you do not select this option, you must manually change the status of the Incident to Closed. The Status of an Incident may also be changed to "Ignored" if the Maintenance Technician decided that nothing needed to be done. However, a Note must be entered along with the "Ignored" Status in order for the record to be saved. Similarly, if the Incident status is changed to "Suspended", a Note must also accompany the Status in order for it to be saved.
NOTE: Once a Status has been entered on an Incident, it cannot be removed from that Incident's history.
Tasks Page
On the Tasks Page of the Incident, you will assign all Tasks that are required in order to complete and resolve the Incident.
Click on the New () button, and enter all the Task details as required (see Add a Task). Continue to add Tasks until all the Tasks required for this Incident have been entered.
You can filter the listing of Tasks to only view those that match particular criteria. To do this, click in the Filter check box and specify your criteria in the following screen.
Click OK and only those matching Tasks matching your criteria will appear in the list. To clear the filter and view all Tasks once again, click in the Filter check box and choose Clear.
Log Page
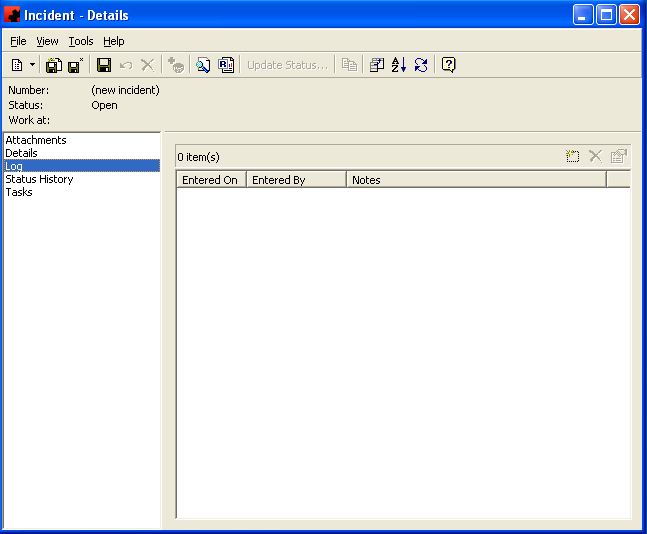
The Log Page allows you to enter detailed Notes pertaining to this specific Incident. It will display the date the Note was entered as well as who wrote it.
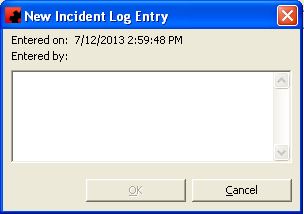
To add a log entry, click on the New () Button.
Enter the Note you wish to record. Click OK. When the Note is added to the Log, the "Date" and "Entered By" fields will be automatically populated.
NOTE: Any Note entered on this page cannot be edited or deleted. It is a permanent record and its integrity must be maintained.
Attachments Page
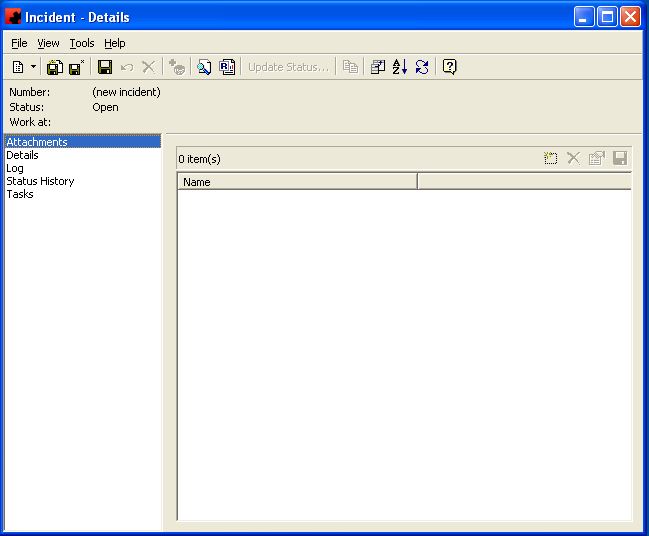
The Attachments Page allows you to attach any electronic file such as documents, pictures, etc. pertaining to the Incident.
For example, the initial report of the Incident came to your office via an outside e-mail. You may wish to attach the e-mail to the Incident for future reference. You could also attach pictures that help describe what happened. To add a new Attachment, click on the New () Button. Browse to find the folder to Look in, and highlight the appropriate document/image. Click Open. The attachment will now be listed on the Attachments page.
Adding Maintenance Items
Type topic text here.
Adding Routine Maintenance Schedules
Type topic text here.
All Structure Types
The STRUCTURE TYPES database contains a list of all the different kinds of structures you have in your inventory. They are used to describe a particular Structure that is either in your shop or in the field. Examples of Structure Types may include:
Garbage Can
Unipole
2-panel Bus Shelter
3-sided MPA Unit
Single Frame Unit
Adding a New Structure Type
To add a new Structure Type from the main Ad Manager window, go to the Public Folders - Maintenance - All Structure Types and click on the New Structure Type icon (). The Stucture Type - Details Window will appear.
Enter the name of the Structure Type, and save the record.
Modifying a Structure Type
To modify a Structure Type, simply click the All Structure Types under the Maintenance Folder. Double-click on the desired Structure Type in the list view, and make the change(s) necessary. Once you have finished, click the Save () button.
Deleting a Structure Type
To delete a Structure Type, there must be no Structures associated with it. Click on All Structure Types under the Maintenance Folder, then highlight the desired Structure Type. Once, highlighted, click the Delete button (). Ad Manager will ask you for confirmation to delete the Structure Type record.
Completing Incidents
Type topic text here.
Deleting Maintenance Items
Type topic text here.
Deleting Routine Maintenance Schedules
Type topic text here.
Modifying Incidents
Type topic text here.
Modifying Maintenance Items
Type topic text here.
Modifying Routine Maintenance Schedules
Type topic text here.
Move a Structure
Type topic text here.
Printing Work Orders
Type topic text here.
Steps to Set Up Maintenance
Type topic text here.
