Difference between revisions of "Face"
(→Classification) |
|||
| Line 66: | Line 66: | ||
For additional information on the buttons that appear at the top of the window, [[Buttons#Face|click here]]. For information on the menu items that appear under the Tools menu, [[FAQ and General Info#Face Tools Menu|click here]]. | For additional information on the buttons that appear at the top of the window, [[Buttons#Face|click here]]. For information on the menu items that appear under the Tools menu, [[FAQ and General Info#Face Tools Menu|click here]]. | ||
| − | The pane in the bottom portion of the screen shows each of the classification categories that you have set up (for information on adding Classification Categories, see [[Custom | + | The pane in the bottom portion of the screen shows each of the classification categories that you have set up (for information on adding Classification Categories, see [[Custom classifications|Custom Classifications]]). |
| − | To enter a value, double click on the classification you wish to specify a value for, and select it from the list. If the value you wish to select is not on the list, you must add it from the Classifications Table (for information on adding Classification Values, see [[Custom | + | To enter a value, double click on the classification you wish to specify a value for, and select it from the list. If the value you wish to select is not on the list, you must add it from the Classifications Table (for information on adding Classification Values, see [[Custom classifications|Custom Classifications]]). |
== Detail == | == Detail == | ||
Revision as of 15:49, 25 July 2013
Page for Face.
Contents |
Attachments
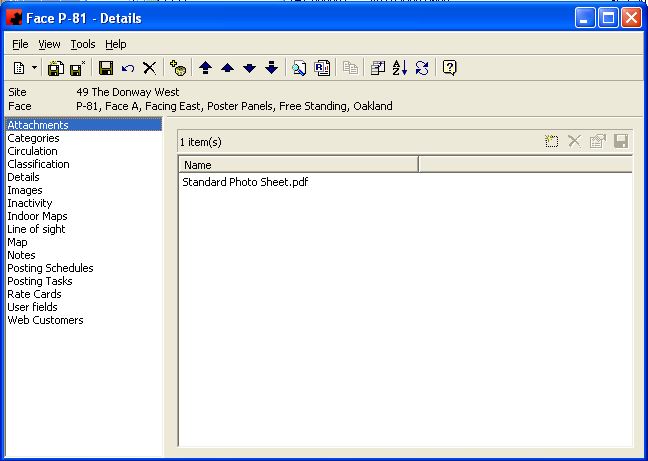
The Attachments Page is where documents can be stored for the Face. You can create a document library showing different files or documents, of any file type (TXT, DOC, XLS, PDF), with each Face. TAB audits and Inactivity work orders are a couple of examples of what can be saved here.
The functions available through the buttons immediately above the Attachments pane are:
- Add a new item for this Face. A window will appear where you can select the desired file.
- Delete an item for this Face. Highlight the item, and click the Delete button.
- Open the document or File item. Highlight the item and click the properties button.
- Save the item to you computer or network drives. Highlight the item, and click on the Save As button.
For additional information on the buttons that appear at the top of the window, click here. For information on the menu items that appear under the Tools menu, click here.
Categories
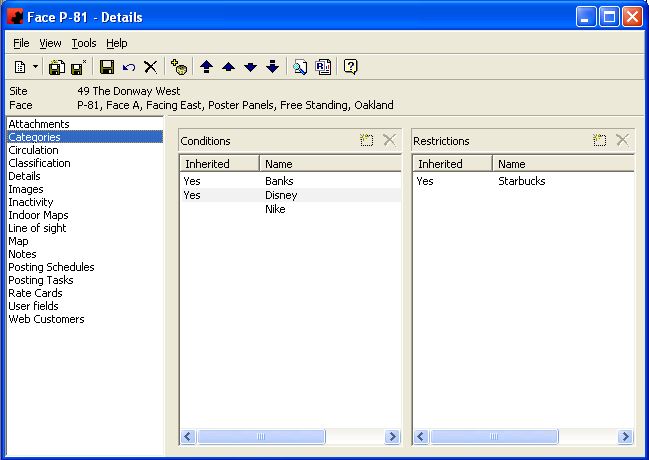
The Categories Page maintains a listing of all items that have been specified as positive conditions or restrictions at a Face. Site conditions and restrictions are inherited by each Face and are shown in this window.
Items in the Conditions box on the left side of the screen are considered to be positive attributes for this Face. Items in the Restrictions box on the right side of the screen are considered to be negative attributes.
The functions available through the buttons immediately above the Categories pane are:
- Add a new Condition or Restriction to the Face. If you are adding a new condition (positive attribute), select the
above the left box. If you are adding a restriction (negative attribute), select the
above the right box.
- Delete the highlighted Condition or Restriction from the Face. If you are removing a condition (positive attribute), select the
above the left box. If you are removing a restriction (negative attribute), select the
above the right box.
For additional information on the buttons that appear at the top of the window, click here. For information on the menu items that appear under the Tools menu, click here.
If the word "Yes" appears in either Inherited column, this indicates that the condition or restriction has been set at the Site level, and it applies to all Faces at the Site. You cannot add or Delete Site Conditions or Restrictions from the Face.
Circulation
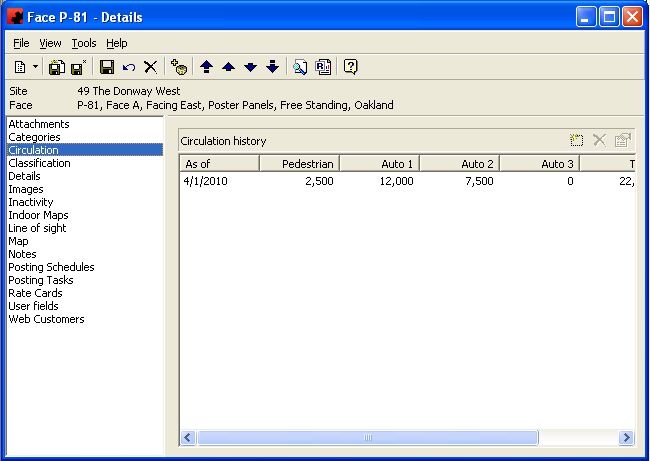
The Face Circulation Page is where traffic and pedestrian circulation data is entered for a Face. Ad Manager allows information to be entered in advance of the date the new circulations take effect, and automatically use the appropriate circulation data as required.
The functions available through the buttons immediately above the Circulation pane are:
- Add a new set of circulation data to the Face. A window will appear where traffic and pedestrian circulation data, along with their count station information can be entered. It is in that screen that you also enter the date that the circulation data will take effect for this Face. Note that when a circulation is added, it is added as a whole value, not in thousands (e.g. 15500, not 15.5).
- Delete the highlighted circulation data entry from the Face.
- The Properties button allows you to review or edit the information about the highlighted set of circulation data.
For additional information on the buttons that appear at the top of the window, click here. For information on the menu items that appear under the Tools menu, click here.
The Circulation History pane shows the basic information for each circulation record, including the date the circulations went/will go into effect, and the breakdown of the total circulation, along with the circulation total.
Classification
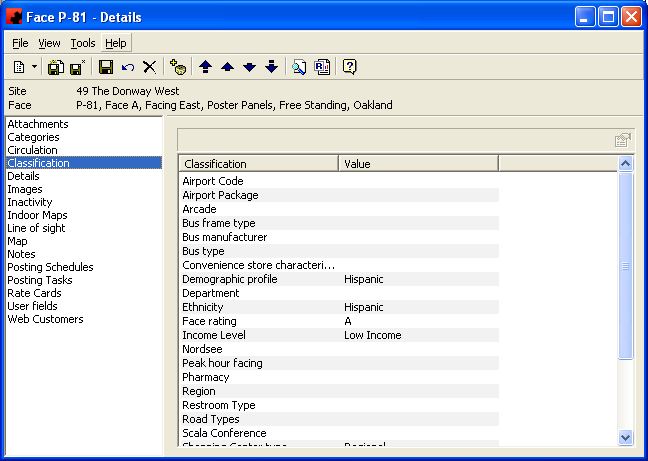
The Classification Page provides you with the ability of assigning specific characteristics to a Face. These Face classifications can be used when scheduling Faces to Contracts by specifying the target classification.
The functions available through the buttons immediately above the Classification pane are:
- The properties button allows you to select a classification value for the classification item currently highlighted.
For additional information on the buttons that appear at the top of the window, click here. For information on the menu items that appear under the Tools menu, click here.
The pane in the bottom portion of the screen shows each of the classification categories that you have set up (for information on adding Classification Categories, see Custom Classifications).
To enter a value, double click on the classification you wish to specify a value for, and select it from the list. If the value you wish to select is not on the list, you must add it from the Classifications Table (for information on adding Classification Values, see Custom Classifications).
Detail
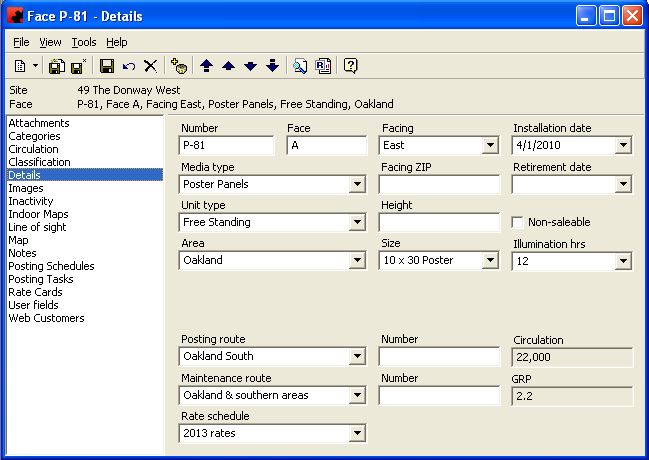
The Details Page is where information about the Face is stored. Media type, unit type, installation and retirement dates, size, illumination as well as posting and maintenance route information are kept on this page.
For information on the buttons that appear at the top of the window, click here. For information on the menu items that appear under the Tools menu, click here.
Fill in the appropriate information for each field. Select the appropriate item from any of the drop down lists (in the boxes) or type in the information if it is not present.
Fields
Area: This is where you specify the predetermined geographic area where this Face is located.
Circulation: This is the total circulation that has the opportunity to view the Face (in thousands). To break the circulation down into its separate components, go to the Circulation Page.
Face: This is an identifier telling you which of the Faces you are on at this site.
Facing: This shows which direction the Face is facing.
Facing Zip: This is where you can add a zip code that this Face can be seen from, other than the one the Face is located in.
GRP: This is the calculated GRP for this Face, based on the default market definition. For more information on default market definitions, see Areas.
Height: This is how far off the ground this Face is located.
Illumination hrs: This is where you can specify the number of hours the Face is lit. (12 hours Unilluminated (no lights), 18 hours illuminated (lights on timers), or 24 hours illuminated (lights on all night))
Installation Date: The Installation Date is the date the Face was physically installed in the field. Click on the arrow to see a calendar from which you can select the date.
Maintenance Route: This is where you identify which maintenance route this Face belongs to.
Media Type: This is the type of media that this Face is.
Non-Saleable: This allows you to mark a Face as not being available for selling, even though it is part of your inventory. Examples include mall directory Faces and Faces given to the lessor.
Number: This is the number that uniquely identifies the Face. It can be any alpha-numeric value.
Posting Route: This is where you identify the name of the group of Faces this Face belongs to that are posted by the same person/crew, or are in the same geographic area for posting purposes.
Retirement Date: This is the date that the Face will be permanently taken down or removed physically from the site.
Size: This is where you specify the size of the Face if it is not the standard size for the media type.
Unit Type: This is any unique characteristic for the Face.
Images
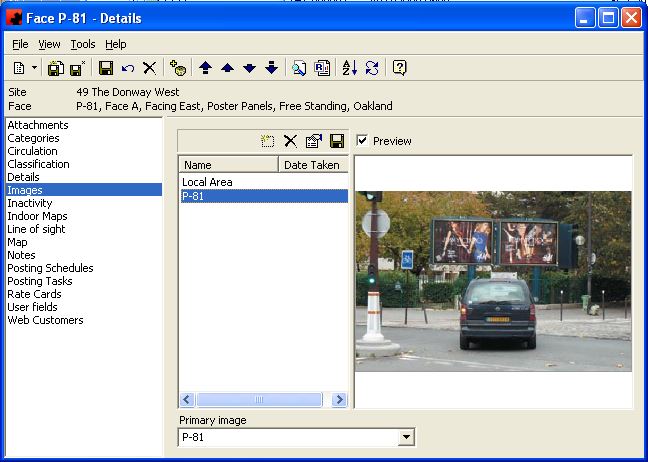
The Images Page is where images, video and Surround View images can be stored for the Face. You can create a multimedia library showing different creative, different distances, maps, floor plans, technical and legal drawings with each Face.
The left pane of the window lists all the multimedia items that have been stored for this Face. The right pane of the window is where the item can be viewed.
The functions available through the buttons immediately above the Images pane are:
- Add a new multimedia item for this Face. A window will appear where you can select the desired file, and you can provide a description to identify what this file is. This descriptor will appear in the left pane of the window.
- Delete a multimedia item for this Face. Highlight the item in the left pane of the window, and click the Delete button.
- Change the Name or the image of a multimedia item. Highlight the item and click the properties button; from here you can change the image by clicking on the Tools menu and selecting Load image.
- Save the image to you computer or network drives. Highlight the item in the left pane of the window, and click on the Save As button.
For additional information on the buttons that appear at the top of the window, click here. For information on the menu items that appear under the Tools menu, click here.
Fields
Preview - Click the Preview check box on to see the highlighted image.
Primary image - This is the image to use on a report that displays an image of the Face.
Inactivity
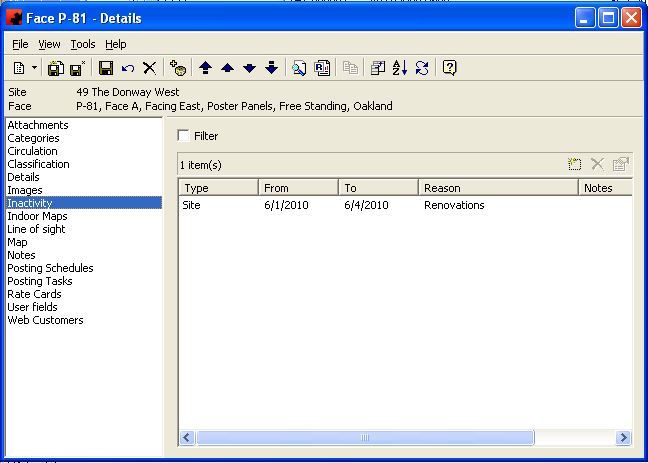
The Inactivity Page maintains a history of all dates that a Site or Face has been/will be inactive.
The functions available through the buttons immediately above the Inactivity pane are:
- To add an inactivity, click the New button. When selected, a screen will appear asking for the reason for the inactivity, the date range the Face will be inactive, and any other notes you wish to maintain about this inactive time frame.
- To delete an inactivity period from the list, highlight it and click on the Delete button. You cannot delete a Site Inactivity from the Face.
- To modify an inactivity period, highlight it and click the Properties button. Make the appropriate changes to the dates or notes, and click the Save (
) button.
For additional information on the buttons that appear at the top of the window, click here. For information on the menu items that appear under the Tools menu, click here.
Inactivity items with a "Yes" in the Site column indicate they are Site inactivities and affect all Faces at the Site.
The Filter check box allows you to filter the listing of Inactivity periods to show only those that meet a certain criteria. When selected, a filter screen will appear, allowing you to choose to see inactivity periods with particular start dates, end dates, durations, etc. When a filter is active, a check mark will appear in the filter box. To clear the filter and see all records, click on Filter, then the Clear button on the Filter screen, followed by the OK button.
Indoor Maps
Type topic text here.
Line of Sight
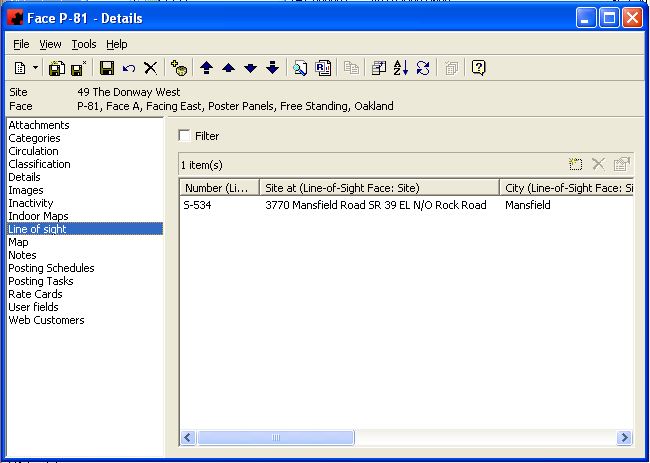
Ad Manager allows users to establish line of sight relationships between Faces. Any scheduling done to any Faces that have a line of sight relationship will automatically be checked to ensure there are no advertiser or category conflicts.
The functions available through the buttons immediately above the Line Of Sight pane are:
- If you wish to add a new line of sight relationship between the current Face and another, click the New button. Ad Manager will prompt you for the Face details, or you can click the More button to filter for the desired Face. Ad Manager automatically enters the inverse relationship between the two Faces.
- If you wish to delete a line of sight relationship, highlight the affected Face in the pane and click the Delete button. Ad Manager automatically deletes the inverse relationship between the two Faces.
- If you wish to view information related to the Face that is in line of sight, highlight it and click the Properties button. Ad Manager will display the information for this Face.
For additional information on the buttons that appear at the top of the window, click here. For information on the menu items that appear under the Tools menu, click here.
The Filter check box allows you to filter the listing of Faces to show only those that meet a certain criteria. When selected, a filter screen will appear, allowing you to choose to see Faces related to a particular market, area, facing a particular way, etc. When a filter is active, a check mark will appear in the filter box. To clear the filter and see all records, click on Filter, then the Clear button on the Filter screen, followed by the OK button.
Map
Type topic text here.
Notes
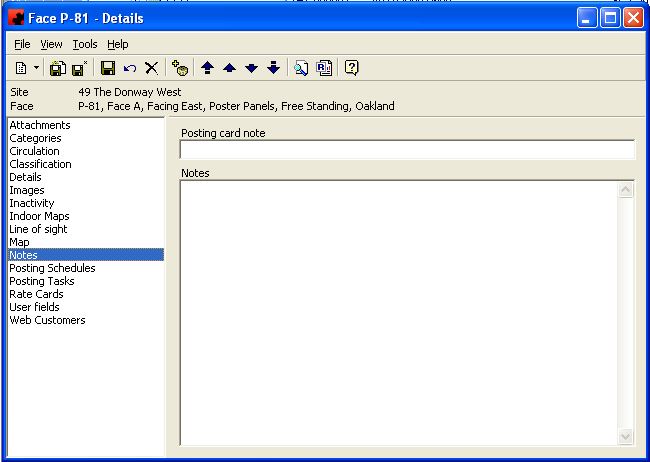
The Notes Page allows you to store notes for use on Posting Cards/Instructions, along with general notes about the Face.
For information on the buttons that appear at the top of the window, click here. For information on the menu items that appear under the Tools menu, click here.
To enter a note to appear on Posting Cards/Instructions, click in the Posting card note portion of the window and type the note you wish to have appear.
If you wish to enter a general note for the Face (this note will not appear on Posting Cards/Instructions), click in the Notes pane and type the appropriate information. You must click the Save () button to save your changes.
Posting Schedules
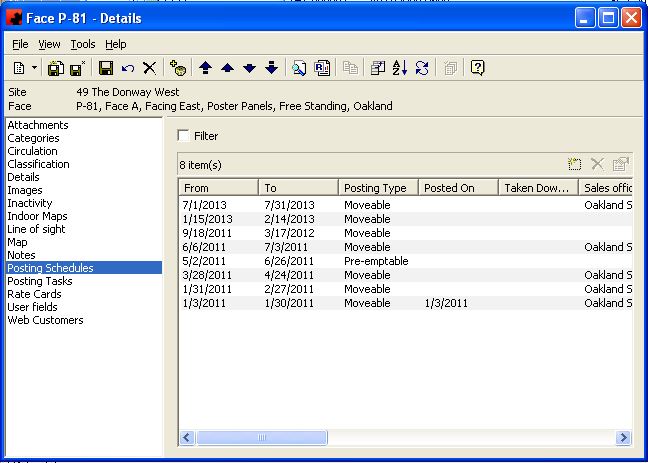
The Posting Schedules Page allows users to view what has been scheduled at a Face, and what is scheduled to go on the Face in the future. This page provides both past and future history for the Face.
Tool buttons found on the top of the screen when you are the Posting Schedules Page:
- Customize Current View allows you to select the columns to display and the order to display them in.
- The Order button allows you to sort the activities in the desired order.
- The Refresh button will reload the list of activities, in the event changes to the activities have occurred since you visited this page.
The functions available through the buttons immediately above the Posting Schedules pane are:
- Allows you to enter new scheduling. When selected you can filter for a Subcontract and flight to select, along with the dates desired. Once selected, Ad Manager will check for any scheduling or location related conflicts and inform you of any problems prior to adding to your Posting Schedules page. Ad Manager automatically updates your Subcontract charting information for you.
- Allows you to delete a scheduled item. When you delete scheduling from this page, Ad Manager automatically updates your Subcontract charting information for you.
- Allows you to modify or review information related to the highlighted posting schedules. If you modify any information (dates, posting type, design), Ad Manager will check for any scheduling or location related conflicts and inform you of any problems. Ad Manager automatically updates your Subcontract charting information for you.
For additional information on the buttons that appear at the top of the window, click here. For information on the menu items that appear under the Tools menu, click here.
The Filter check box allows you to filter the listing of Posting schedules to show only those that meet a certain criteria. When selected, a filter screen will appear, allowing you to choose to see schedules (charting) related to a particular contract, subcontract, advertiser, etc. When a filter is active, a check mark will appear in the Filter box. To clear the filter and see all records, click on Filter, then the Clear button on the Filter screen, followed by the OK button.
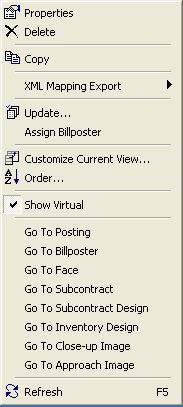
Right Click
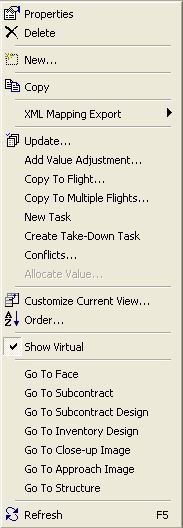
- Right clicking on the list of assigned Faces will display this menu. From here you can schedule design changes, change posting type, select the design to be assigned, alter the assignment's duration, copy to another flight, create a new task (e.g. repost), create a Take-Down task, or Update a property (or properties) for one or more highlighted schedule(s).
To change the information being viewed in the list, simply right click in the list, and choose Customize Current View. To change the sort order, simply right click in the list, and choose Order.
Copy To Flight - This will allow you to copy (transcribe) the highlighted Faces from this Subcontract flight to any other flight for any Subcontract. Ad Manager will check to ensure the Face is available and suitable on the new Subcontract flight.
Copy to Multiple Flights - This will allow you to copy (transcribe) the highlighted Faces from this Subcontract flight to other flights for other Subcontracts (instead of copying them one at a time). Ad Manager will check to ensure the Face(s) is/are available and suitable on the new Subcontract flights.
Create Take-Down Task - This feature allows you to inform Ad Manager to create a task that will generate a Posting Card/Instruction that will remove the existing copy and not replace it with new copy. You can specify the date that this Take-Down will occur.
Go To - The Go To feature allows you to open a window for the appropriate item for the highlighted record.
New Task - This will allow you to create a new posting of the same copy on a different date for this Subcontract or create a take down record for the highlighted Face(s).
Show Virtual - This will allow you to display any posting schedules on any related Virtual Faces.
Update - The Update menu item allows you to to modify a property (or properties) for one or more highlighted schedule.
Posting Tasks
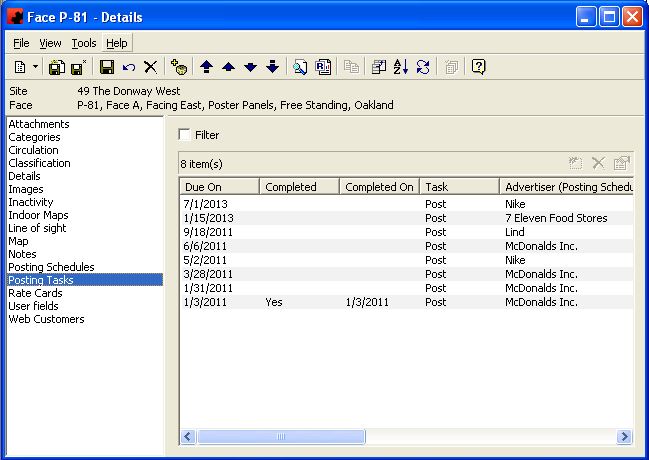
The Posting Tasks Page allows users to enter posting related information (including Billposter assignments and completion information) for any campaign assigned to the Face.
Tool buttons found on the top of the screen when you are on the Posting Tasks Page:
- Customize Current View allows you to select the columns to display and the order to display them in.
- The Order button allows you to sort the activities in the desired order.
- The Refresh button will reload the list of activities, in the event changes to the activities have occurred since you visited this page.
- The Update button allows you to select one or more posting tasks and update the posting task information for them. For more information on using the Update button, see Change or Remove Posting Information.
The functions available through the buttons immediately above the Posting Tasks pane are:
- Allows you to delete a scheduled task that has not yet been completed.
- Allows you to modify or review information related to the highlighted posting tasks.
For additional information on the buttons that appear at the top of the window, click here. For information on the menu items that appear under the Tools menu, click here.
The Filter check box allows you to filter the listing of Posting tasks to show only those that meet a certain criteria. When selected, a filter screen will appear, allowing you to choose to see posting tasks related to a particular contract, subcontract, advertiser, etc. When a filter is active, a check mark will appear in the Filter box. To clear the filter and see all records, click on Filter, then the Clear button on the Filter screen, followed by the OK button.
Right Click
- Right clicking on the list of posting tasks will display this menu. From here you can update posting information for this Face, or go to the appropriate item.
To change the information being viewed in the list, simply right click in the list, and choose Customize Current View. To change the sort order, simply right click in the list, and choose Order.
Assign Billposter - Allows you to identify the Billposter who will be responsible for posting the copy. When producing posting cards/instructions, you can filter to find only those items that have been scheduled for the Billposter.
Go To - The Go To feature allows you to open a window for the appropriate item for the highlighted record.
Show Virtual - This will allow you to display the posting tasks of any related Virtual Faces.
Update - This allows you to enter posting related information (including Completion information) for the Face.
Rate Cards
Type topic text here.
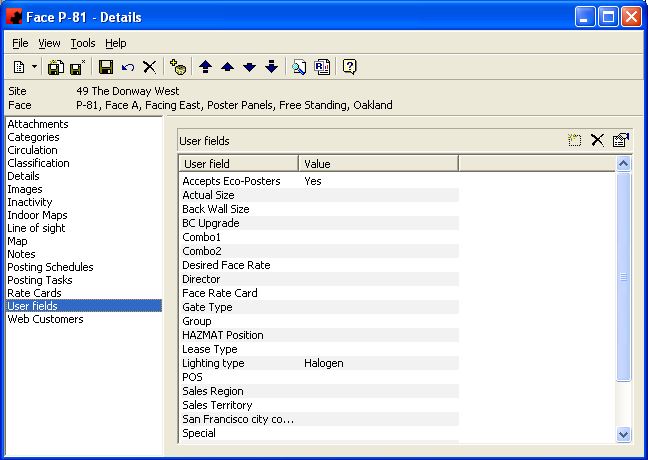
User Fields
Ad Manager allows users to create their own fields to store information for use throughout the program. These User fields can be filtered on when doing a find.
The functions available through the buttons immediately above the User Fields pane are:
- The New button allows you to create a new User field. When a User field is created, Ad Manager creates it for every Face.
- The Delete button allows you to delete the highlighted User field. When a user field is deleted, it is deleted from every Face.
- Clicking the Properties button will allow you to change the name of the highlighted User field. When the name of a user field is changed, it is changed for every Face.
For additional information on the buttons that appear at the top of the window, click here. For information on the menu items that appear under the Tools menu, click here.
To change the value assigned to a user field, double click the User field to edit, and type in the new value in. Press the Enter key on your keyboard to save your change. Every user field does not need to be filled in for a Face, only those items that relate to this Face.
Web Customers
Type topic text here.
