Reports
For information on how to customize an existing report, please see Customizing a Report
Available Locations Report
The Available Locations Report provides information on faces that will be available for a specified period of time. This is a valuable report when looking to supplement the Location List with specific locations or to provide your client with a list of available locations for their potential campaign. This report can be filtered and fine-tuned to provide you with the exact list of available locations that you require, and that your client has asked for.
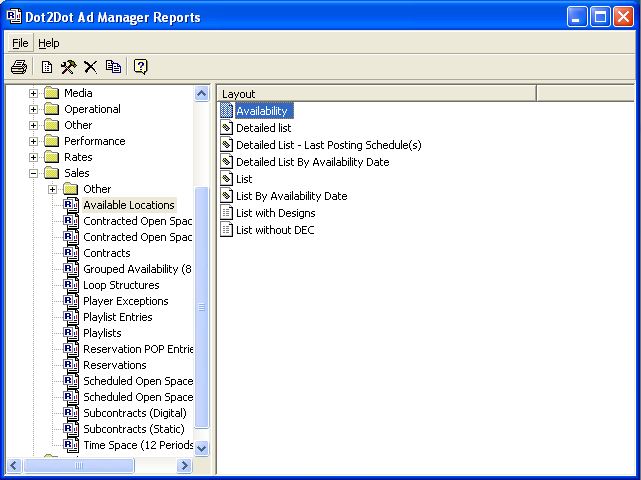
To run the Available Locations Report, open the Reports window by clicking on the Reports button. Then go to Sales - Available Locations and choose the layout you wish to run.
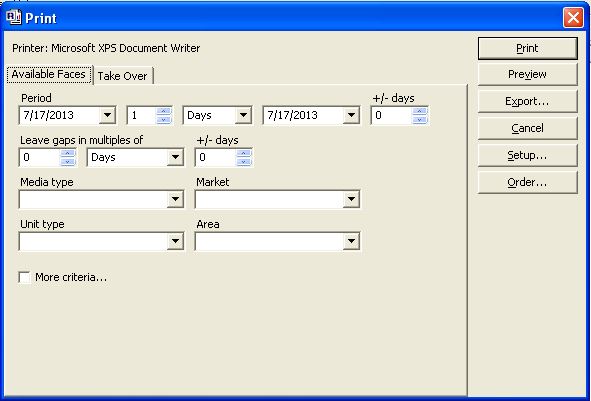
Once you have double-clicked on the Layout you want, the following Print Screen will appear.
Available Faces Tab
It is not necessary to select any criteria, except for a period of availability, however if you choose to select criteria, here is a discription of what can be filtered on.
Period - This prompt allows you to specify the time frame for reporting on locations that are available in your inventory.
+/- days - This option allows you to choose an availability date margin.
Leave gaps in multiples of - In a number of cases, you may be charting several months in advance of the showing. When you do this, you can create time gaps where Faces should not be used. See Minimizing Gaps.
Media type - This option allows you to identify which media type you wish to run the report for.
Market - This option allows you to identify which Market you wish to run the report for.
Unit type - This option allows you to identify which unit type you wish to run the report for.
Area - This option allows you to identify which area you wish to run the report for.
More criteria... - If you wish to produce a report based on other criteria, select this check box. This action will open up the filter options so you can further streamline your report.
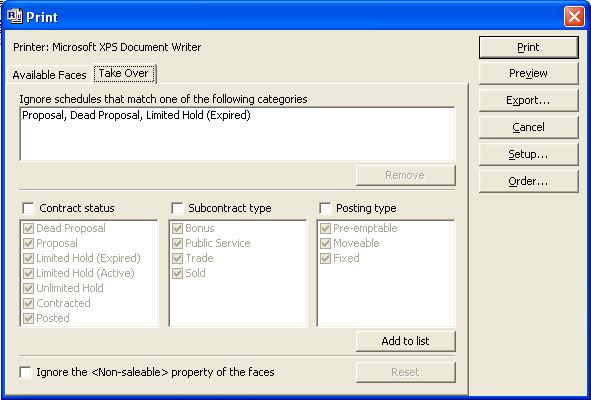
Take Over Tab
If you are tight for space during a particular time frame or want to find faces that may be acceptable that aren't currently considered available, you can use the Take Over features to generate a larger pool of faces to select from.
To print the report, see Printing Reports.
Background Database Report
The following Background Databases Reports can also be printed when desired. Each of these reports has no options as to their content. The report prints a copy of all the information contained in each database.
| Areas | Cities | Counties |
| Countries | Markets | Media Types |
| Mobile Routes | Neighbours | Permits |
| Places | Plants | Posting Routes |
| States | Unit Types |
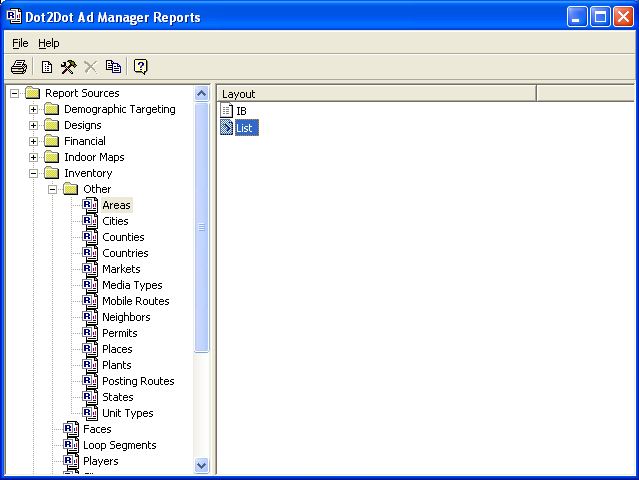
To run any of these Background Databases Reports, open the Reports window by clicking on the Reports button. Then go to Inventory - Other, select the background database category and double-click on the List Layout.
To print the report, see Printing Reports.
Bill Posting Design Summary Report
The Bill Posting Design Summary Report provides the Bill Poster with a list of all the Designs required to complete the Posting Tasks during a specified time frame. The quantity of copies needed of each creative is also listed next to the Design Name. In order to run this report, you must specify the desired time frame. All creative that is needed to complete Posting Tasks that are due in this time frame will be listed.
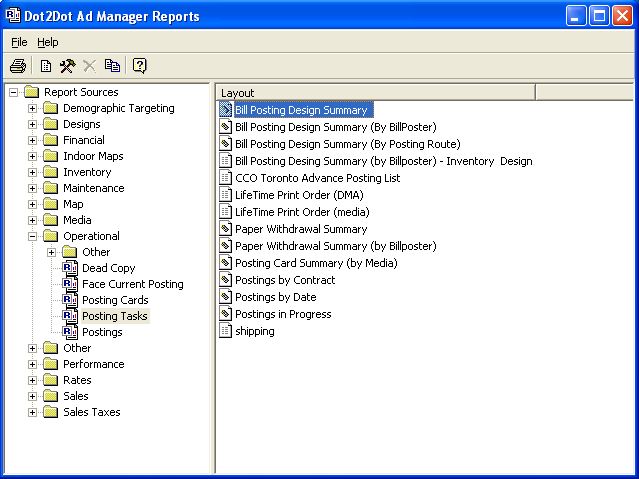
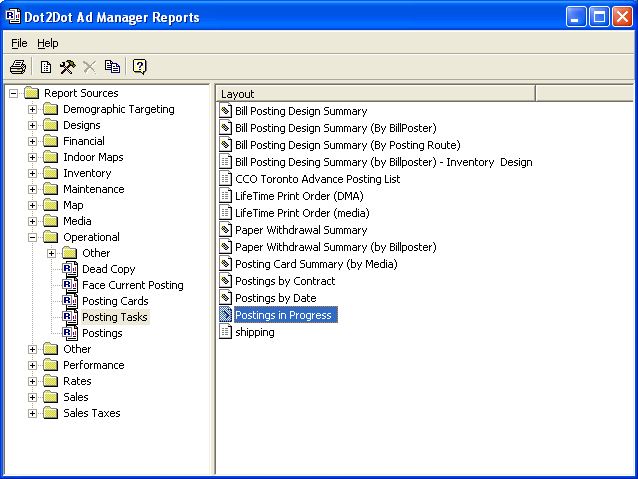
To run the Bill Posting Design Summary Report, open the Reports window by clicking on the Reports button. Then go to Operational - Posting Tasks and double-click on the Bill Posting Design Summary Layout.
If you wish to produce a report based on other criteria, click on the Selection Criteria check box. The filter allows the user to identify the parameters that will shorten the listing to only those Designs for Posting Tasks you wish to see. Since the filter command only displays Designs for Posting Tasks which meet your criteria, the more parameters you identify, the more specific your request and the shorter the list of Designs reported on.
You can choose to see all Designs, or only those involving a Posting, Re-post or those involving a Take Down/Cover. You can also specify the Date(s) you want to print your list for. The report will only list the Designs for those Posting Tasks where the Due Date is within the date range specified. If no date range is entered under Due Date, every Design in Ad Manager will be printed (subject to your other criteria).
You can also choose to filter which Designs to include by selecting the desired items. For example, you may only wish to produce a list of Designs for Posting Tasks assigned to a certain Bill Poster, or select Posting Tasks where the Design is to originate from a particular source plant.
Once you have set all your desired criteria, click OK.
For more information on printing the report, see Printing Reports.
Billing Reports
Type topic text here.
Budget and Audit Report
Type topic text here.
Campaign Summary Report
The Campaign Summary Report provides summary of delivery information for all Subcontracts of a Contract and all Markets for that Contract upon the Contract's completion.
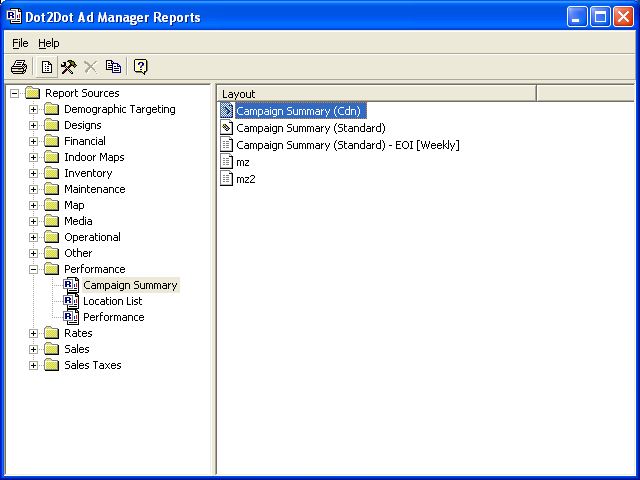
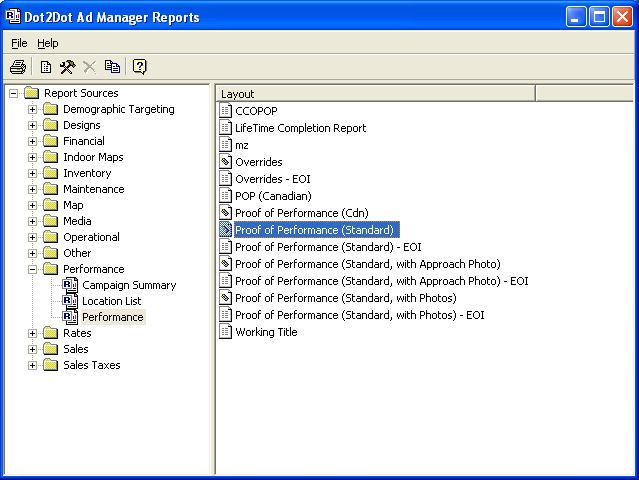
To run the Campaign Summary Report, open the Reports window by clicking on the Reports button. Then go to Performance - Campaign Summary and choose the layout you wish to run.
Campaign Summary (Cdn) - This is the Canadian version of the Campaign Summary Report. It is a COMB (Canadian Outdoor Measurement Bureau) approved report that is to be used by Canadian plant operators for reporting purposes.
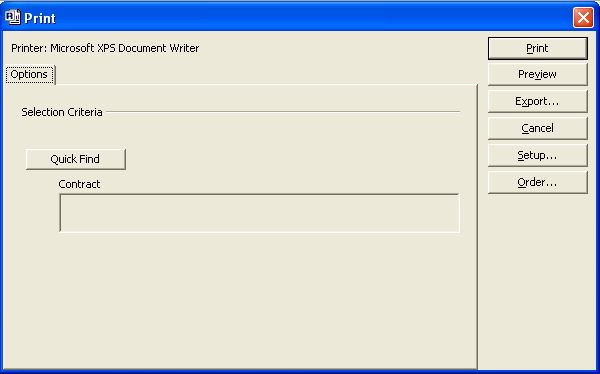
Once you have double-clicked on the Layout you want, the following Print Screen will appear.
Click on the Quick Find button to choose the contract you wish to report on.
To print report, see Printing Reports.
Category Sales Sumarry Report
The Category Sales Summary Report provides a breakdown of sales revenue for each of your Categories (e.g. Automotive, Restaurant, etc.). The report displays the Primary Categories with the sold costs in dollar amounts for Gross Value, Net Value and Rate Card Value.
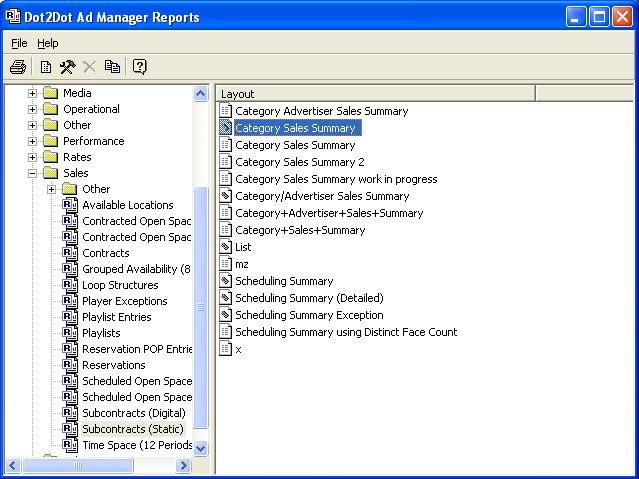
To run the Category Sales Summary Report, open the Reports window by clicking on the Reports button. Then go to Sales - Subcontracts and double-click on the Category Sales Summary Layout.
If you wish to produce a report based on certain criteria, select the check box for Selection Criteria. The filter will allow you to identify the parameters that will shorten the listing to only those items you wish to see. Since the filter command only displays items which meet your criteria, the more parameters you identify, the more specific your request and the shorter the list of items reported on.
Once you have determined your filter parameters, click on the OK button.
For additional information on printing the report, see Printing Reports.
Category/Advertiser Sales Summary Report
The Category/Advertiser Sales Summary Report provides a breakdown of what sales have been like for each of your Advertisers, grouped by your Categories. The report displays each Advertiser with the sold costs in dollar amounts for Gross Value, Net Value and Rate Card Value.
Completion Reports
Type topic text here.
Contracted Open Space Reports
There are several formats of Contracted Open Space Reports that can be run in Ad Manager which are found under two categories in the Reports Window. These reports provide information on what space has been SOLD to advertisers. These reports only deal with availability based on information input into the Subcontracts Counts Tab. Faces are assigned to each area based on the market distribution being used for each Subcontract. This distribution is applied to the number of faces listed on each Subcontract Counts Tab to determine expected occupancy and availability. The only other information taken into account are any custom distributions entered on the Distribution Tab of the Subcontracts.
For availability based on scheduling (charting) information, see the Scheduled Open Space Reports.
The Contracted Open Space Reports provide a table on how many faces have been Sold and how many are Available in each of your markets over future time frames.
To run the Contracted Open Space Reports, open the Reports window by clicking on the Reports button. Then go to Sales and choose either Contracted Open Space (12 Periods) or Contracted Open Space (24 Periods).
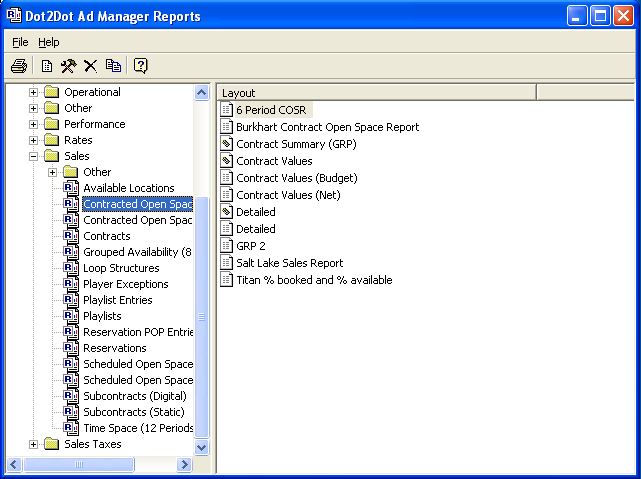
The following screen shows the various Layouts in the Contracted Open Space (12 Periods) category.
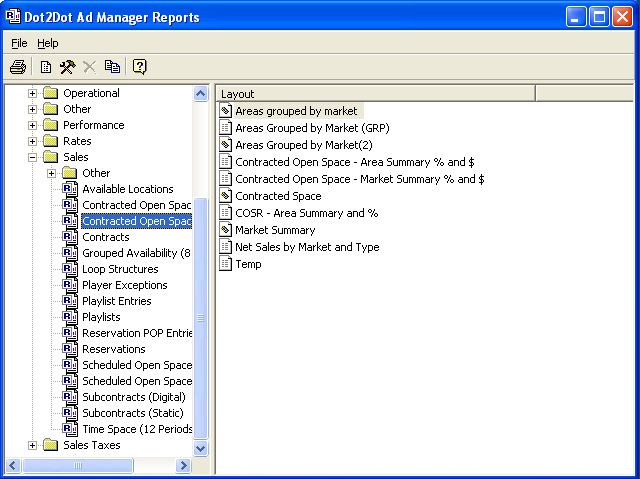
The following screen shows the various layouts in the Contracted Open Space (24 Periods) category.
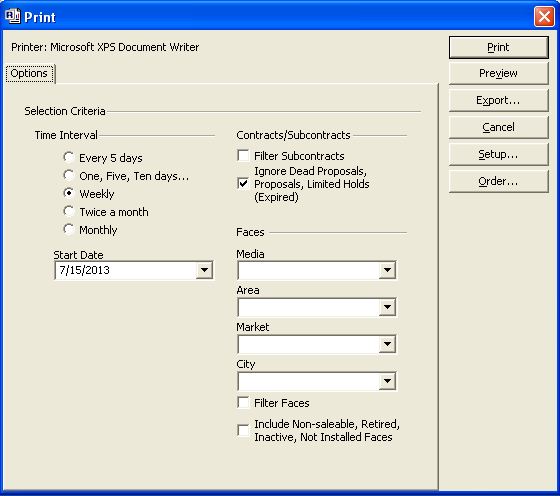
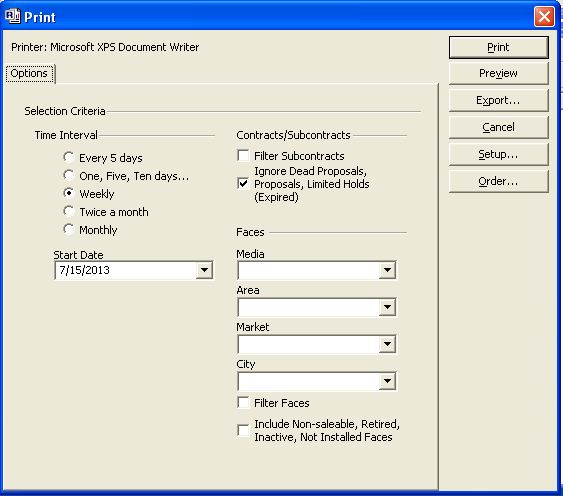
Once you have double-clicked on the Layout you want, the following Print Screen will appear.
To run the Contracted Open Space Report, you must select a time interval and a start date. All other items are optional, however...
Time Interval - Select the time period for reporting, by clicking on the radial dial next to the desired time interval. The selections are Every 5 days, One, Five, Ten days..., Weekly, Twice a month, and Monthly.
Start Date - The Start Date field allows you to identify the beginning of the time frame for which you wish to print the report.
Filter Subcontracts - If you wish to produce a report based on specific Subcontract information, select this check box and choose your filter options.
Ignore Dead Proposals, Proposals, Limited Holds (Expired) - This option allows you to choose whether you wish proposals and expired holds to be included in the numbers produced on the report.
Media - This option allows you to identify the media type on which you wish to run the report.
Area - This option allows you to identify the area on which you wish to run the report.
Market - Identify the market on which you wish to run the report in the Market field.
City - This option allows you to identify the city on which you wish to run the report.
Filter Faces - If you wish to produce a report based on specific face information, select this check box and choose your filter options.
Include Non-saleable, Retired, Inactive, Not Installed Faces - If you wish to see include non-active faces to your report, click the check box next to this option.
To print the report, see Printing Reports.
Areas grouped by market Layout
This layout provides information on the number of faces available in each area of your plant, allowing you to determine your expected occupancy in each area based on default market distributions, customized market distributions and Subcontract information.
Dead Copy Report
The Dead Copy Report is used to identify any Faces where the currently posted copy is no longer supposed to be up because the Contract/Subcontract has expired. This report allows you to identify Faces which are immediately available for posting to another Contract/Subcontract.
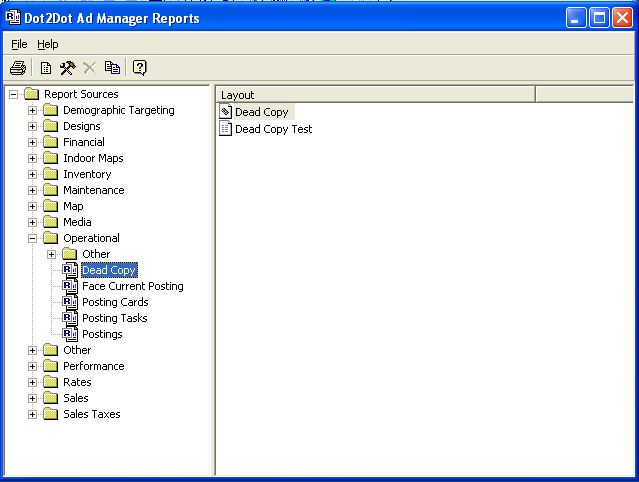
To run the Dead Copy Report, open the Reports window by clicking on the Reports button. Then go to Operational - Dead Copy and double-click on the Dead Copy Layout.
The following Print Screen will then open.
The "As of " Date allows you to identify the date for which you wish to run a Dead Copy Report for (default is today's date).
If you wish to produce a report based on other criteria, select the check box for Selection Criteria. The filter will allow you to identify the parameters that will shorten the listing to only those items you wish to see. Since the filter command only displays items which meet your criteria, the more parameters you identify, the more specific your request and the shorter the list of items reported on.
Once you have determined your filter parameters, click on the OK button.
For additional information on printing the report, see Printing Reports.
Design Activities Report
The Design Activities Report provides a listing of any activity related to Designs arriving or leaving the plants.
To run the Design Activities Report, open the Reports window by clicking on the Reports button. Then go to Designs - Design Activities and double-click on the List Layout.
If you wish to filter the report further, click on the Selection Criteria check box. The filter will allow you to identify the parameters that will shorten the listing to include only those items you wish to see. Since the filter command only displays items which meet your criteria, the more parameters you identify, the more specific your request and the shorter the list of items reported on.
Once you have determined your filter parameters, click on the OK button.
For additional information on printing the report, see Printing Reports.
Export a Report
A report format can be exported as a Report Layout format (*.rpl) in order to send a custom report to another office for use in Ad Manager or to send to Dot2Dot Communications to investigate any anomalies with the report.
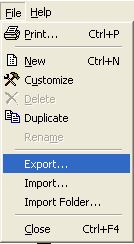
To export a report layout, click on the Reports button. This will open the Reports Window. Once the Reports Window is open, go to the category the report belongs to and highlight the Layout you wish to export in the Layout Window. Next, select File - Export from the Reports menu.
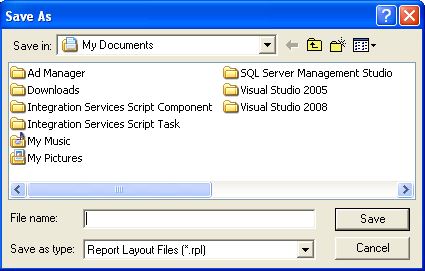
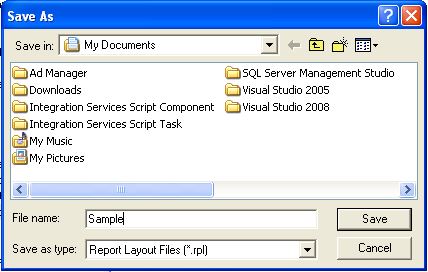
The Save As dialog box will open so that you can select where you wish to save the report.
Once you have selected the folder to which you will export your report, give it a name in the File Name: field and make sure that the Save as Type: is Report Layout Files (*rpl), click the Save button. A copy of the report has been exported and you are free to close the Report Window. You can now e-mail the report.
For instructions on importing reports, click here.
Face Scheduling History
The Face Scheduling History Report allows you to see a history of Advertisers and Designs posted and scheduled on each Face during a specified time period. The report displays these postings with their scheduled posting dates as well as their actual posted and covered dates.
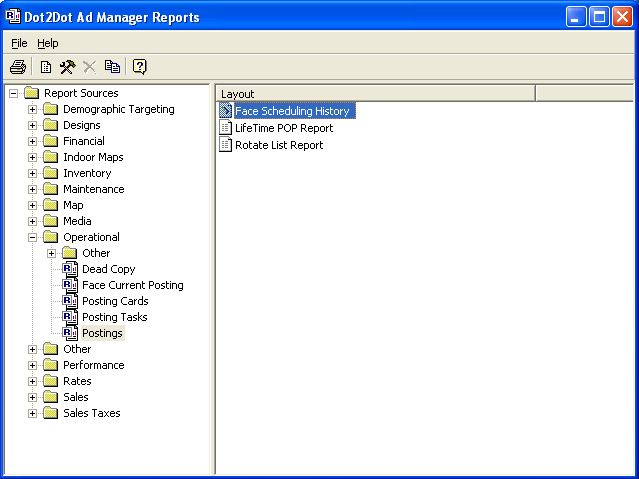
To run the Face Scheduling History Report, open the Reports window by clicking on the Reports button. Then go to Operational - Postings and double-click on the Face Scheduling History Layout.
If you wish to filter your report further, click on the Selection Criteria check box. The filter will allow you to identify the parameters that will shorten the listing to include only those items you wish to see. Since the filter command only displays items which meet your criteria, the more parameters you identify, the more specific your request and the shorter the list of items reported on.
Once you have determined your filter parameters, click on the OK button.
For additional information on printing the report, see Printing Reports.
Grouped Availability Report
The Grouped Availability Report provides you with the ability to determine how many Faces are available for a specified time interval for a specified number of consecutive weeks.
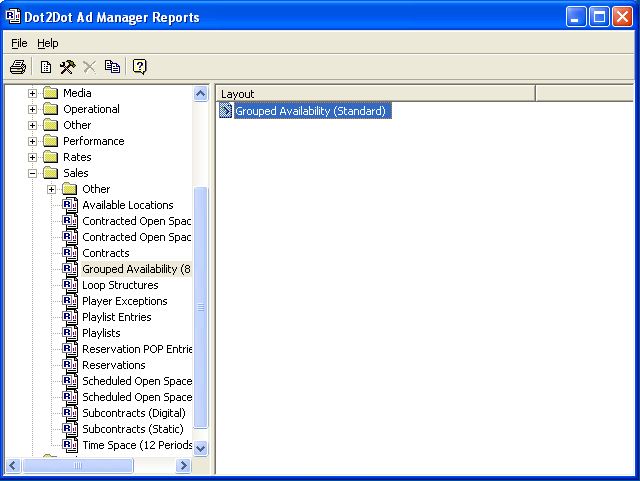
To run the Grouped Availability Report, open the Reports window by clicking on the Reports button. Then go to Sales - Grouped Availability (8 Periods) and double-click on the Grouped Availability (Standard) Layout.
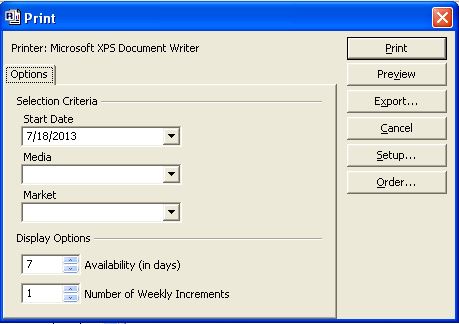
The following Print Screen will then open.
The "Start Date " allows you to identify the start date for which you wish to run a Grouped Availability Report from (default is today's date).
The "Availability (in days)" option allows you to specify the interval you wish to use for finding the information on how many Faces are available and how many are booked. The number entered here acts as a multiple, and data are provided accordingly. For example, if you enter an Availability of 7, information on how many Faces are available is provided for 7, 14, 21, 28, etc. consecutive days.
This report will take some time to generate as it has to check the availability of each Face for each time frame for each week selected. In order to speed up the processing time, the software gives you the option to choose the number of consecutive weeks worth of data you wish to see by entering it in the "Number of Weekly Increments" field. The fewer the number of consecutive weeks reported on, the faster the report will generate.
The "Media" field allows you to identify which media type you wish to run the report for.
The "Market" field allows you to identify which Market you wish to run the report for.
For additional information on printing the report, see Printing Reports.
Import a Report
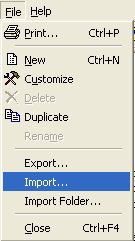
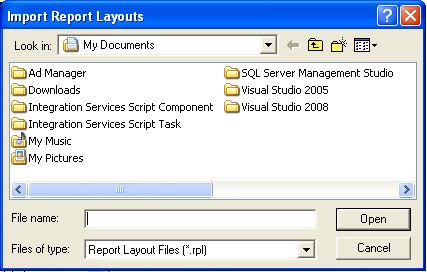
To import a report, click on the Reports button. This will open the Reports Window. The report must have a Report Layout File (*.rpl) in order to import into Ad Manager. Once the Reports Window is open, go to the category the report belongs to so that all its current layouts are visible in the Layout Window. Next, select File - Import from the Reports menu.
The following screen will then appear.
Find and highlight the Report Layout File (*.rpl) you wish to import and click the Open button. At this point you will be prompted to Name the New Report Layout. This is the name you will see in the Layout window. When you have named your new report, click on the OK button. The Report Layout window will then be opened. Just close this window and your new report will be in the Layout window of your Reports.
Please note that these imported or custom reports are displayed with the icon. These Report Layouts can be deleted, and customized without prompting you to create a copy. Therefore, we recommend that you also save the Report Layout File (*.rpl) somewhere outside of Ad Manager as a backup.
If a report does not work after being imported, check to make sure it has been imported into the correct Report Category.
For instructions on exporting a report, click here.
Inventory Status Report
The Inventory Status report allows you to produce a snapshot of what is posted on your inventory on any past or current date.
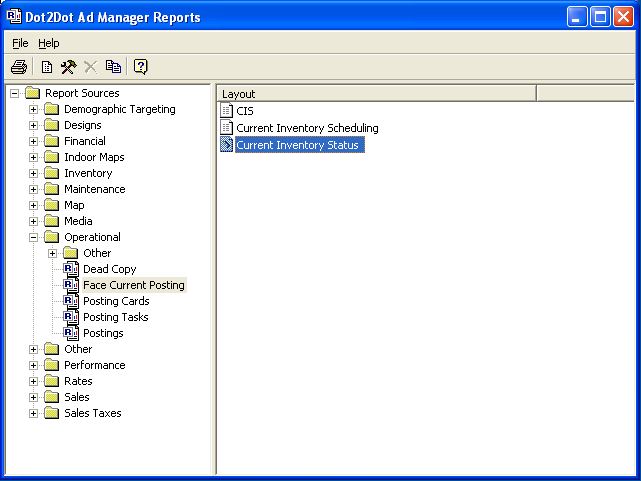
To run the Inventory Status Report, open the Reports window by clicking on the Reports button. Then go to Operational - Face Current Posting and double-click on the Current Inventory Status Layout.
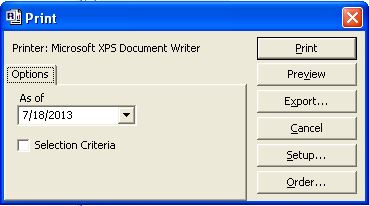
The following Print Screen will then open.
The "As of " Date allows you to identify the beginning of the time frame you wish to print the Inventory Status Report for.
If you wish to produce a report based on other criteria, select the check box for Selection Criteria.
For additional information on printing the report, see Printing Reports.
Lease Information Report
Type topic text here.
Lease Revenue Report
The Lease Revenue Report allows the user to identify how much revenue is being generated by each Face on a Lease during a specified time period.
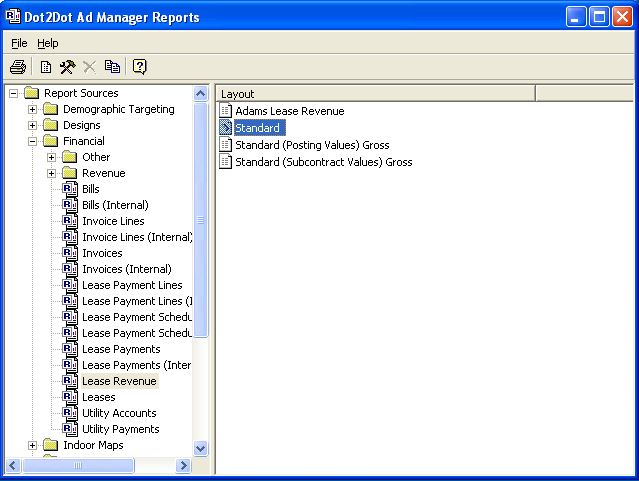
To run the Lease Revenue Report, open the Reports window by clicking on the Reports button. Then go to Financial - Lease Revenue and double-click on the Standard Layout.
The following Print Screen will then open.
For this report to run, you must identify the range of Postings start dates you wish to include in the report. The output will identify all Contracts assigned to each Face during this period, along with the amout it was sold for.
If you wish to filter your report further, click on the Selection Criteria check box. The filter will allow you to identify the parameters that will shorten the listing to include only those items you wish to see. Since the filter command only displays items which meet your criteria, the more parameters you identify, the more specific your request and the shorter the list of items reported on.
Once you have determined your filter parameters, click on the OK button.
For additional information on printing the report, see Printing Reports.
Location List Report
The Location List report is an advance list identifying which faces have been selected for a particular Subcontract and Contract. It provides planned delivery information along with a listing of when faces are due to be posted and covered.
To run the Location List report, open the Reports window by clicking on the Reports button. Then go to Performance - Location List and choose the layout you wish to run.
To print report, see Printing Reports.
Revised Location List (Canadian)
The Revised Location List is used when reporting any changes to the campaign since the original Location List was printed. It contains all the information in the Location List and allows you to highlight (manually) any revisions. It does not automatically identify any changes made since a previous list was printed.
Location List (Circulation Summary)
The Circulation Summary option provides circulation information at the end of the report summarizing the the Circulation this showing (total and average), the Plant Average circulation, and how much over (or under) the average is being delivered on this contract. Note that the plant average circulations shown are not calculated but taken from the information input in the media type database.
Maintenance Outstanding Reports
Type topic text here.
Paper Withdrawal Summary Report
The Paper Withdrawal Summary Report provides the Plant with a list of all the Advertisers, and quantities of Designs required to complete Posting Tasks during a specified time frame. The quantity of copies needed of each creative and the BIN where they are stored is listed next to the Design Name. In order to run this report, you must specify the desired time frame. All creative that is needed to complete Posting Tasks that are due in this time frame will be listed.
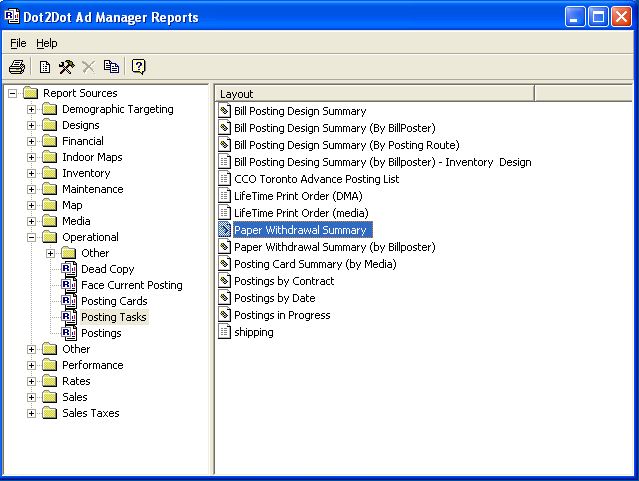
To run the Paper Withdrawal Summary Report, open the Reports window by clicking on the Reports button. Then go to Operational - Posting Tasks and double-click on the Paper Withdrawal Summary Layout.
If you wish to produce a report based on other criteria, click on the Selection Criteria check box. The filter allows the user to identify the parameters that will shorten the listing to only those Designs on Posting Tasks you wish to see. Since the filter command only displays Designs for Posting Tasks which meet your criteria, the more parameters you identify, the more specific your request and the shorter the list of Designs reported on.
You can choose to see all Designs, or only those involving a Posting, Re-post or those involving a Take Down/Cover. You can also specify the Date(s) you want to print your list for. The report will only list the Designs for those Posting Tasks where the Due Date is within the date range specified. If no date range is entered under Due Date, every Design for every Posting Task in Ad Manager will be printed (subject to your other criteria).
You can also choose to filter which Designs to include by selecting the desired items. For example, you may only wish to produce a list of Designs for Posting Tasks assigned to a certain Bill Poster, or select Posting Tasks where the Design is to originate from a particular source plant.
Once you have set all your desired criteria, click OK.
For more information on printing the report, see Printing Reports.
Posting Card Summary Report
The Posting Card Summary Report provides information on the number of Posting Tasks that have been completed during a specified time frame and the number of posting cards printed for that time frame. This report shows the number of Posting Tasks by Subcontract, Market, grouped by Media Type.
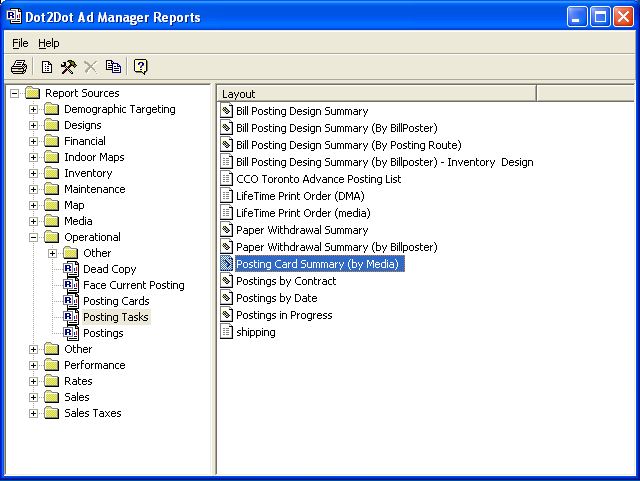
To run the Posting Card Summary Report, open the Reports window by clicking on the Reports button. Then go to Operational - Posting Tasks and double-click on the Posting Card Summary (by Media) Layout.
If you wish to produce a report based on other criteria, click on the Selection Criteria check box. The filter allows the user to identify the parameters that will shorten the listing to only those Posting Tasks you wish to see. Since the filter command only displays Posting Tasks which meet your criteria, the more parameters you identify, the more specific your request and the shorter the list of Posting Tasks reported on.
The Due Date is required to be identified in order to generate a Posting Card Summary Report. In this field you can select the desired start date of the report; all Faces which were to be posted on or before this date will be listed. You can also select a range of dates here by selecting the "between" option. This will allow you to display all Postings occurring during the Due Date range selected.
Once you have determined your filter parameters, click on the OK button.
For more information on printing the report, see Printing Reports.
Postings by Contract
The Postings by Contract report provides a listing of posting dates and information for each face on a Contract for a specified date range.
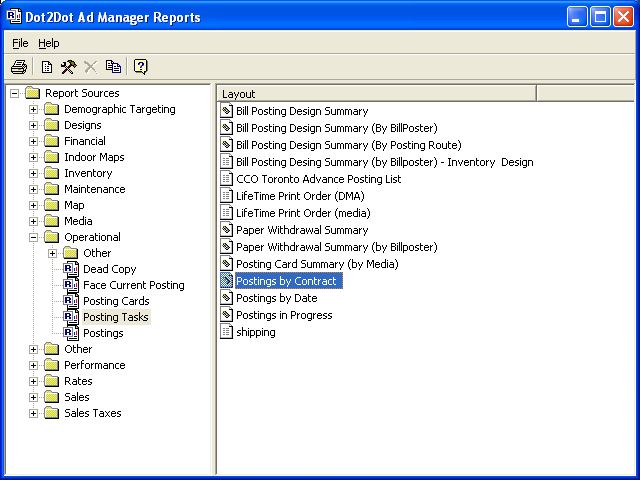
To run the Postings by Contract Report, open the Reports window by clicking on the Reports button. Then go to Operational - Posting Tasks and double-click on the Postings by Contract Layout.
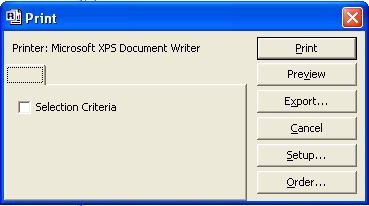
The following Print Screen will open:
If you wish to produce a report based on other criteria, click on the Selection Criteria check box. The filter allows the user to identify the parameters which will shorten the listing to only those contracts which you wish to see. Since the filter command only displays contracts which meet your criteria, the more parameters you identify, the more specific your request and the shorter the list of contracts reported on.
If you are searching for a particular contract, then identifying the contract number will quickly achieve that objective. Go to the Contract Tab and select "=" in the Number field, then enter the location number in the field next to it. However, the only contract that will be displayed in your report will be that one. If you require a listing of a particular advertiser, go to the Contract Tab and select the advertiser from the pulldown menu of the advertiser field. There are many, many fields you can select for your filter. If you wish to filter on a specific field, then specify what you want to review in that field. If you leave a field blank, then the search will not be dependant on that field.
For more information on printing the report, see Printing Reports.
Postings by Date
The Postings by Date report allows you to produce a listing of all the Posting Tasks that occurred/will occur on each date during a specified time frame. In order to run this report, you must specify the desired time frame. All Posting Tasks that have been completed in this time frame will be listed.
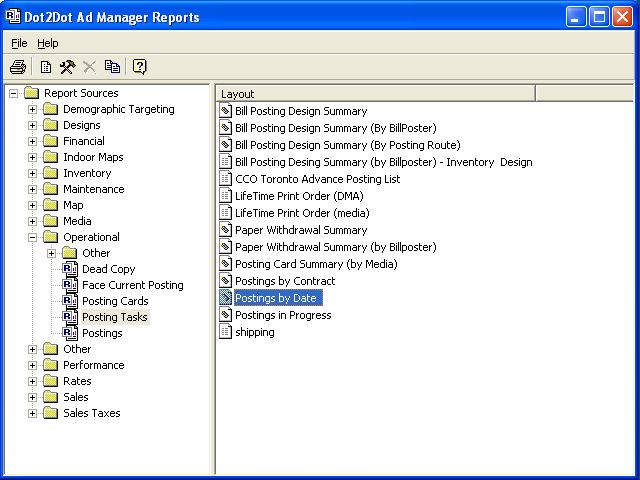
To run the Postings by Date Report, open the Reports window by clicking on the Reports button. Then go to Operational - Posting Tasks and double-click on the Postings by Date Layout.
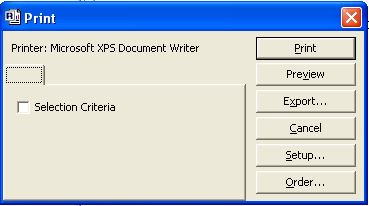
The following Print Screen will open:
If you wish to produce a report based on other criteria, click on the Selection Criteria check box. The filter allows the user to identify the parameters which will shorten the listing to only those Posting Tasks which you wish to see. Since the filter command only displays posting tasks which meet your criteria, the more parameters you identify, the more specific your request and the shorter the list of posting tasks reported on.
If you are searching for a particular contract, then identifying the contract number will quickly achieve that objective. Go to the Contract Tab and select "=" in the Number field, then enter the location number in the field next to it. However, the only Contract that will be displayed in your report will be that one. If you require a listing of a particular advertiser, go to the Contract Tab and select the advertiser from the pulldown menu of the advertiser field. There are many, many fields you can select for your filter. If you wish to filter on a specific field, then specify what you want to review in that field. If you leave a field blank, then the search will not be dependant on that field.
For more information on printing the report, see Printing Reports.
Posting in Progress Report
The Postings In Progress Report identifies Faces which were supposed to be posted by the specified date but completed on dates have not been keyed into Ad Manager yet. The listing identifies the Face, Contract, Due Date and Advertiser and is grouped by Media Type.
To run the Postings In Progress Report, open the Reports window by clicking on the Reports button. Then go to Operational - Posting Tasks and double-click on the Postings In Progress Layout.
If you wish to produce a report based on other criteria, click on the Selection Criteria check box. The filter allows the user to identify the parameters that will shorten the listing to only those Posting Tasks you wish to see. Since the filter command only displays Posting Tasks which meet your criteria, the more parameters you identify, the more specific your request and the shorter the list of Posting Tasks reported on.
The Due Date is required to be identified in order to generate a Postings In Progress Report. In this field you can select the desired start date of the report; all Faces which were to be posted on or before this date will be listed. You can also select a range of dates here by selecting the "between" option. This will allow you to display all Faces that were to be posted but were not during the Due Date range selected.
If you are searching for a Face in one Contract in particular, then identifying the Face Number and Media Type will quickly achieve that objective. However, the only Face which you will be able to see will be that one. If you require a listing of a particular area or route, a more general filter request may be more appropriate. There are several different fields which you can select for your filter parameters. If you wish to filter by a specific field, then specify what you want to review in that field. If you leave a field blank, then the filter will not be dependent on that field.
Some fields may already have information selected in them. Should you wish to change any of these inputs you can do so by inputting new information into these fields.
Once you have determined your filter parameters, click on the OK button.
For more information on printing the report, see Printing Reports.
Printing Reports
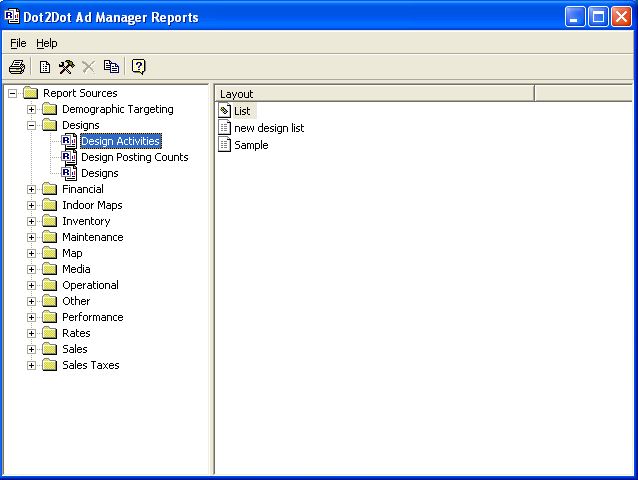
To use reports, click on the Reports button. This will open the Reports Window. From here, reports can be selected, customized, run, printed and exported.
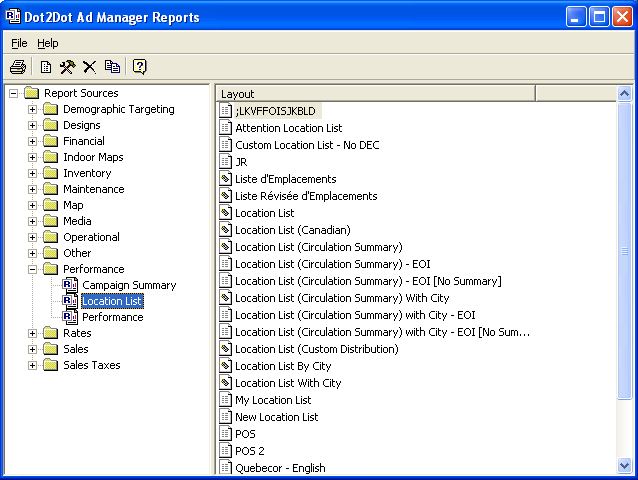
The Ad Manager Reports window is divided into two sections, the left side is the Folder List, and the right side is the Layout.
All reports fall into one of the categories listed in the Folder List. You can select the category (Inventory, Operational, Performance, Sales, etc.) of reports you wish to print from the Folder List. Click on any category and the List window will show all reports available for that category. For example, the above window shows all available reports for the category Performance.
For additional information on the buttons that appear at the top of the window, click here.
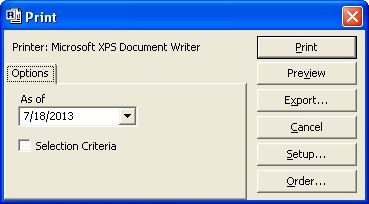
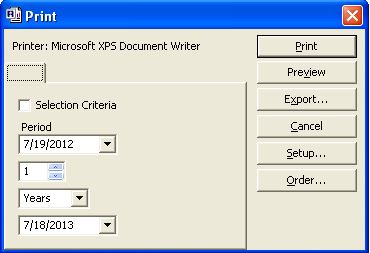
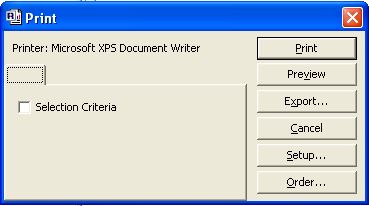
To run a particular report, double-click on the name of the report in the Layout Window. The following Print dialog box will now appear:
From this screen, you must set up your report and then print it or export it for use in another piece of software (such as Word or Excel). Note that depending upon which report you select the window could contain different fields and selection criteria. Click on the Selection Criteria check box to be shown the appropriate filtering options for the report you have selected.
The filter allows the user to identify the parameters which will shorten the listing to only those listings which you wish to see. Since the filter command only displays information which meets your criteria, the more parameters you identify, the more specific your request and the shorter the list of items reported on.
If you are searching for a particular contract, then identifying the contract number will quickly achieve that objective. Go to the Contract Tab and select "=" in the Number field, then enter the location number in the field next to it. However, the only contract that will be displayed in your report will be that one. If you require a listing of a particular advertiser, go to the Contract Tab and select the advertiser from the pulldown menu of the advertiser field. There are many, many fields you can select for your filter. If you wish to filter on a specific field, then specify what you want to review in that field. If you leave a field blank, then the search will not be dependant on that field.
Once you have determined your search parameters, select OK. By clicking on the OK button, all Faces, Designs, Subcontracts, Contracts, and Posting Tasks in your database will be compared to your search guidelines. If when the report is printed or previewed there is no information displayed, then your search parameters were too specific, and none of the information in your database matched these criteria. You will need to go back to Selection Criteria and change your filter criteria to be less specific, or click on the Clear button to clear the filter criteria all together.
If you wish to reduce the amount of information listed on your report because you were not specific enough, select Selection Criteria again. At this point, specify additional criteria which will reduce the list further.
Common Features of All Report Print Windows
Click on the Selection Criteria option (as shown above) if you wish to filter for specific data on your report. The filter works exactly the same way as all other filters in Ad Manager. The Filter screen offers you a multitude of selections to help streamline the data displayed on your report. Once you have specified the criteria for your filter, hit the OK button. The Selection Criteria check box should now have a checkmark in it, indicating that you have set up a filter.
Ordering Your Report
See Sorting in Reports.
Previewing Your Report
If you wish to view the report on your screen before printing it, click on the Preview button. The report may take a few minutes to generate. Please be patient. Once you have finished viewing your report, click on the Print button to send it to your printer. If you decide that you need to change your selection criteria or order, close the preview of your report to return to the Print Window.
Note, Ad Manager's Reports can work behind the scene's as you can work on other Ad Manager functions while waiting for the preview screen to open.
Printing Your Report
The Print button allows you to print your report to a printer.
Note that there are some custom reports built for specific countries' or companies' unique needs or languages. Be careful in your selection as the formulae for certain calculations may differ from Standard reports provided.
Exporting Your Report To Another Application Format
If you wish to export this report for use in another software, click on the Export button. A Save As window will open. Here you must select the place you wish to save the file. Choose the name for the file and type it in the File Name field as shown below:
Once you have selected a file type, given it a name and identified a place to save it, click on the Save button. To open the report in a Word type software save as a text file (*.txt). To open in a spreadsheet software like Excel, save as a Microsoft Excel File (*.xls) type. To create an Adobe file for easy e-mailing to clients and staff, save as an Adobe PDF File (*.pdf) type.
Printer Setup
The Setup button brings up the Print Setup screen. From here, you may select your printer options.
Canceling Your Report Selection
The Cancel button allows you to close the Print window.
Report Types
Design Reports
Reports in this section are related to design management. Key reports in this section are the:
Design List
Financial Reports
Reports in this section deal with Billing and Leasing information. A key report in this section is the:
Inventory Reports
These reports range from simple printed lists of each database in the system as well as more detailed reports in the major databases such as Sites and Faces. Key reports in this section are:
Faces - Standard Photo Sheet
Faces - List
Map Reports
As the name implies, this area contains the mapping reports that can be exported as a PDF file for e-mailing to clients or printing on your color printer.
Operational Reports
Operational reports are primarily posting related. Key reports in this section are:
Posting Instructions
Posting Tasks reports
Performance Reports
These reports are designed to provide information on delivery of subcontracts. Key reports in this section are:
Sales Reports
Reports in this section are designed to provide summary information you may need for day-to-day operations and planning. Key reports in this section are the:
Subcontracts - Scheduling Summary (both overview and detailed version)
Proof of Performance Report
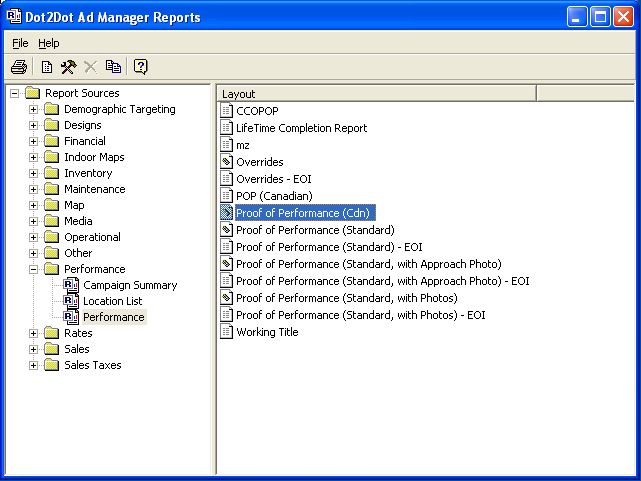
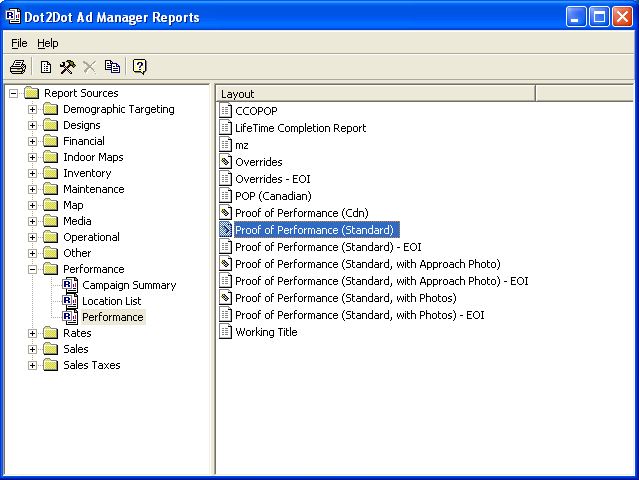
There are 2 main layouts for performance reports, Proof of Performance (Cdn) and Proof of Performance (Standard).
Proof of Performance (Cdn)
This is the Canadian version of the Performance report. It is a COMB (Canadian Outdoor Measurement Bureau) approved report that is to be used by Canadian plant operators for proof of performance reporting purposes.
To run this report, go to the Reports window, go to Performance - Performance and double-click on the Proof of Performance (Cdn) report in the Layout window.
For instructions on Printing the report, see Printing Reports.
On the report, the information in the bottom half of the screen displays the Posted and Covered information instead of the Start and End information on the Location List.
The report is used to provide information on what has been delivered for this contract as of a certain date. The information in the Market Summary box contains calculations as of the date of the report. Locations that have not yet been covered in the software are displayed without a cover date.
Proof of Performance (Standard)
To run this report, go to the Reports window, go to Performance - Performance and double-click on the Proof of Performance (Standard) report in the Layout window.
For instructions on Printing the report, see Printing Reports.
On the report, the information in the bottom half of the screen displays the Posted and Covered information instead of the Start and End information on the Location List.
The report is used to provide information on what has been delivered for this contract as of a certain date. The information in the Market Summary box contains calculations as of the date of the report. Locations that have not yet been covered in the software are displayed without a cover date.
Overrides
This report shows the number of days over or over and under delivery for each face on a Contract.
Repairs Completion Summary
Type topic text here.
Revenue and Cost Report
Type topic text here.
Running Daily Routing Reports
Type topic text here.
Scheduled Open Space
This report provides information on what space has been CHARTED not allocated based on sales information.
For availability based on Contract information, see Contracted Open Space Reports.
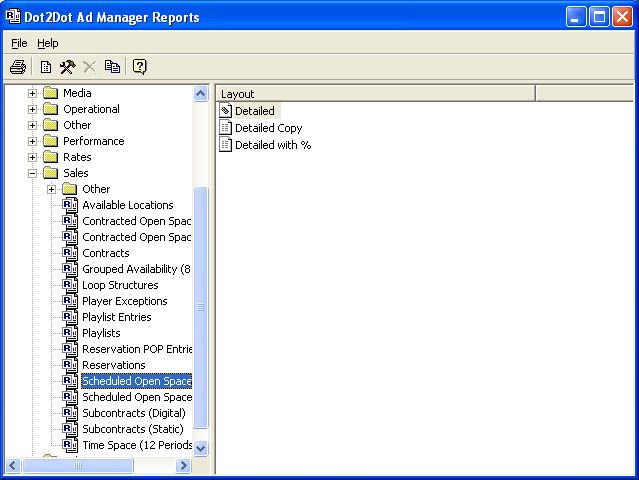
The Scheduled Open Space Report provides information on how many faces have been scheduled and how many are available in each of your markets over future time frames.
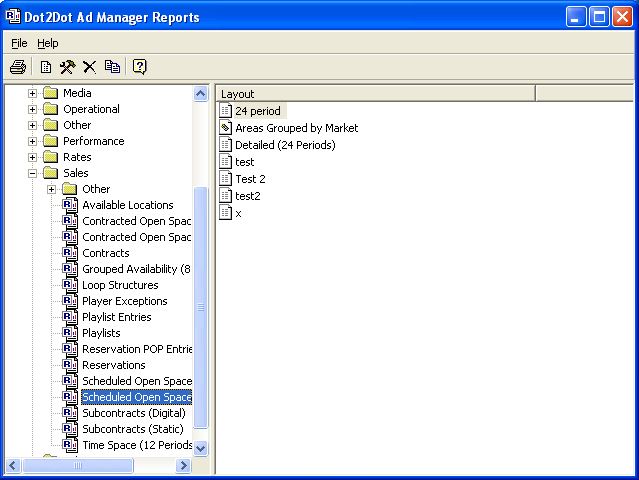
To run the Scheduled Open Space Reports, open the Reports window by clicking on the Reports button. Then go to Sales and choose either Scheduled Open Space (12 Periods) or Scheduled Open Space (24 Periods).
The following screen shows the various Layouts in the Scheduled Open Space (12 Periods) category.
The following screen shows the various Layouts in the Scheduled Open Space (24 Periods) category.
Once you have double-clicked on the Layout you want, the following Print Screen will appear.
To run the Scheduled Open Space Report, you must select a time interval and a start date. All other items are optional, however...
Time Interval - Select the time period for reporting, by clicking on the button next to the desired time interval. The selections are Every 5 days, One, Five, Ten days..., Weekly, Twice a month, and Monthly.
Start Date - The Start Date field allows you to identify the beginning of the time frame for which you wish to print the report.
Filter Subcontracts - If you wish to produce a report based on specific Subcontract information, select this check box and choose your filter options.
Ignore Dead Proposals, Proposals, Limited Holds (Expired) - This option allows you to choose whether you wish proposals and expired holds to be included in the numbers produced on the report.
Media - This option allows you to identify the media type on which you wish to run the report.
Area - This option allows you to identify the area on which you wish to run the report.
Market - Identify the market on which you wish to run the report in the Market field.
City - This option allows you to identify the city on which you wish to run the report.
Filter Faces - If you wish to produce a report based on specific face information, select this check box and choose your filter options.
Include Non-saleable, Retired, Inactive, Not Installed Faces - If you wish to see include non-active faces to your report, click the check box next to this option.
To print report, see Printing Reports.
Areas grouped by market Layout
This Layout provides information on the number of faces available in each area of your plant, allowing you to determine your expected occupancy in each area based on charting information.
Scheduling Summary Report
The Scheduling Summary Report provides information on the current status of your Subcontracts, what has been scheduled and what needs to be scheduled. From here you can determine the status of upcoming Subcontracts.
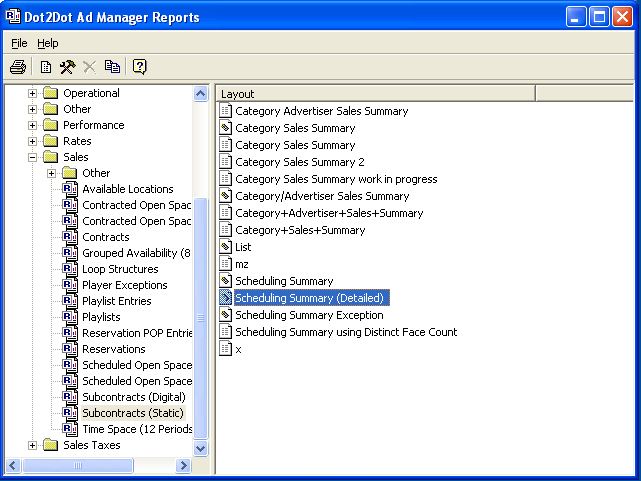
To run the Scheduling Summary report, open the Reports window by clicking on the Reports button. Then go to Sales - Subcontracts and choose the Scheduling Summary Layout or the Scheduling Summary (Detailed) Layout.
For instructions on Printing the report, see Printing Reports.
Scheduling Summary (Detailed)
If you wish to produce a Scheduling Summary that identifies all faces scheduled to Contracts, in addition to the Subcontract status, select the Scheduling Summary (Detailed) Layout. This will provide a listing of every face scheduled for each contract along with its scheduled design.
Sorting in Reports
Sorting in Reports
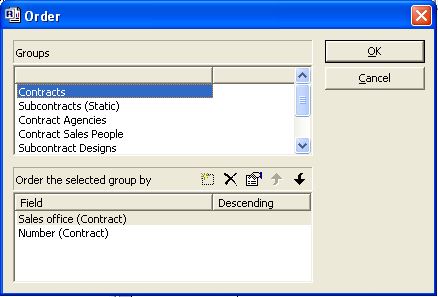
To display the data on your report in a specific order, click on the Order button on the Print Screen of your report. Each report is divided into groups of data. Each of these groups can be ordered. The example below shows the Order Screen of a Location List Report.
To sort a specific group of items in the report, highlight the group name (for example, Subcontract Posting Schedules) in the Groups Box. The current order for this group in the report is displayed in the "Order the selected group by" box. On this Location List Report example, if there is more than one Posting Schedule to the Subcontract, the Posting Schedule will be ordered first by Area then by Site at, then by the Start Date, then by the End Date.
In the above example, to change the order the Posting Schedules are displayed for each Subcontract, go to the "Order the selected group by" box and click the button to add a column to sort by, or highlight the field you do not want to sort by and click on the
button. If you want to move the fields around, highlight the one you want in a different order and use the arrow keys to move it up
or down
the list of sorting criteria.
If you want any fields ordered in descending order, highlight the field and double-click it under the Descending column. A "Yes" will be displayed in the Descending column if you have chosen to order that field in descending order. To change a descending order to ascending, double-click the field in the Descending column so that the "Yes" is no longer there.
When you are done ordering your report, click on the OK button.
Time Space Report
The Time Space Report provides a graph on a face-by-face basis of what has been scheduled and posted. This can provide an easy reference to determine what the availability of faces will be in the future.
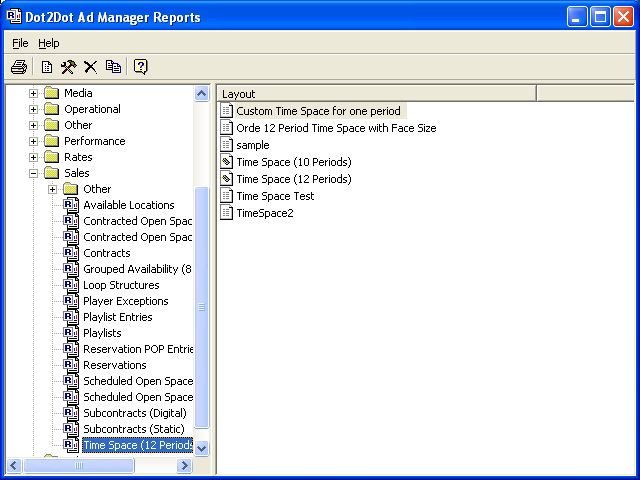
To run the Time Space Reports, open the Reports window by clicking on the Reports button. Then go to Sales and choose Time Space (12 Periods).
The following screen shows the various Layouts in the Time Space (12 Periods) category.
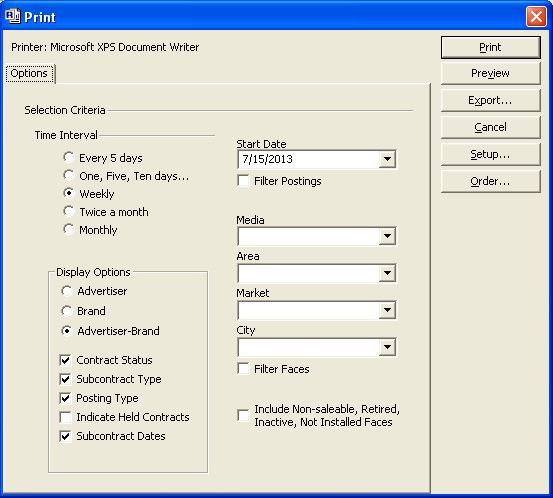
Once you have double-clicked on the Layout you want, the following Print Screen will appear.
To run the Time Space Report, you must select a time interval, a start date and display options, all other criteria is optional. However...
Time Interval - Select the time period for reporting, by clicking on the radial dial next to the desired time interval. The selections are Every 5 days, One, Five, Ten days..., Weekly, Twice a month, and Monthly.
Start Date - The Start Date field allows you to identify the beginning of the time frame for which you wish to print the report.
Filter Postings - If you wish to produce a report based on specific posting information, select this check box and choose your filter options.
Media - This option allows you to identify the media type on which you wish to run the report.
Area - This option allows you to identify the area on which you wish to run the report.
Market - Identify the market on which you wish to run the report in the Market field.
City - This option allows you to identify the city on which you wish to run the report.
Filter Faces - If you wish to produce a report based on specific face information, select this check box and choose your filter options.
Include Non-saleable, Retired, Inactive, Not Installed Faces - If you wish to see include non-active faces to your report, click the check box next to this option.
Display Options - This option gives you the ability to choose what information from the scheduling you wish to display on the report.
To print the report, see Printing Reports.
Verify Lease Data Report
Type topic text here.
