Permits
The Permit database tracks all Permits issued for every site in your inventory. Information on when each Permit was requested, approved, expires and when the reapplication process should begin is all stored for quick and easy access.
Contents |
Adding a New Permit
To add a new Permit, click on the arrow beside the New icon () for a list of items you can add. Select OTHER, and then select Site Permit. The Permit Details Window will appear, and a new Permit can be entered.
Modifying a Permit
To modify a Permit, simply click the database from the OTHER folder, then double click the desired item and make the change(s) necessary. Once you have finished, click the Save () button.
Deleting a Permit
To delete a Permit, simply click the database from the OTHER folder, then highlight the item you wish to delete. Click the Delete icon (). Ad Manager will not allow you to delete a Permit if it is already in use.
Attachments
For more information on the Attachments page, click here
Details
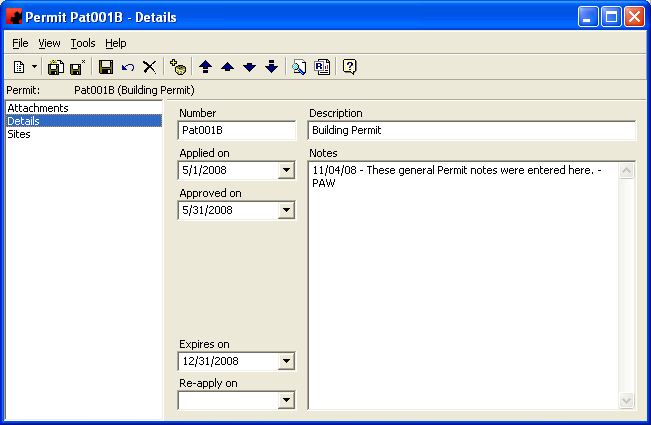
The Details Page is where information about the Permit is displayed. What the Permit is for, when it was applied, approved and when it expires is some of the information displayed on this page.
For information on the buttons that appear at the top of the window, click here. For information on the menu items that appear under the Tools menu, click here.
Fill in the appropriate information for each field. Select the appropriate item from any of the drop down lists (in the boxes) or type in the information if it is not present.
Fields
Applied on: The date when the Permit takes effect.
Approved on: The date when the Permit was approved.
Description: This is a quick description of what this Permit pertains to. This description allows the users to be able to recognize the Permit among a long list of Permits.
Expires on: The date when the Permit will expire.
Notes: You can enter any notes regarding the Permit here.
Number: This is the unique number issued to the Permit.
Re-apply on: This is an arbitrary date, chosen to flag your Leasing department that its time to go out and re-apply for the Permit.
Sites
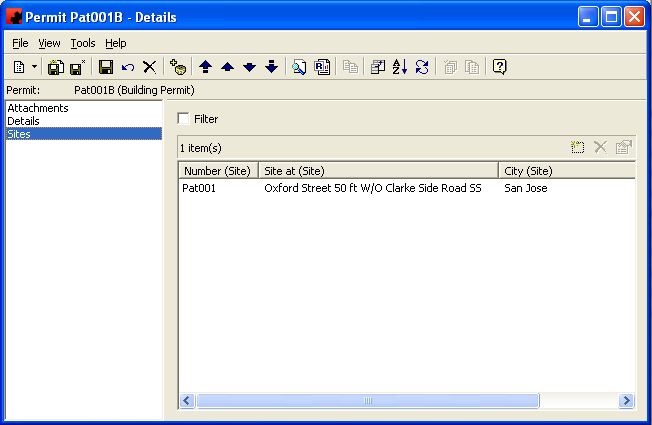
The Sites Page lists all Sites that have been attached to the Permit.
Tool buttons specific to the Sites Page:
- Customize Current View allows you to select the columns to display and the order to display them in.
- Order allows you to sort the list of Sites on the Permit in the desired order.
- The Refresh button will reload the list of Sites, in the event changes to the number of Sites has occurred since you visited this page.
- The Update button allows you to highlight multiple Sites and apply the same properties to them.
- The Duplicate button allows you highlight a Site from the list and create a new Site with the same Face configuration as the highlighted one.
The pane in the window shows a listing of all Sites that are assigned to this Permit. The functions available through the buttons immediately above the pane are:
- Add a new Site to the Permit.
- Delete the highlighted Site from the Permit.
- Edit the information for the highlighted Site.
In addition, while you are in the pane, you can double click on a Site to see details about the Site. You can also right click in the pane and select "New", "Customize Current View" , "Order" or "Refresh" (see above).
For additional information on buttons that appear at the top of the window, click here. For information on the menu items that appear under the Tools menu, click here.
The Filter check box allows you to filter the listing of Sites to show only those that meet a certain criteria. When selected, a filter screen will appear, allowing you to choose to see Sites in a certain city, state, zip code, on a certain street, etc. When a filter is active, a check mark will appear in the filter box. To clear the filter and see all records, click on Filter, then the Clear button on the Filter screen, followed by the OK button.
Right Click
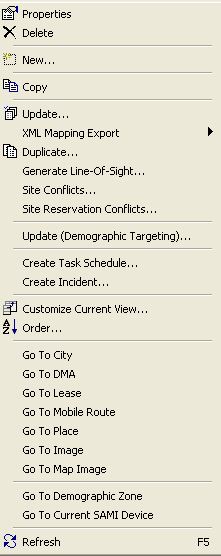
- Right clicking on the list of Sites will display this menu. From here you can create a new Site and add it to the Permit, duplicate a Site, Generate Line-of-Site conflicts between Sites, or Update a property (or properties) for one or more highlighted Site(s).
To change the information being viewed in the list, simply right click in the list, and choose Customize Current View. To change the sort order, simply right click in the list, and choose Order.
Duplicate - The Duplicate menu item allows you to create a new Site with the same Face configuration as the current Site.
Generate Line-Of-Sight - the Generate Line-Of-Sight menu item allows you to create line of sight conflicts between Faces on a Site, based on their direction facing or virtual Face configuration.
Go To - The Go To feature allows you to open a window for the appropriate item for the highlighted record.
Site Conflicts - The Site Conflicts menu item allows you to view all conflicts that exist on any Face for this Site. You can specify what conditions are considered to be a Conflict prior to clicking OK. The subsequent list is all scheduling that has generated a conflict.
Update - The Update menu item allows you to to modify a property (or properties) for one or more highlighted Sites.


