Incidents
Contents |
Attachments
For more information on the Attachments page, click here
Details
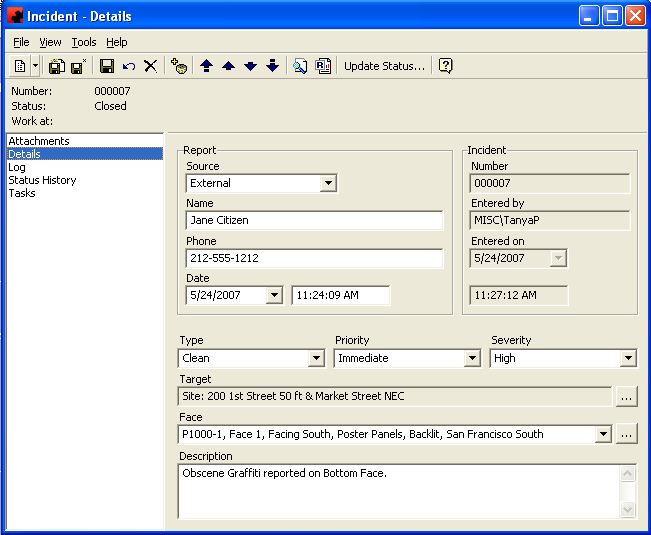
The Details Page is where information about the Incident is displayed. An Incident can be classified as something that has happened to a Site, Face or a Structure, and needs to be addressed. An Incident require a Task or multiple Tasks to resolve the issue. Information on what type of Incident it is, as well as, who reported it, when it was reported is kept on this page.
For information on the buttons that appear at the top of the window, click here. For information on the menu items that appear under the Tools menu, click here.
Fill in the appropriate information for each field. Select the appropriate item from any of the drop down lists (in the boxes) or type in the information if it is not present.
Fields
Description: This is a detailed description of what was reported to have happened, as well as any other pertinent details the Maintenance crew will need to know.
Face: If a Site is selected as the Target of the Incident, this field becomes active and you are given the option to then target a specific Face on the Site. To select a Face to target, click on the ellipsis () button next to the Face field. This action will then bring up a filter screen so you may specify which Face you are targetting.
Incident: This information will be automatically generated when the Incident is saved.
Entered by: This is the User ID of the person who entered the Incident into Ad Manager.
Entered On: This is the date/time the Incident was entered into Ad Manager.
Number: This is a sequential number that is assigned to the Incident, according to the Incident Numbering options.
Priority: This allows you to mark the Incident as needing either Immediate, Low or Normal priority for resolving it. The Priority status assigned to the Incident will assist in determining if someone needs to be sent right away to fix the problem or if it can be addressed during routine maintenance.
Report: This section contains the details as to how the Incident was reported.
Date & Time: This is the Date and Time the Incident was reported. The fields will automatically populate with the system date and time the Incident is being created and saved. If it is not "today's date and time", enter the correct information.
Name: This is the Name of the person who reported the Incident.
Phone: This is the telephone number of the person who reported the Incident.
Source: This is how the Incident was reported. This can be internal (a staff member for example) or external (someone who calls in to report an issue).
Severity: This allows you to classify the Incident as having High, Low or Normal severity. The more severe Incidents will need to be looked as right away.
Target: This is the Site or Structure the Incident focuses on. To select the target, click on the ellipsis () button and select either Site or Structure from the menu items. This action will then bring up a filter screen so you may specify which Site or which Structure you are targetting. By selecting a target, the Incident is then linked to that Site/Face or Structure, so choose the target option that best suits the Incident and where the attention should be focused.
Type: This list allows you to identify what kind of Incident event you are dealing with. Examples of Incident Types are damage, maintenance, electrical, etc.
Log
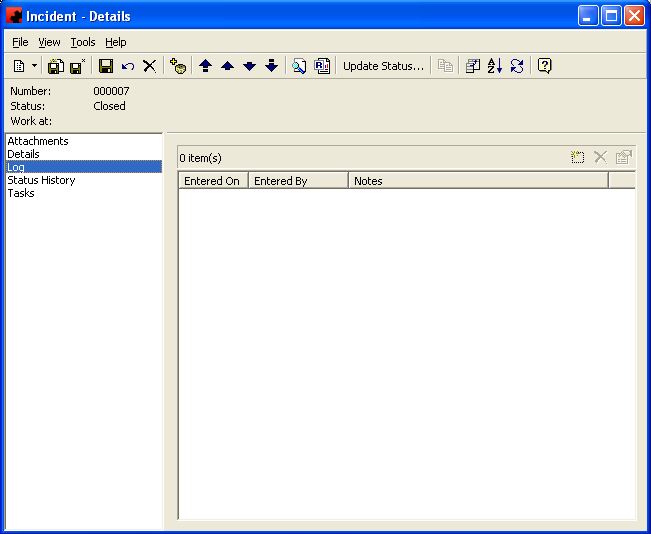
The Log Page allows you to enter detailed notes pertaining to this specific Incident. It will display the date the note was entered as well as who wrote it. Any note entered on this page cannot be edited or deleted. It is a permanent record and its integrity must be maintained.
The pane in the window shows a listing of all Notes for this Incident. The functions available through the buttons immediately above the pane are:
- Add a new Note to the Incident.
For additional information on buttons that appear at the top of the window, click here. For information on the menu items that appear under the Tools menu, click here.
Status
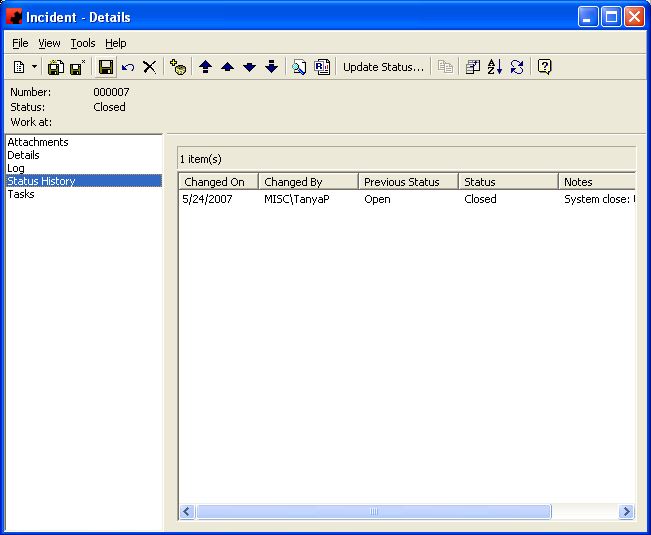
The Status Page displays the current Status of the Incident along with a history of any changes to its Status.
For information on the buttons that appear at the top of the window, click here. For information on the menu items that appear under the Tools menu, click here.
Fill in the appropriate information for each field. Select the appropriate item from any of the drop down lists (in the boxes) or type in the information if it is not present.
Fields
History: This is a historical listing of all changes to the Status of this Incident.
Notes: This field contains all notes pertaining to the Status changes of the Incident.
Status: This allows you to set where the Incident is in terms of completion. There are four options to choose from when setting the Status of an Incident.
Closed: This status should be selected once the Incident has been addressed and all Tasks have been set as Completed.
Ignored: This status should be selected if the Maintenance technician decided that nothing needed to be done. However, a note must be entered along with the "Ignored" status in order for the record to be saved.
Open: This is the default status of a new Incident and should remain as such until the Maintenance technician visits the target and addresses it.
Suspended: This status should be selected if the work necessary to resolved the Incident is suspended due to some circumstance. A note must accompany this Status in order for it to be saved.
Tasks
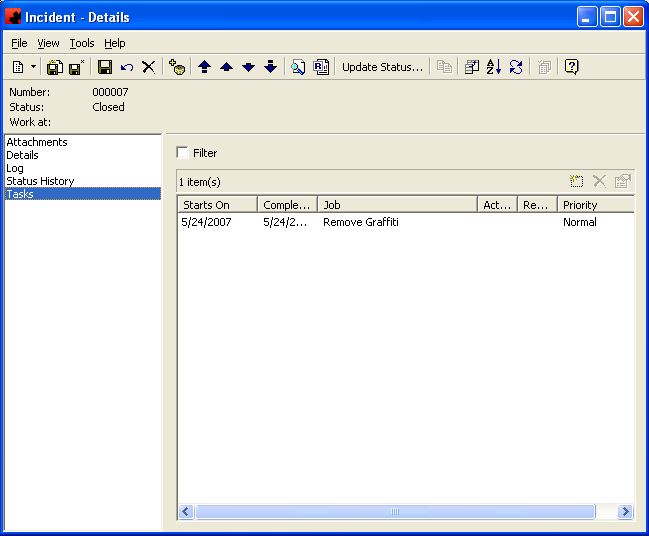
On the Tasks Page you will assign all Tasks required to complete and resolve the Incident.
Tool buttons specific to the Tasks Page:
- Customize Current View allows you to select the columns to display and the order to display them in.
- Order allows you to sort the list of Tasks for the Incident in the desired order.
- The Refresh button will reload the list of Tasks, in the event changes to the number of Tasks has occurred since you visited this page.
- The Update button allows you to select one or more Tasks and change information on them. All highlighted Tasks will be changed to reflect the items selected.
The pane in the window shows a listing of all Tasks for this Incident. The functions available through the buttons immediately above the pane are:
- Add a new Task to the Incident.
- Delete the highlighted Task(s) from the Incident.
- Edit the information for the highlighted Task(s).
Right Click
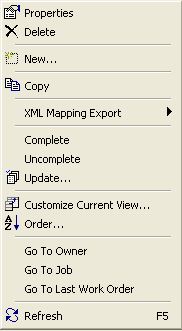
- Right clicking on the list of Tasks will display this menu. From here you can change the start date of the Task as well as change the technician to perform the Task using the Update option, complete, and uncomplete the Task.
To change the information being viewed in the list, simply right click in the list, and choose Customize Current View. To change the sort order, simply right click in the list, and choose Order.
Complete - If a Task has not been assigned to a Work Order, or the Work Order has not been issued, you can manually record that the Task has been completed in those cases when the work has already been done using this tool option and entering the date of completion.
Uncomplete - This allows you to re-open a Task, that has been previously marked as Complete.
Update - The Update menu item allows you to to modify a property (or properties) for one or more highlighted Task(s).
Go To - The Go To feature allows you to open a window for the appropriate item for the highlighted record.
For additional information on buttons that appear at the top of the window, click here. For information on the menu items that appear under the Tools menu, click here.
The Filter check box allows you to filter the listing of Tasks to show only those that meet a certain criteria. When selected, a filter screen will appear, allowing you to choose to see Tasks starting on a certain date, for a certain job, for a certain technician, on a specific workorder, etc. When a filter is active, a check mark will appear in the filter box. To clear the filter and see all records, click on Filter, then the Clear button on the Filter screen, followed by the OK button.
