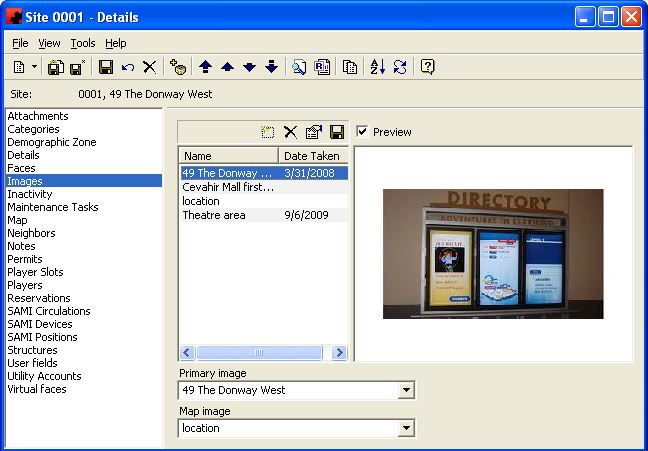
Images page
The Images Page is where photo, video and Surround View images can be stored for the Object. Adding Images creates a multimedia library showing such things as different creative, different distances, maps, floor plans, technical and legal drawings.
The left pane of the window lists all the multimedia items that have been stored for the Object. The right pane of the window is where the selected Image can be viewed.
The functions available through the buttons immediately above the Images pane are:
- To add a new multimedia item for the Object, click the New button. In the window that appears select the desired file, and enter a name to identify the file. If the digital camera used to capture the image date and time stamps it, these fields will automatically fill. Otherwise enter the date and time the image was taken. Click the Save button to save the image to the Object.
- To delete a multimedia item from the Object, select the item in the left pane of the window, and click the Delete button.
- To change the name or the image of a multimedia item select the item and click the Properties button; to change the image click on the Tools menu and selecting Load image. Click the Save button to save the changes.
- To save the image to your computer or network drives select the item in the left pane of the window, and click on the Save As button.
The image selected as the Primary Image can be displayed on an Ad Manager Report. The image selected as the Map Image can also be displayed on an Ad Manager Report.
For additional information on the buttons that appear at the top of the window, click here. For information on the menu items that appear under the Tools menu, click here.
Fields
Map image - This is the image to use when using a report that displays a map of the Site.
Preview - Click the Preview check box on to see the highlighted Image.
Primary image - This is the image to use on a report that displays an image of the Site.
