Difference between revisions of "Financial"
(→Allocating Revenue) |
(→Allocating Revenue) |
||
| Line 204: | Line 204: | ||
[[File:New_Bill_Definition_Details.JPG]] | [[File:New_Bill_Definition_Details.JPG]] | ||
| − | If working from a list, highlight the Bill Definition you are allocating and click the Allocate Revenue button ([[File: | + | If working from a list, highlight the Bill Definition you are allocating and click the Allocate Revenue button ([[File:New_allocate_revenue_button.gif]]) in the toolbar. The following window will appear which will be your worksheet for creating the Allocation Amount(s) and assigning the Posting Schedule(s) to each. |
[[File:New_Bill_Definition_allocate_revenue.JPG]] | [[File:New_Bill_Definition_allocate_revenue.JPG]] | ||
| Line 236: | Line 236: | ||
=== Calculating Allocations === | === Calculating Allocations === | ||
| − | Next you need to apply the Amount(s) to the Posting Schedule(s) as necessary. Click on All Posting Schedules to get the list, highlight which Postings are going to be allocated using an Amount definition and click and drag them to the Amount; or use the Move to button ([[File:New_move_to_button.JPG]]); or right click and choose "Move to" and select the Amount from the list. Click on the Calculate button ([[File: | + | Next you need to apply the Amount(s) to the Posting Schedule(s) as necessary. Click on All Posting Schedules to get the list, highlight which Postings are going to be allocated using an Amount definition and click and drag them to the Amount; or use the Move to button ([[File:New_move_to_button.JPG]]); or right click and choose "Move to" and select the Amount from the list. Click on the Calculate button ([[File:New_allocate_revenue_button.gif]]) in the toolbar and Ad Manager will allocate the amount to the Posting Schedule(s) as per the criteria set up on the Amount. Continue to select your Posting Schedules, assign to the corresponding Amount and Calculate as necessary. |
NOTE #1: You may not be able to calculate all Amounts, depending upon how long the Contract has been scheduled. | NOTE #1: You may not be able to calculate all Amounts, depending upon how long the Contract has been scheduled. | ||
Revision as of 11:25, 17 July 2013
Page for Financial.
Adding a Lease
The dictionary describes the term "Lease" as follows:
"A contract by which one conveys real estate, equipment, or facilities for a specified term and for a specified rent; also : the act of such conveyance or the term for which it is made."
In Ad Manager you can track all types of information pertaining to a Lease; from the Lease number, to the terms, to which Sites/Faces are attached to it. With accurate and up-to-the minute data entry, you can have the entire history of the Lease; and, with the use of some saved Finders, you can work with your Leases in a timely organized manner.
If you have the Ad Manager Financial Module you can enter Payment Schedules and track Payments in addition to the standard leasing functionality.
The first step is to enter a new lease into the system.
Adding a Lease
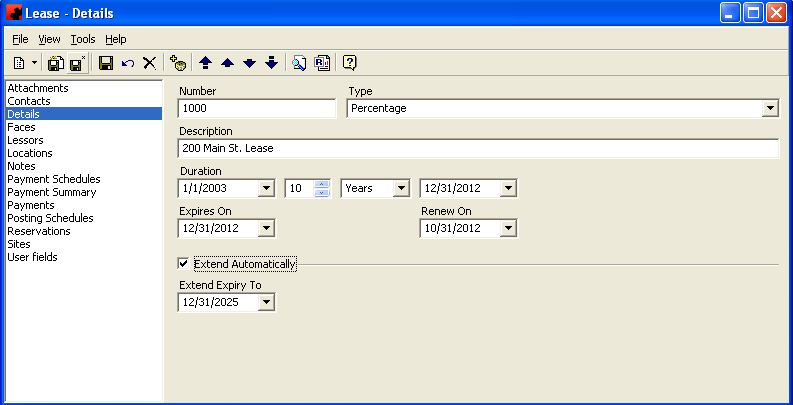
If you are on a Site Window, to enter Lease information, you can either enter the new lease number in the Lease Number field on the Site Details page, or you can go click on the arrow beside the New icon () for a list of items you can add. Select OTHER, and then select Lease. The Lease - Details Window will appear, and a new Lease can be entered.
To add a Lease into Ad Manager, from the main Ad Manager Window, click the File - New - Other menu item and select Lease. The new Lease window will appear.
On this screen, basic information about the Lease can be entered on the Details Page. This information includes the Lease Number, any description you may wish to give for the Lease, the start and end dates of the Lease, and any renewal information you may wish to enter. Usually the renewal information will be dependent upon how you wish to track your Leases and when to address renewals. NOTE: Information you put on this page does not affect your Lease Payment Schedule(s). If you make changes to the dates, you will still have to edit the Payments, as necessary, to reflect these changes.
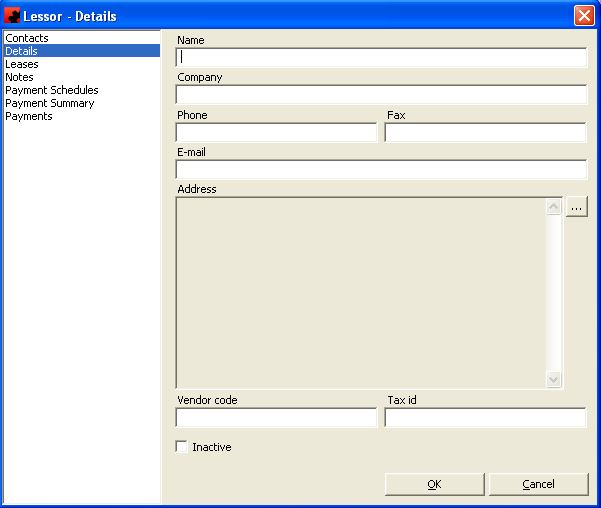
On the Lessors Page you can add Lessor information. To add a new Lessor, click the New () button to the right and you can either select an existing name or create a new one by choosing <New>. If you choose <New> the following window will appear:
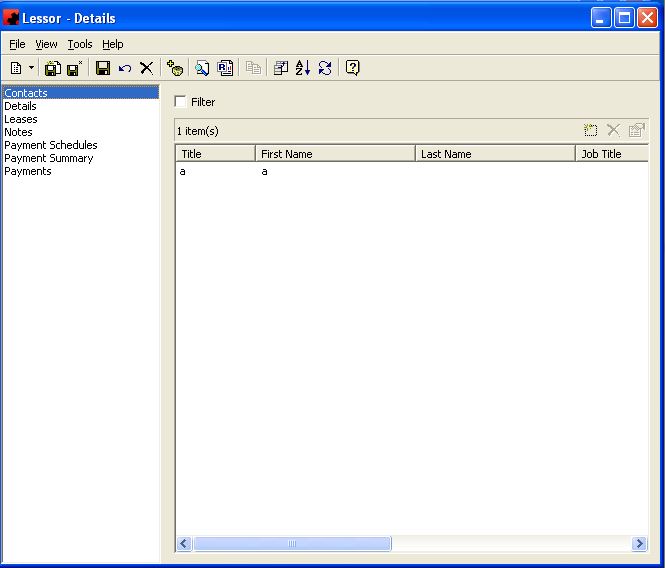
Complete the necessary data such as name, phone numbers, address, etc. NOTE: Vendor Code is a required field and must be filled in. You may also want to complete the Tax Id box if you are providing your Lessor with Government income statements. Perhaps you may wish to add a contact name if the Lessor is a Company rather than a person. To add the Contact person, click the Contacts Page, click the New ( ) button, either choose a name already existing from the list or choose <New> to add a new one and enter the detail. NOTE: You can have as many Lessors on a Lease as necessary.
On the Contacts Page, any contact people that are related to this Lease can be added. To add a Contact person, click on the New ( ) button on the page. From here you can select a Contact from the list, or add one by clicking on <New&ldots;> at the top of the list. Once you have finished adding Contacts to the Lease, click on the Save button to save the Lease.
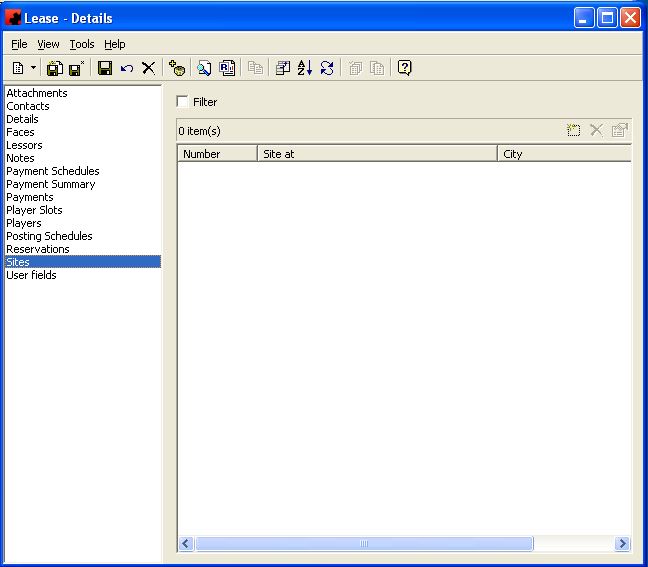
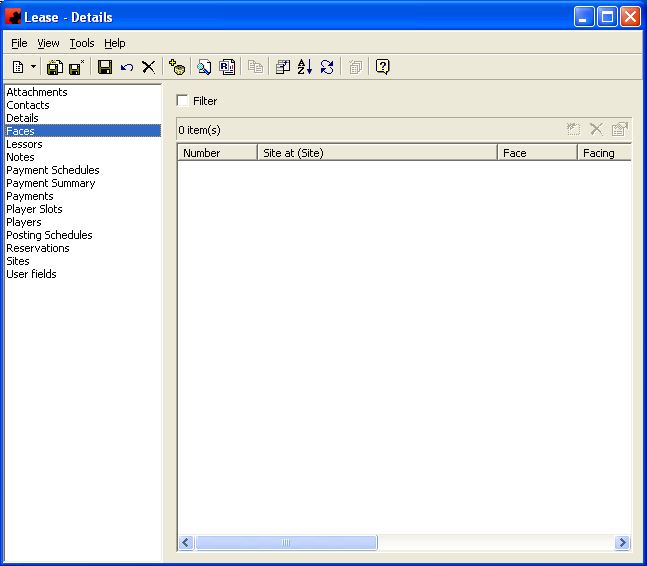
The Sites Page and Faces Page will list all Sites and their corresponding Faces that have been attached to the Lease. To learn any further information about a particular Site or Face, double click the item in the listing and it will open the Details Page of whichever item you choose. You will notice that you can neither add nor delete a Site or Face from either Page. The Lease is attached to the Site on the Site Details Page, which by association will attach it to the corresponding Faces.
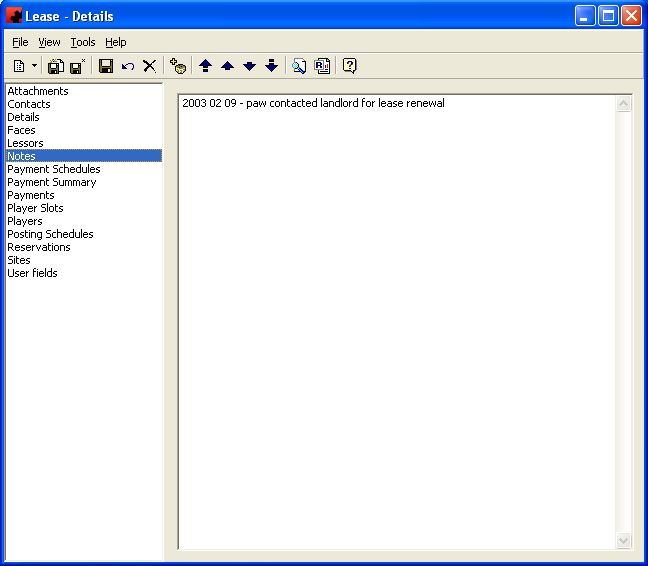
The Notes Page allows you to enter any notes you wish to keep about the Lease. Some Lease reps use this page for their Contact notes any time they make a call or visit the landlord, so they will have a detailed history of the lease and what happened.
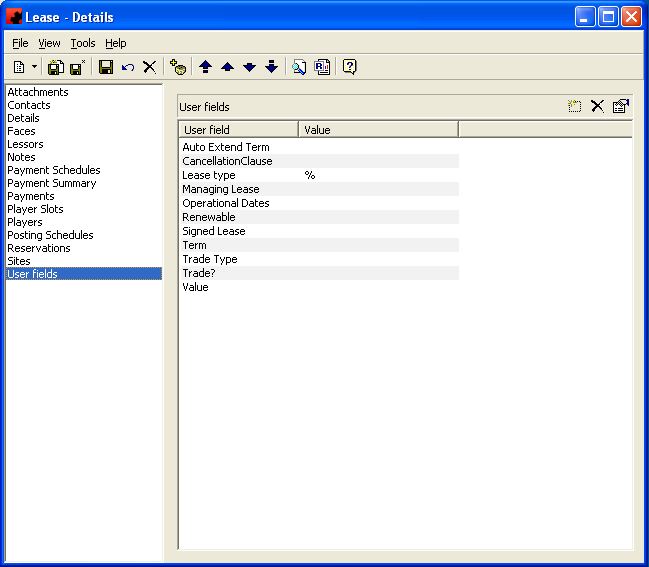
The User fields page allows you to create your own Fields and fill in a value for each. These fields in turn become searchable criteria in your Lease query and as well can be added to a customized view of a Lease listing. An example of a User field might be Lease Representative and the Value could be the initials or name of the person responsible for that Lease in your company.
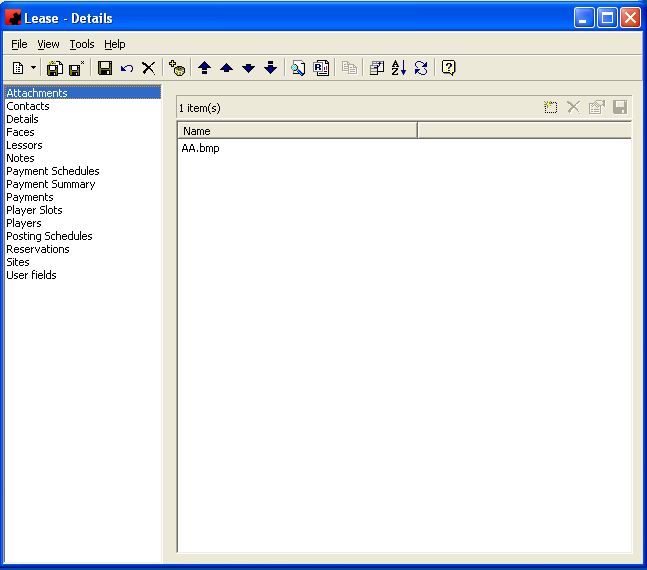
The Attachments Page allows you to attach an electronic copy of any correspondence and the signed Lease itself. You are required to have the Multimedia Module in order to use this page.
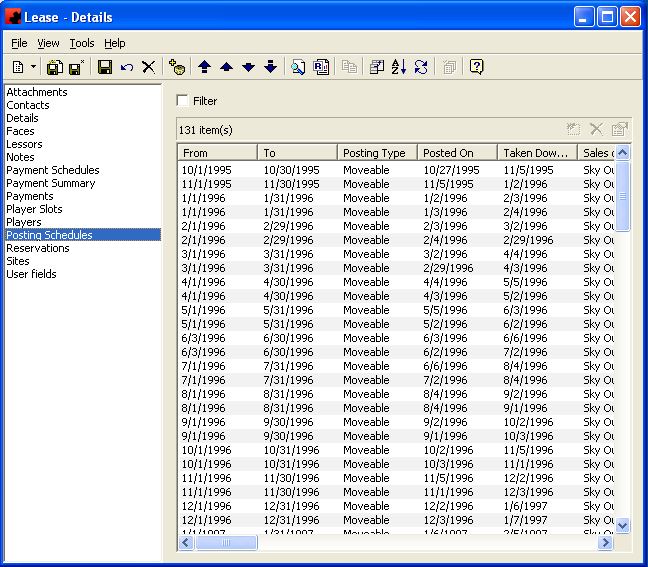
The Posting Schedules Page shows you a listing of all past, present and future postings for all Faces that are attached to this particular Lease. This is useful in determining how often the Faces have been sold, and, if you anticipate any difficulties renewing the Lease, you can determine in advance if canceling of the Lease will affect any planned or posted Schedules.
The Payment Schedules Page, Payments Page, and Payment Summary Page show the financial history of the particular Lease. They are discussed in more detail in the Setting Up Lease Payment Schedules section. You are required to have the Financial Module in order to use these pages.
Adding Bill Definitions
The Bill Definition is used as the "template" for the creation of the Invoices that will be sent to your Advertisers, Agencies, etc. Creating the Bill Definition in Ad Manager eliminates the necessity of duplication of data entry. It becomes a single entry with the pre-determined details being exported to your Accounting package. There are 2 types of Bill Definitions that may be created in Ad Manager - Contract and Custom.
Adding Contract Bill Definitions
This type of Bill Definition is the one that will be attached to a specific Contract and uses some details of it in order to create the "template". It contains invoice amounts for such things as Space, Production, Extensions, etc.
NOTE: Your Contract Bill Definition, even though attached to a Contract, is created independent of the Contract dates and/or amounts. This gives you more flexibility in the creation of your Contracts/Subcontracts/Flights and Invoices.
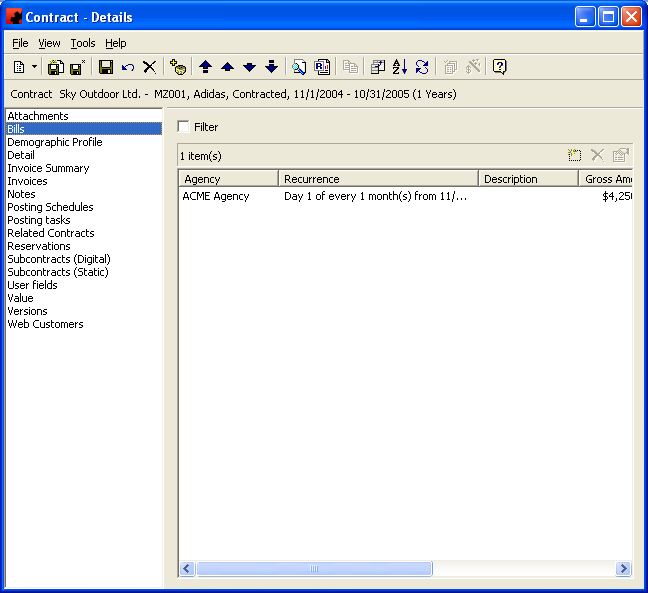
To create the Bill Definition, find the corresponding Contract using a Finder, Quick Find or a list of Contracts. Click the Bills Page of the Contract and then click the New button to the right.
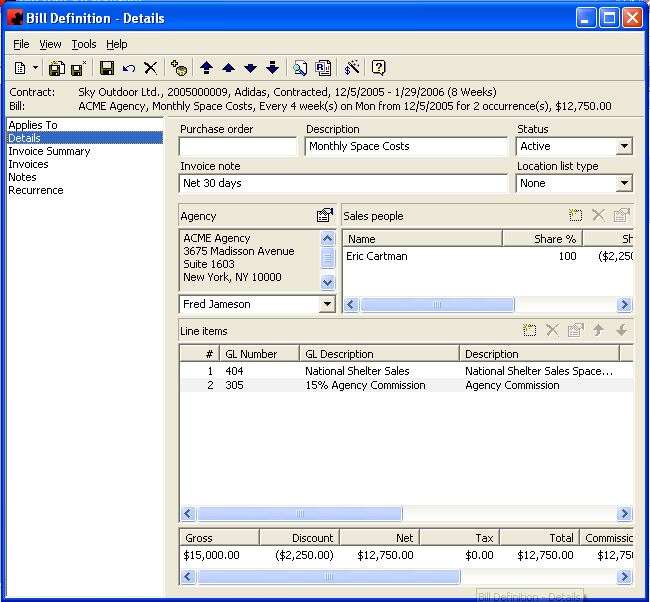
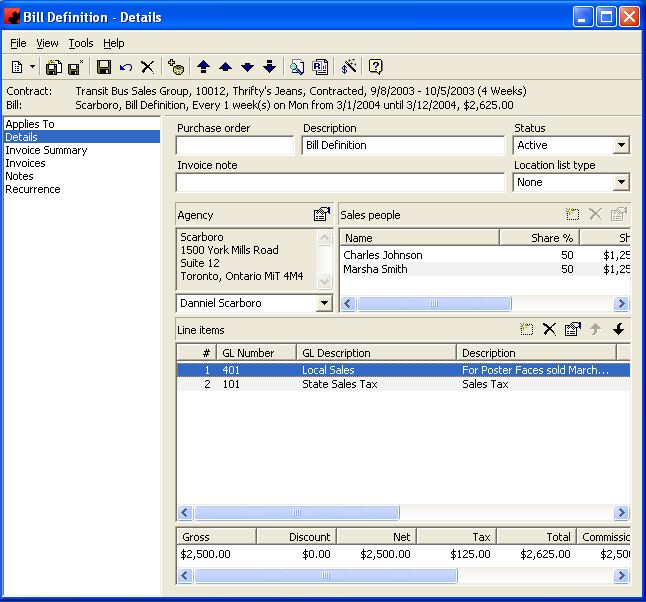
The first requirement is to select the Agency or "Bill to" for this Bill Definition. Ad Manager will default to the Agency that has been input on the Details page of the Contract. If this is not the Agency who will receive the Invoices created from the Bill Definition, click the Select button and a list of Agencies entered on the Contract Details screen is shown (if more than one). Click <More&ldots;> to obtain a list of all Agencies from the Agency Database. Select one and click Finish. The Bill Definition - Details screen will appear.
This selection will be automatically populated in the Agency Field of your Bill Definition. NOTE: If you accidentally choose the incorrect Agency on the previous screen, you can still correct this on the Bill Definitions-Details screen by clicking the Properties button on that field. The Purchase Order field will populate from the Contract Details Page, as well as the Sales people information, and Contact Person information in the Agency field. If this information is not present, enter it as required.
The Description field allows you to identify this Bill Definition so it will be easily recognizable from a list of all Bill Definitions. For example, you might enter "Monthly Space Costs", "Credit for late posting", "Bulletin Monthly Cost". The Status determines if the Invoices of this Bill Definition can be exported. Only "Active" and "Force" statuses can be part of an Invoice Export file.
The Invoice Note field allows you to enter an additional line of information that may appear on your Invoices.
NOTE: This note should apply to all Invoices of this Definition. If it does not, enter the note individually on each Invoice once they have been created.
You may also choose to have a location list appear on your Invoice and the format of it by selecting it from the dropdown list. This does not automatically happen, but will need to be programmed to appear in the required field.
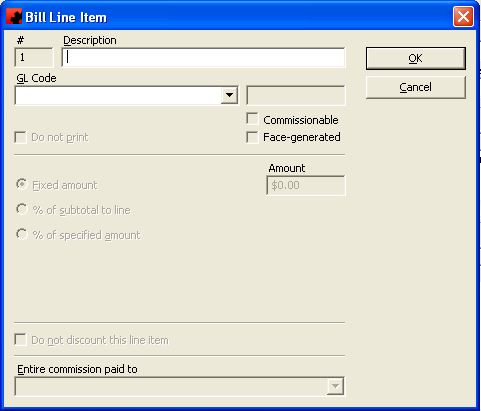
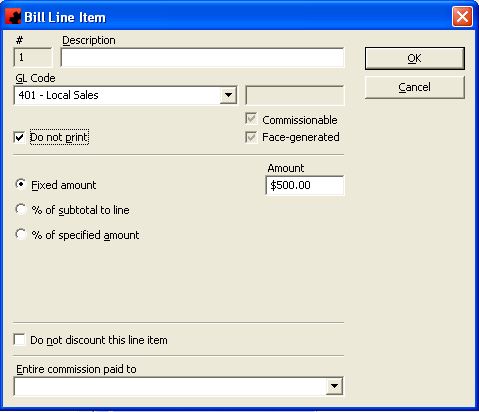
To add Line Items for this Bill Definition, click the New button. The following screen will appear.
From this screen you enter a description for the Line item, as well as the corresponding GL Code to which to assign this line item. The GL Code will match an identical Code set up in your Accounting Package. You can specify whether the dollar amount is a fixed amount, a percent of a specified amount, or a percent of the subtotal. Depending on which of these choices you select, different fields of information will appear for you to complete. You can also identify line items that you do not want to print on the invoice, by checking the box "Do not print".
This allows you to set up journal entries that are not part of the printed Invoice, but will be transferred to your accounting package.
NOTE: This will not apply if you are printing your Invoices using Ad Manager Reports.
NOTE: If the Taxes and Discounts criteria have already been established in the GL Code database of Ad Manager, the percentages will automatically appear and the calculation will be done as the Line Items for each are added.
If there is more than one Sales Person on the Contract, you may specify which one will receive the commission for a particular line item at the bottom of the screen. You can also identify if a particular line item is not to be discounted, or when discounts are applied by checking the box "Do not discount this line item". Once you have completed your Line item information, click OK. You can add additional Line items as appropriate.
NOTE: If this Line Item is for an amount that is a credit, it is entered with a minus (-) sign in front.
Ad Manager processes the Line Items in the order they appear in the list of Line Items. If you have a Line Item that is taking a percentage of a subtotal and it is not in the correct spot, Ad Manager will calculate an incorrect amount. To move a Line up or down on the screen, highlight the Line Item and click the move up or move down button as appropriate.
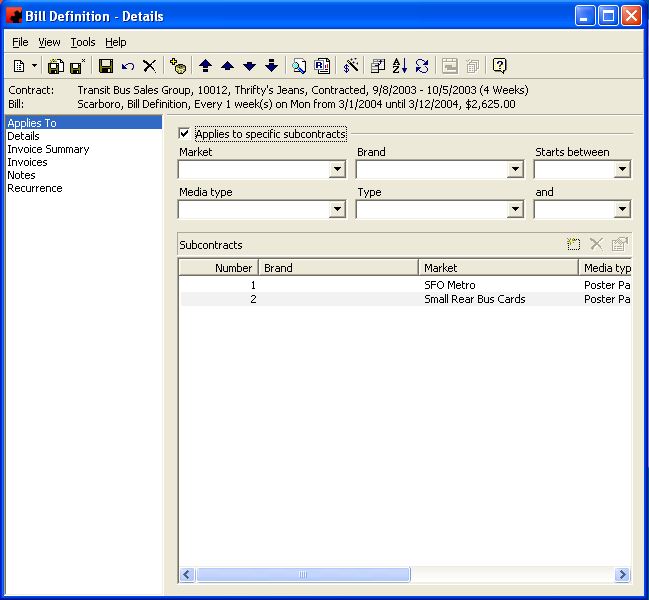
On the Applies To Page you can identify if this Bill Definition applies to a particular subset of Subcontracts. You might use this page if you have a single Contract with Subcontracts set up representing different Media Types or Markets and the invoicing will happen on different dates; or another example might be that you have Bonus Subcontracts set up on your Contract and you don't want to send out an Invoice for these. Click on the box beside the "Applies To specific subcontracts" and then enter the criteria for the particular Subcontracts to which this Bill Definition will apply.
NOTE: The Add and Delete buttons on the screen where the Subcontracts are listed will add or delete the actual Subcontract from the Contract. They are not used to remove a particular Subcontract from the Applies to criteria. What you entered as your criteria will determine your list.
Setting Up Invoice Recurrence
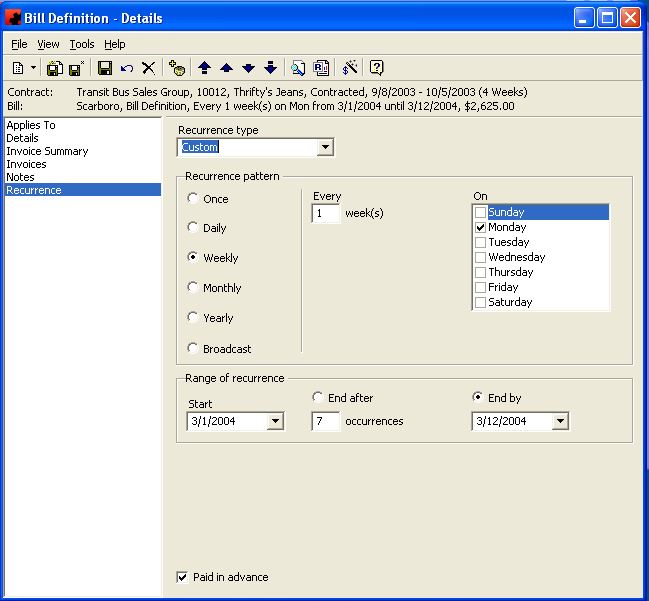
Once you have completed your Bill Definition details, you can identify the Recurrence for this Bill. To do this, click on the Recurrence Page and the following screen will appear.
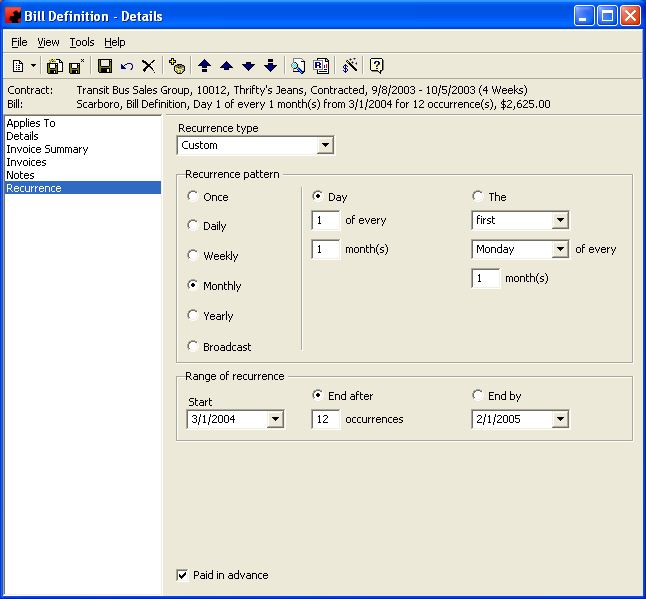
From this screen you can identify how often and for how long you wish to invoice this Contract. Do this by first selecting a Recurrence Pattern in the top section of the screen. If the Invoices are to be sent quarterly (Jan 1, Apr 1, etc) for example, choose Custom in the Recurrence Type box, and the Recurrence Pattern would be Monthly, Day 1 of every 3 months. If the Invoices are to be sent monthly for example, choose Custom in the Recurrence Type box, and the Recurrence Pattern would be Monthly, Day 1 of every 1 month. You can also choose to invoice on the Subcontract dates if multiple ones have been entered for each posting cycle by selecting it from the Recurrence type dropdown list and Ad Manager will automatically set up the number of Invoices which correspond to these dates and display them on the Invoices Page for you to verify. Also note that you may choose to invoice on a Broadcast calendar by selecting Custom as the Recurrence type and choosing Broadcast.
In the bottom section of the screen set the Range of Recurrence. This identifies the period during which time you wish Invoices to be generated. For example, you might enter the Start Date as August 1, 2005, click the End After and fill in 12 occurrences and the End by date will automatically fill in with the last Invoice date, which, in this example will be July 1, 2006.
You can also identify if the Invoices are "Paid in advance" (i.e. The Invoice is sent at the start of the display period) by leaving the checkmark in the box at the bottom of the screen or sent at the end of the display period by removing the checkmark from the box. To remove the checkmark from the box, click on the box. This field will determine the display Period Dates that are now part of the Invoice information on the Invoices Page. This information can be contained in your Invoice Export and show in printed Invoices. NOTE: If the Invoice Range of Recurrence is set up as Once, you must enter the Period dates to which it applies, regardless of whether the "Paid in advance" box is checked or not.
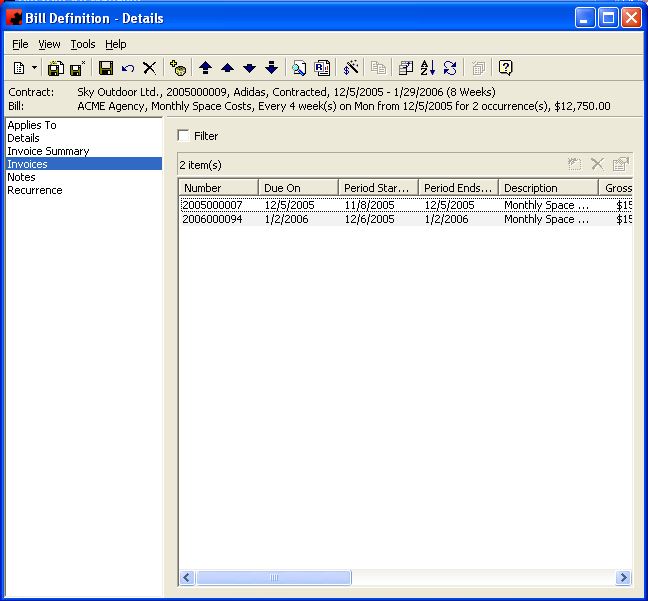
Once you have entered the Bill Definition Details and the Recurrence, click the Save button. If you wish to review or verify when Invoices are scheduled, go to the Invoices page where a listing of all Invoices created as a result of the Bill Definition will display.
NOTE: No Invoices will appear on the Invoices page until the Bill Definition and its Recurrence have been saved.
Recording Notes for the Bill Definition
The Notes Page allows you to enter information concerning the Bill Definition that is not contained in the data already entered on the Details or Recurrence pages.
For example, you may have to cancel future invoicing on a Contract because the advertiser/agency has cancelled the Contract. You may wish to record when and why the invoicing was cancelled. It is recommended that if you are using the Notes page, the information be entered in the following format ... Date, Notation, Initials of personwho entered the note. Also, it is recommended that you keep the most current note at the top.
Reviewing Your Bill Definition Totals
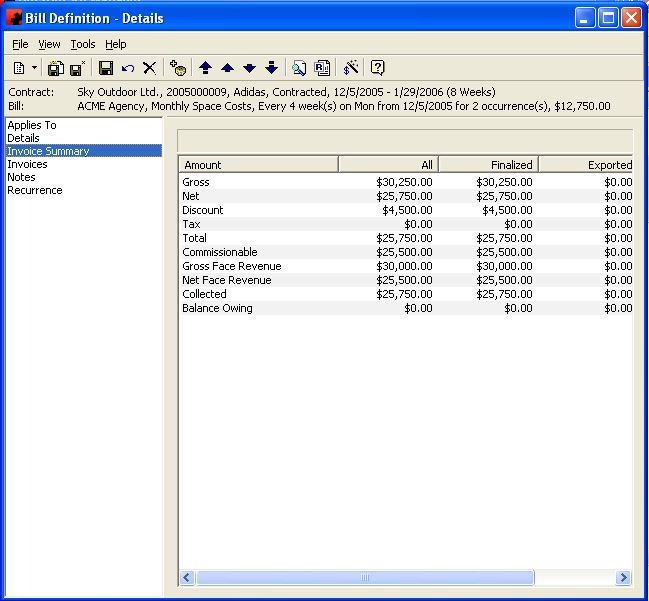
The Invoice Summary Page summarizes the various dollar values of all Invoices created by the Bill Definition.
It also records the dollar values of finalized, exported and sent Invoices. These amounts will accumulate as invoicing is exported to your accounting package.
Adding A Custom Bill Definition
A custom Bill Definition is one that is created independent of any Contract, but you still wish to track in Ad Manager. This could be for such things as the selling of blanking paper, paste, etc. to another person/company. By creating the Bill Definition in Ad Manager you can maintain a complete history of all company related invoicing as well as have a single entry system for it.
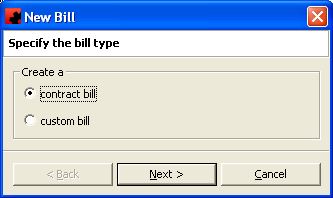
To create a Custom Bill Definition click on File - New - Other and Select Bill Definition from the list. The following screen will appear:
On this screen select Custom Bill and click the Next> button and the following screen will appear:
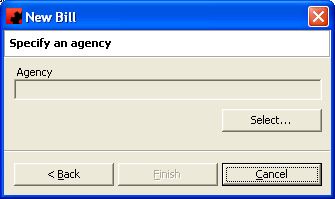
Click the Select button to get a list of Agencies, then select the name. If the Agency does not appear on the list, select <New> and enter the details on the following screen.
Click <Finish> when you have selected and/or entered the Agency information. The Bill Definition - Details screen will open. For information on adding a new Agency, click here.
Complete the Bill Definition as you would for a Contract Bill Definition.
Adding Billing Schedules
Type topic text here.
Adding Lease Information
Type topic text here.
Adding Tax Codes
Type topic text here.
Allocating Revenue
One of the big concerns of any Leasing Department is to have the ability to quickly and accurately allocate revenue to Faces and in turn to Leases. This is especially important with regards to determining Percentage Lease Payments as you need to know how much money the Face(s) on the Lease generated in order to determine the amount to which you apply the percent. As well, you may wish to determine how profitable a particular Lease/Site/Face is to your company.
Using the data and tools provided in Ad Manager, this becomes a much more manageable process. You will be able to set up your Allocation Amounts in advance, determine if all Revenue dollars are allocated, and, provide revenue information to your Payees dependent upon how you pay each one.
NOTE: Ad Manager will only display and calculate Revenues from Line Items on the Bill Definitions that have the GL Revenue Code set up as Face Generated. As well, it is important to note that the Revenue Calculations in Ad Manager are based on Face Days which is a much more accurate method as monies are allocated dependent upon how many days in each month the client is advertising. If the Posting Schedules cross from one month to another, each month will receive a portion of allocation based on the number of days the ad appeared.
Setting up Allocations
To set up the allocations, you use the Bill Definitions that you have entered for your Invoicing. You can either create the Allocation amounts as you set up the Bill Definition, use a Finder to locate a particular one or work from a list of All Bill Definitions.
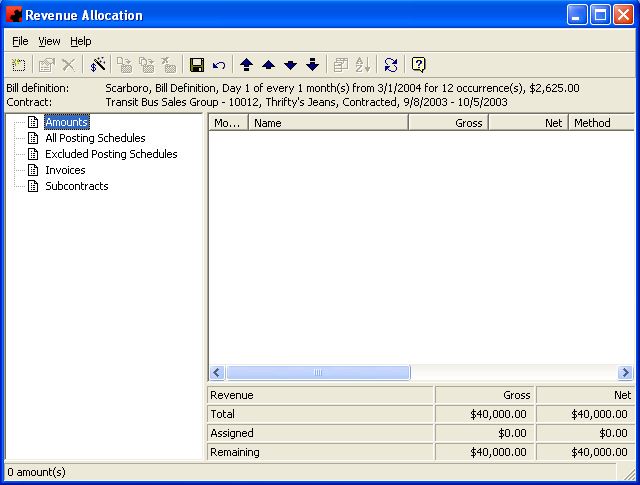
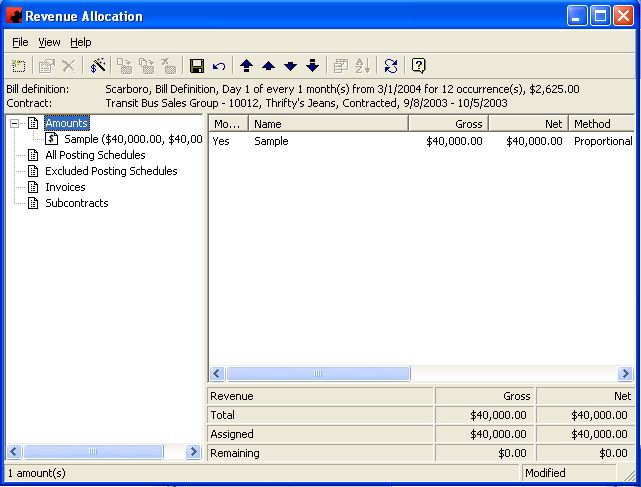
If working from a list, highlight the Bill Definition you are allocating and click the Allocate Revenue button (![]() ) in the toolbar. The following window will appear which will be your worksheet for creating the Allocation Amount(s) and assigning the Posting Schedule(s) to each.
) in the toolbar. The following window will appear which will be your worksheet for creating the Allocation Amount(s) and assigning the Posting Schedule(s) to each.
Amounts are the definitions of the Allocation you create. They will display the Posting Schedules that have been added to them, the Faces represented by the Schedules and the amounts allocated and remaining to be allocated in Gross and Net dollars.
All Posting Schedules will display a list of all Faces that are currently scheduled for this Contract in the right side of the screen. NOTE: This list could change, depending upon how far in the future you have scheduled the Contract and/or any changes that you might make to the scheduling or the Bill Definition.
Excluded Posting Schedules will display a list of all Posting Schedules that have not been added to an Amount Definition.
Invoices will display a list of all Invoices created from this Bill Definition.
Subcontracts will display a list of all Subcontracts associated with this Bill Definition.
Creating Allocation Amounts
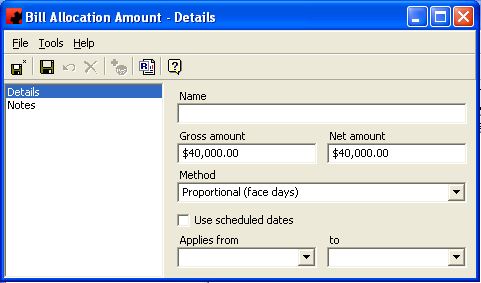
To create an Allocation Amount, click the new button in the toolbar. The following window will appear.
Identify the Name of this Amount (e.g. Total Allocation, January Amount, Poster Amount, etc); enter the Gross and Net dollars; select the Method you wish to use to allocate the dollars; and if this amount applies to a period of time. If you wish to use Scheduled dates instead of posted dates to complete the calculation, check the box. Once you have completed the criteria for this Allocation Amount, click Save. The newly created Amount(s) will now appear on the left side of the window under Amounts. Continue to create the Allocation Amounts, as necessary, until all revenue has been assigned to an Amount.
NOTE: The Gross and Net Amount fields will automatically populate with the unallocated amounts when you create new Allocation Amounts.
Calculating Allocations
Next you need to apply the Amount(s) to the Posting Schedule(s) as necessary. Click on All Posting Schedules to get the list, highlight which Postings are going to be allocated using an Amount definition and click and drag them to the Amount; or use the Move to button (); or right click and choose "Move to" and select the Amount from the list. Click on the Calculate button (
![]() ) in the toolbar and Ad Manager will allocate the amount to the Posting Schedule(s) as per the criteria set up on the Amount. Continue to select your Posting Schedules, assign to the corresponding Amount and Calculate as necessary.
) in the toolbar and Ad Manager will allocate the amount to the Posting Schedule(s) as per the criteria set up on the Amount. Continue to select your Posting Schedules, assign to the corresponding Amount and Calculate as necessary.
NOTE #1: You may not be able to calculate all Amounts, depending upon how long the Contract has been scheduled.
NOTE #2: If you have more than one Amount defined, you may decide to click on Excluded Posting Schedules and work from this list. As Schedules are associated with Amounts, they will drop from the list, so that the remaining Schedules are ones that have not been associated. This is also a good check to ensure that all valid Posting Schedules have been associated with an Amount.
Once all Amounts have been calculated, click the Save button on the toolbar.
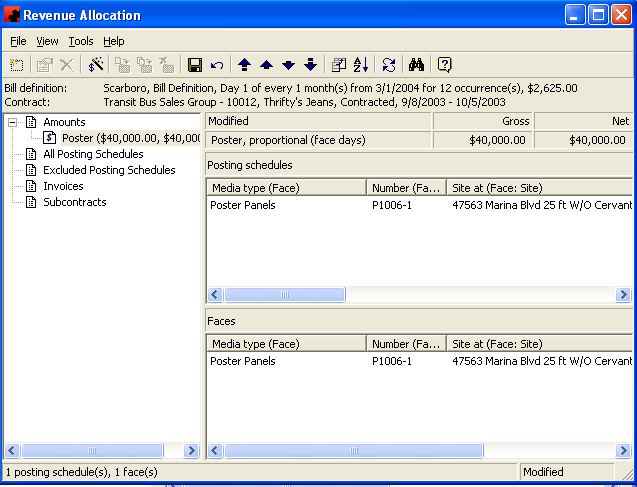
You will now notice that when you select each Amount, the list of Posting Schedules and corresponding Faces will appear on the right side of the screen as well as their allocated Revenue amounts. NOTE: If there is more than one Posting Schedule per Face, you will notice that the Face amount will be the total of the Posting Schedule amounts.
To remove Posting Schedules that were applied in error to an Allocation Amount, select the Amount to get the list of Schedules, highlight the one(s) that you wish to remove from this Amount, right click and choose Remove or click on the Remove button () in the toolbar. These Schedules will now appear under Excluded Posting Schedules.
To move Posting Schedules from one Allocation Amount to another, select the Amount to which they are currently assigned to get the list of Schedules, highlight the one(s) you wish to move to another Amount, right click and choose Move to, or click on the Move to () button in the toolbar. You will then see a list of all other Amounts that have been set up. Choose the one to which you are moving the Schedules and click OK.
NOTE: If you move(or remove) an allocated Posting Schedule, you will need to recalculate the affected Allocation Amounts.
Bills and Invoices - What's the Difference
Ad Manager divides the A/R function into Bill(s)/Bill Definition(s) and Invoice(s). The Bill(s)/Bill Definition(s) is used to define the Invoice(s) detail as well as how often and when (Recurrence) the Invoice(s) should be generated. It is used to determine the Agency (Bill to), and the line item(s) that will appear on the Invoice(s). It is also used to determine Sales Person(s)' commissionable amount(s).
The Invoice(s) is the result of the Bill/Bill Definition and is contained in the Financial Export file. The Invoice(s) can also be printed from Ad Manager's Reports menu. Ad Manager does not allow the user to add a new Invoice(s). The user must add a new Bill/Bill Definition or modify an existing one.
Changing Recurrence Patterns
Step one is to check the Payments page of the particular Lease Payment Schedule that you are changing to see if any Payments have been exported from Ad Manager. Find the Lease Payment Schedule and click on the Payments Page.
If no Payments have been exported yet from Ad Manager, click the Recurrence page. At the bottom of this screen change the recurrence to reflect the new dates and number of Payments you require.
If Payments have been exported (even one), change the Recurrence as follows:
Start date = date of the next Payment needed (refer back to your original listing to get this date. In our example above it would be 7/25/2005)
Occurrences = Number of Payments you still require
End date = Date you want to end the Payments.
Save the Payment Schedule and check your Payments Page again to ensure that you now have the correct number of remaining Payments you need and no duplication.
Commisions
Type topic text here.
Creating Invoices with Escalators
You may find that you will have a Contract signed by the Sales Department on which escalators have been defined over the term of the Contract. For example, you might have a 5-year Contract for a Permanent Bulletin that escalates by 5% every year and you will need to set up the Bill Definitions accordingly. In our example you will have 5 Bill Definitions, each with its own amount, date range, etc. and the Definitions will show the following details:
Year 1: Initial $$ amount
Year 2: Initial $$ amount + 5% = Second $$ amount
Year 3: Second $$ amount + 5% = Third $$ amount
Year 4: Third $$ amount + 5% = Fourth $$ amount
Year 5: Fourth $$ amount + 5% = Fifth $$ amount
Creating Lease Payments with Escalators
You may find that you will have a Lease signed by the Leasing Department on which escalators have been defined over the term of the Lease. For example, you might have a 20-year Lease that escalates by 5% at the end of every 5 years and you will need to set up the Payment Schedules accordingly. In our example you will have 4 Payments Schedules, each with its own amount, date range, etc. and the Schedules will show the following details:
Year 1 - Year 5 = Initial $$ amount
Year 6 - Year 10 Initial $$ amount + 5% = Second $$ amount
Year 11 - Year 15 Second $$ amount + 5% = Third $$ amount
Year 16 - Year 20 Third $$ amount + 5% = Fourth $$ amount
You will find that the new Duplicate Tool will assist you in setting up these 4 Lease Payment Schedules, making the necessary changes for each escalator such as dollar amount and dates for the Recurrence.
Deleting Billing Schedules
Type topic text here.
Exporting Payments
Type topic text here.
Finalizing Invoices
Finalizing an Invoice will prevent you from making additional changes to it. This can be done manually prior to an Invoice Export, or it will automatically occur during the Export if you are running the Exporter within Ad Manager. If you wish to finalize Invoices manually, use the Find tool and look for Invoices that meet your criteria.
Highlight the Invoices you wish to finalize and go to the Tools menu and click Finalize. Ad Manager will finalize these Invoices. If you were to open the Invoice details screen, Ad Manager will show the Invoice as Finalized with a Unique Transaction ID as well as an Invoice Number if you have set up Ad Manager to automatically number your Invoices under Tools - Options.
Prior to Finalizing your Invoices, you might wish to Customize the View of your Invoices list to add a column called "Delivery %". This column will tell you the percent of completed Posting Tasks vs. Scheduled Postings for the period of the Invoice. To Calculate the Delivery %, highlight the Invoices, click the Tools menu item and select "Calculate Delivery %". Ad Manager will then calculate this percentage for you so you can determine if enough postings have been completed and the Invoice can be Finalized and Exported.
If at any time, you wish to check the details of one of the Invoices on the list, double click it and the Invoice Details page will appear. Once an Invoice is marked as Finalized, you cannot change the information on the Invoice. You must Un-Finalize it in order to make any changes.
Un-Finalizing Invoices
If an Invoice has incorrectly been marked as Finalized, Ad Manager provides you with the ability to Un-Finalize it. To Un-Finalize an Invoice, find it either using a Finder, from a list of Invoices or from the Invoices Page of a Contract. Right click on the Invoice you wish to Un-Finalize, go to the Tools menu and select Un-Finalize. Ad Manager will remove the Finalized status, but will still show a Unique Transaction ID, indicating that this Invoice was Finalized at one time.
Finalizing Payments
Finalizing a Payment will prevent you from making additional changes to it. This can be done manually prior to a Lease Export, or it will automatically occur during the Export if you are running the Exporter within Ad Manager. If you wish to finalize payments manually, use the Find tool and look for Lease Payments that meet your criteria. Highlight the Lease Payments you wish to finalize and go to the Tools menu and click Finalize. Ad Manager will finalize these Payments. If you were to open the Payment details screen, Ad Manager will show the Payment as Finalized with a Unique Transaction ID.
Prior to Finalizing your Payments, you might wish to Customize the View of your Payments list to add a column called "Exportable". This column will tell you, even though you have Finalized the Payments, if it can be contained in the Export file of Payments. If the field is blank, double click the Payment(s) to determine why the Payment cannot be exported (e.g. It's marked as In Dispute, the Invoice is not marked as being received, etc.), make the necessary changes and save. Again, you are double checking your Payments to make sure that everything is correct prior to the export.
Once a Payment is marked as Finalized, you cannot change the information of the Payment. You must Un-Finalize it in order to make changes.
Un-Finalizing Payments
If a Payment has incorrectly been marked as Finalized, Ad Manager provides you with the ability to Un-Finalize it. To Un-Finalize a Payment, find it either with a Finder, from a listing of Lease Payments or from the Payments page of a Lease. Right click on the Payment you wish to Un-Finalize, go to the Tools menu and select Un-Finalize. Ad Manager will remove the Finalized status, but will still show a Unique Transaction ID, indicating this Payment was Finalized at one time.
GL Codes
The GL CODES database contains a listing of General Ledger Codes which will match ones in the users' Accounting Program. Ad Manager uses these codes when setting up a Bill Definition or Lease Payment Schedule and they may be part of the data contained in a financial export.
Adding a GL Code
To add a GL Code, click the arrow beside the New icon () for a list of items you can add. Select OTHER, and then select GL Code. The GL Code Details Window will appear, and a new GL Code can be entered. Enter a Number (may be alpha-numeric), Code (matches the one contained in the Accounting Program and may be alpha-numeric) and brief Description that will identify what the code represents when viewed in a listing.
NOTE: The Number field must be unique, however, the Code may be duplicated.
Identify the Type as Revenue or Expense and whether it is none (-), Discount, or Tax. If it is a Revenue Type, identify if it is Commissionable (sales persons are paid commission on the amount) and/or Face-generated (used in Allocation of Revenue to Faces for Percentage Lease Payments). If it is a Discount/Tax Type, identify the Percentage and the Round To digit(s).
Modifying a GL Code
To modify a GL Code, simply click the database from the FINANCIAL folder, then double click the desired item and make the changes(s) necessary. Once you have finished, click the Save () button.
NOTE: Caution should be taken when modifying a GL Code as it might adversely affect the Bill Definition and Lease Payment Schedules. However, if the Invoice or Payment has been exported, it will not be affected.
Deleting a GL Code
To delete a GL Code, there must be no reference to it on a Bill Definition or Lease Payment Schedule. Select the database from the FINANCIAL folder, then double click the desired item. Select the Delete button() for the record. Ad Manager will ask you for confirmation to delete the GL Code.
Lease Payment Schedules and Lease Payments - What's the Difference
Ad Manager divides the A/P function into Lease Payment Schedule(s) and Lease Payment(s). The Lease Payment Schedule(s) is used to define the Lease Payment(s) detail as well as how often and when (Recurrence) the Lease Payment(s) should be generated. It is used to determine the Payee(s), payment type, the line items that will appear on the Payment(s) as well as the amount that will be paid.
The Lease Payment(s) is the result of the Lease Payment Schedule(s) and is contained in the Financial Export file. The Lease Payment(s) can also be printed from Ad Manager's Reports menu. Ad Manager does not allow the user to add a new Payment(s). The user must add a new Lease Payment Schedule or modify an existing one.
Leases with the Financial Module
Ad Manager maintains a database of all leases that structures are assigned to. The lease information is used in a number of areas of the software. If you do not have Ad Manager's Financial Module, only certain information can be entered.
Adding a New Lease
To add a new Lease, click on the arrow beside the New icon () for a list of items you can add. Select OTHER, and then select Lease. The Lease Details Window will appear, and a new Lease can be entered. Contact details can be entered on the Contacts page.
To set up payments, click on the Payment Schedules page. This will allow you to enter the details related to the payments, including payment calculations, payee and recurrence information.
Modifying a Lease
To modify a Lease, simply click the database from the OTHER folder, then double click the desired item and make the change(s) necessary. Once you have finished, click the Save () button.
Deleting a Lease
To delete a Lease, there must be no sites associated with it. Select the database from the OTHER folder, then double click the desired item. Select the Delete button () for the record. Ad Manager will ask you for confirmation to delete the lease.
Lessors
The Lessors database contains a listing of companies and/or people to whom you are making a lease payment(s). Ad Manager uses this database when setting up a Lease Payment Schedule and the data may be contained in a financial export.
Adding a Lessor
To add a Lessor, click the arrow beside the New icon () for a list of items you can add. Select OTHER, then select Lessor. The Lessor Details window will appear, and a new Lessor can be entered. Enter the First Name and Last Name (if you are paying a person), the Company name (if you are paying a company), Business Phone Number, Mobile Phone Number, Business Fax Number and E-mail Address (as applicable). To add the Address information, click on the ellipsis () and enter the Street and/or Postal Box Number, City, State/Province, Zip/Postal Code and Country and then click OK. Enter the Tax Id Number and Vendor Code Number (usually matches one that has been set up in the users' Accounting Package).
NOTE: The Name or Company and Vendor Code fields are REQUIRED fields in order to save the information.
The Notes page allows the user to enter other information about the Lessor, not contained on the Details page.
Modifying a Lessor
To modify a Lessor, simply click the database from the FINANCIAL folder, then double click the desired item and make the change(s) necessary. Once you have finished, click the Save () button.
NOTE: Caution should be taken when modifying the Name and/or Company field because Ad Manager will change ALL references to these fields no matter if the Lease Payments have already been finalized or exported. Ad Manager history will be changed when you modify these fields even though the users' Accounting Package will contain the original details. Should the user wish to maintain historical data, it is recommended that a new Lessor be created as well as a new Lease Payment Schedule.
Deleting a Lessor
To delete a Lessor, there must be no reference to it on a Lease Payment Schedule. Select the database from the FINANCIAL folder, then double click the desired item. Select the Delete button () for the record. Ad Manager will ask you for confirmation to delete the Lessor.
Modifying Billing Schedules
Type topic text here.
Modifying Invoices
To make revisions to an Invoice in Ad Manager, first find the particular Invoice that requires changes. You can either choose the Invoice from the listing of all Invoices or select the Contract to which it applies and click on the Invoices Page to obtain the list of Invoices for that Contract. Double click on the Invoice you wish to revise and the following screen will appear:
Marking an Invoice as Sent
If you wish to track in Ad Manager whether an Invoice has been sent, you can do so from the Invoices Page of the Contract. Double click the appropriate Invoice and the screen above will appear. From this screen, click the box beside Sent and enter the date. Click the Save button to keep your changes.
Marking an Invoice as Collected
If you wish to track in Ad Manager whether monies have been collected against a particular Invoice you can do so from the Invoices Page of the Contract. Double click the appropriate Invoice and the screen above will appear. From this screen, enter the Collected dollars in the field called Collected and Ad Manager will automatically calculate the Balance owning amount.
Changing a Single Invoice
If you wish to change information about a single Invoice (e.g. adding a one time special credit or charge), this can be done from the Invoices Page of the Contract or from a list of Invoices.
To make the change, double click on the Invoice you wish to modify. From this screen, you can make any changes specific to this Invoice. Once you have made the necessary changes, click on the Save button.
NOTE 1: You might want to record why this Invoice has been changed. Click the Notes Page of the Invoice and make your remarks here. This will be saved with the changed Invoice for further reference.
NOTE 2: You cannot delete a single Invoice in Ad Manager; to skip an Invoice or not have it exported to your Accounting Package, change the type to Cancelled or On Hold on that Invoice and save it.
NOTE 3: If an Invoice has been Finalized and/or Exported, it cannot be modified. You must first Reset the Export Status, then Un-finalize the Invoice in order to make the changes. See Finalizing Invoices.
When an Invoice has been changed, Ad Manager will assign it a Number so at a quick glance you can see Invoices in a list that have been modified.
Changing All Invoices
If you wish to change a characteristic about all Invoices (e.g. change of Recurrence, Invoice Note, etc.) of a particular Bill Definition, this can be done from the Details Page or Recurrence Page of the Bill Definition as appropriate. Find the Bill Definition, either from a list of all Bill Definitions or from the corresponding Contract. Double click the item to open it and make the necessary changes. After you have made your changes, click on the Save button.
NOTE 1: You might want to record why this Bill Definition has been changed. Click the Notes Page of the Bill Definition and make your remarks here. This will be saved with the changed Bill Definition for further reference.
NOTE 2: If any Invoices have been exported from Ad Manager, they will not reflect the changes. Only non-exported Invoices will change.
Deleting a Non-Standard Invoice
If you have altered one or more of the Invoices to be different from the standard Invoices that were set up using the Details or Recurrence Pages from the Bill Definition, you can delete these Invoices by highlighting them on the Invoices Page and clicking on the Delete button. This will reset the Invoices to the default Bill Definition.
NOTE: This will only work if the Invoices have not been exported from Ad Manager.
Modifying Invoice Period Dates
When you create a new Bill Definition in Ad Manager, Invoice period dates are automatically created at the same time for each Invoice of the Bill. These dates are dependent upon information you input on the Recurrence Page of the Bill Definition and if you identified them as "Paid in advance" or not. They can also be contained in your Invoice Export and/or printed on an Invoice. However, you have the opportunity to change the period dates on any Invoice as required.
To change the information, select the Invoice by using the Find tool, selecting from the list of All Invoices or from the Invoice page of a Contract; change the date range and Save the record. The Invoice will now display the new dates.
NOTE: If the Invoice have been finalized and/or exported, you cannot change this information.
Modifying the Recurrence Pattern of a Bill Definition
Step one is to check the Invoices Page of the particular Bill Definition that you are changing to see if any Invoices have been exported from Ad Manager. Find the Bill Definition and click on the Invoices Page.
If no Invoices have been exported yet from Ad Manager, click the Recurrence Page. At the bottom of this screen change the recurrence to reflect the new dates and number of Invoices you require.
If Invoices have been exported (even one), change the recurrence as follows:
Start date = date of the next Invoice needed (refer back to your original listing to get this date. In our example above it would be 1/19/2005)
Occurrences = Number of Invoices you still require
End date = Date you want to end the invoicing.
Save the Bill Definition and check your Invoices Page again to ensure that you now have the correct number of remaining Invoices you need with no duplication.
Price Indexes
The PRICE INDEXES database contains a listing of indexes and their source(s). Ad Manager uses these indexes when setting up a Lease Payment Schedule and the data may be contained in a financial export.
Adding a Price Index
To add a Price Index, click the arrow beside the New icon () for a list of items that you can add. Select OTHER, and then select Price Index. The Price Index Details Window will appear, and a new Price Index can be entered.
Modifying a Price Index
To modify a Price Index, simply click the database from the FINANCIAL folder, then double click on the desired item and make the change(s) necessary. Once you have finished, click the Save () button.
Deleting a Price Index
To delete a Price Index, select the database from the FINANCIAL folder, then double click on the desired item. Select the Delete button () for the record. Ad Manager will ask you for confirmation to delete the Price Index.
Reviewing Allocated Revenue Status
Ad Manager provides you with tools that you may wish to use to ensure that all of your Revenues have been allocated prior to calculating your Percentage Leases.
Method #1: Customize the View in a list of Bill Definitions and add the columns "Gross Face Revenue" and "Net Face Revenue". At a quick glance you can compare these amounts against the Net and Gross Values of the Bill Definition to determine if there is Face Generated Revenue on the Bill Definition, and if so, set up allocation amounts and calculate as required. If you need to see more detail, double click the Bill Definition on the list to open it.
Method #2: If you wish to determine the allocation status of one Bill Definition, highlight it in the list, right click and choose View Revenue Allocation Status. Ad Manager will inform you if all Revenue has been allocated or if there is still an outstanding amount remaining. If there is still an outstanding amount, double click the Bill Definition to open it, click the Allocate Revenue button in the toolbar and complete the Allocation.
Method #3: If you wish to find any Un-Allocated Revenues against the Bill Definition(s), highlight the one(s) in the list you wish to check, right click and choose Find Un-Allocated Revenue. Ad Manager will check and then provide you with a list of any Bill Definitions that have outstanding amounts. You can work from this list, double clicking each item and completing the Allocation as necessary. You can also customize the list to show Gross and Net Face Revenue.
Revising Payments
To make revisions to a Payment in Ad Manager, first find the particular Payment that requires changes. You can either choose the Payment from the listing of all Lease Payments or select the Lease and click on the Payments page to obtain the list of Payments for that Lease. Double click on the Payment you wish to revise and the following screen will appear:
Marking an Invoice Received
If you have a Lease that requires an Invoice be received prior to payment, you can mark the Invoice received from the Payments Page. Double click the Payment that the Invoice applies to and the screen above will appear. From this screen, click the box beside Invoice Received. Ad Manager will ask you for the Invoice date and number.
Fill this information in and click OK. Click the Save button to keep your changes.
Marking a Lease Payment as Paid
If you wish to track, in Ad Manager, whether a Lease Payment has been made, you can do so from the Payments Page of the Lease. Double click the Payment and the screen above will appear. From this screen, click the box beside Paid. Ad Manager will ask you for the date paid, cheque number and status information.
Complete the information as appropriate and click OK. Click the Save button to keep your changes.
Changing a Single Payment
If you wish to change information about a single Payment (e.g. adding a one time special payment or charge), this can be done from the Payments Page of the Lease.
To make the change, double click on the Payment you wish to modify. The Lease Payment - Details screen will open where you can make any changes specific to this Payment. Once you have made the necessary changes, click on the Save button.
NOTE 1: You might want to record why this Payment has been changed. Click the Notes Page of the Payment and make your remarks here. This will be saved with the changed Payment for further reference.
NOTE 2: You cannot delete a single payment in Ad Manager; to skip a Payment or not have it exported to your Accounting Package, change the type to Cancelled on that Payment and save it.
NOTE 3: If a Payment has been finalized and/or exported from Ad Manager, it cannot be modified. In order to make changes, the Export Status needs to be reset, and/or the Payment un-finalized.
Changing All Payments
If you wish to change a characteristic about all Payments (e.g. change of Recurrence, cheque comment, etc.) of a particular Payment Schedule, this can be done from the Details Page or Recurrence Page of the Payment Schedule as appropriate. Find the Payment Schedule, either from a list of all Lease Payment Schedules or from the corresponding Lease. Double click the item to open it and make the necessary changes. After you have made your changes, click on the Save button.
NOTE 1: You might want to record why this Payment Schedule has been changed. Click the Notes Page of the Payment Schedule and make your remarks here. This will be saved with the changed Payment Schedule for further reference.
NOTE 2: If any Payments have been exported from Ad Manager, they will not reflect the changes. Only non-exported Payments will change.
Removing a Non-Standard Payment
If you have altered one or more of the Payments to be different from the standard Payments that were set up using the Details Page or Recurrence Page from the Lease Payments Schedules, you can delete these Payments by highlighting them on the Payments Page and clicking on the Delete button. This will reset the Payments to the default Payment Schedule.
NOTE: This will only work if the Payments have not been exported from Ad Manager.
Setting Up a Lease Using the Financial Module
Type topic text here.
Setting Up a Lease Without the Financial Module
Ad Manager allows users who do not have the Financial Module to enter basic lease information into the system. This allows the user to track the lease and any relevant contact information. Users who have the Financial module can also enter payment schedules and review payment information. For information on setting up a Lease using the Financial Module, click here.
Adding a New Lease
To add a New Lease into the system, you can go to the Site and enter the Lease Number, or you can enter it from the Leasing Screen.
From the Site
Go to the desired Site, make sure the Leased check box has been selected, and select the Lease number from the Lease dropdown Combo box (). If the Lease Number is not on the list, type the desired Lease Number into the box. Ad Manager will display a new screen that will allow you to enter Lease Details.
From the Leasing Screen
To enter a New Lease from the Leasing screen, select the arrow portion of the New button (), Other and then Lease from the Ad Manager Explorer Window.
Setting Up Lease Payment Schedules
In order to have Lease Payments for a particular Lease, you must first set up a Lease Payment Schedule. No Lease Payments will be created without the Schedule that acts as the "template" for its corresponding Payments. Ad Manager allows you to have multiple Payment Schedules, each with different Payees, different amounts and recurrences as needed.
To add a Lease Payment Schedule, go to the Lease you wish to add a Payment Schedule for. This can be done by using the Find tool or selecting the appropriate Lease from the list of All Leases.
When you have selected the desired Lease, click on the Payment Schedules Page.
To add a new Payment Schedule, click on the New () button and the following screen will appear.
From this screen you can add a Payment Schedule by selecting the appropriate Payee from the Payee list. If the Payee is not listed, you can add them in by typing the appropriate information. When you hit the Tab key on your keyboard after entering a new Payee, Ad Manager will display a window that allows you to enter in all relevant details about this Payee, including their Tax ID and Vendor Code information. NOTE: Vendor Code is a required field and must be entered. After entering the details, click OK to return to the Payment Schedule.
You can also enter a Description of this Lease Payment, as well as a Cheque Comment. The Description is for internal use, identifying the type of Schedule this is on a listing of Payment Schedules (e.g. Monthly Lease Payment, Annual % Top-Up Payment, etc.), and the Cheque Comment is what can appear as a memo item on the cheque.
From the Type list you can identify whether this lease is for Cash, Trade, or Other.
The Status list allows you to identify whether this Payment Schedule is Active, Cancelled, In Dispute, On Hold or Suspended. NOTE: Only Lease Payments identified as Active can be exported from Ad Manager to your Accounting Package.
You also can identify whether a Lease Payment will only be issued when an Invoice is received from the Payee. Check the box beside Invoice Required to indicate this. NOTE: Any payment with this box checked will not export until the Invoice Received box has been checked and details are entered on the Payment.
To add Line Items for this Payment Schedule, click the New () button. The following screen will appear.
From this screen you enter in a description for the Line item, as well as the GL Code to which this line item is assigned. This GL Code will match an identical Code set up in your Accounting Package. You can specify whether the dollar amount is a fixed amount, a percent of a specified amount, or a percent of the subtotal. Depending which of these choices you select, different fields of information will appear for you to fill in. Once you have completed your Line Item information, click OK. You can add additional Line Items as appropriate. You can also identify line items that you do not want to print on the cheque stub, by checking the box "Do not print".
This allows you to set up journal entries that are not part of the printed cheque information, but will be transferred to your accounting package. NOTE: This will only apply if you are printing your cheques using Ad Manager Reports.
NOTE: If the Taxes and Discounts criteria have already been established in the GL Code database of Ad Manager, the percentages will automatically appear and the calculation will be done as the line items for each are added.
Ad Manager processes the Line Items in the order they appear in the list of Line Items. If you have a Line Item that is taking a percentage of a subtotal and it is not in the correct spot, Ad Manager will calculate an incorrect amount. To move a Line up or down on the screen, highlight the Line Item and click the move up () or move down () button as appropriate.
Setting Up Recurrence
Once you have completed your Lease Payment details, you can identify the Recurrence for this Payment Schedule. This will determine how often and when the Payments are to be made. To do this, click on the Recurrence Page and the following screen will appear.
From this screen you can identify how often and for how long you wish to pay this Schedule. Do this by first selecting a Recurrence Pattern in the top section of the screen. If the Lease is paid quarterly (Jan 1, Apr 1, etc) for example, the Recurrence Pattern would be Monthly, Day 1 of every 3 months.
In the bottom section of the screen set the Range of Recurrence. This identifies the period during which time you wish Payments to be generated. For example, you might enter the Start Date as January 1, 2003, click the End After and fill in 40 occurrences and the End by date will automatically fill in with the last Payment date, which, in this example will be October 1, 2012.
You can also identify if the Payments are "Paid in advance" by leaving the check in the box at the bottom of this screen or paid in arrears by removing the check from the box. To remove the check from the box, click in the box. This field will determine the Period dates which are now part of the Payment information on the Payments page. This information can be contained in your Lease Payment Export to show on the printed cheque. NOTE: If the Payment Range of Recurrence is set up as Once, you must enter the Period dates to which it applies, regardless of whether the "paid in advance" box is checked or not.
Once you have entered the Lease Payment Details and the Recurrence, click the Save button. If you wish to review or verify when Payments are scheduled, go to the Payments Page.
NOTE: No payments will appear on the Payments Page until the Schedule and its Recurrence have been saved.
Notes Page
The Notes page allows you to enter information concerning the Payment Schedule that is not contained in the data already entered on the Details or Recurrence pages.
For example, you may have changed the Status of the Lease Payment Schedule from "Active" to "In Dispute" while you are in discussions with the landlord over payments. You may wish to record when and why the payments were changed. It is recommended that if you are using the Notes page, the information be entered in the following format &ldots; Date, Notation, Initials of Person who entered the note. Also, it is recommended that you keep the most current note to the top.
Payment Summary Page
The Payment Summary page summarizes the various dollar values of all Payments created by the Payment Schedule.
It also records the dollar values of finalized, exported and paid payments. These amounts will accumulate as payments are exported to your accounting package.
Special Billing
Type topic text here.
Standard Billing
Type topic text here.
Steps to Set Up Billing
Type topic text here.
Transferring Billing Details to Accounting System
Type topic text here.
Viewing Allocated Revenue
At any time you can view your Allocated Revenues in Ad Manager by going to Tools - Financial - View Allocated Revenue in the Main Explorer Window. When you do this, the following window will appear:
Here you will enter if you wish to view the Revenues by Lease, Site, Face or Posting; the Start Date from which you wish to view the data and for how many periods; and the duration of each period. For example, if you wish to see the revenues for particular lease and need to provide a listing of all Postings to accompany the cheque, you would choose Postings and check the box beside Filter to input the Lease criteria. Perhaps this is a quarterly payment, so you would enter the start date for 3 periods and the duration would be 1 month. When all the criteria have been entered, click OK and Ad Manager will display this information accordingly.
You can customize the view of these results to display only the information you wish to appear on your report and sort it as required. You can also store your customized view by clicking View - Stored Views - Save Current View As, name the view and click OK. This will save the customized view so it can be applied as required to a listing of revenue by postings as in our example above by clicking View - Stored Views, and selecting the desired view from the list.
You can print the resulting list from this window by clicking the Print button in the toolbar. To do any further calculations (e.g. Totaling columns, figuring % amounts) you would export the list by clicking File - Export and then open it in a program such as Excel.
It is important to note that the Revenue Calculations in Ad Manager are based on Face Days which is a much more accurate method as monies are allocated dependent upon how many days in each month the client is advertising. If the Posting schedules cross from one month to another, each month will receive a portion of allocation based on the number of days the ad appeared. The amounts shown using this Tool reflect this method of allocation.
The following are examples of how the data will display, depending upon whether you select Lease, Site, Face or Postings from the dropdown.
