Difference between revisions of "Rate cards (static)"
m (→Adding a Rate Card (Static)) |
m (→Adding a Rate Card (Static)) |
||
| Line 4: | Line 4: | ||
== Adding a Rate Card (Static) == | == Adding a Rate Card (Static) == | ||
| − | To add rates for | + | To add rates for static advertising opportunities, go to the Rates Folder in Tree View and click All Rate Schedules(Static). Go to the File menu and click New, Rate Schedule (Static), or right click in the Detail View and select New. |
[[File:New_Rate_Card_(Static).JPG]] | [[File:New_Rate_Card_(Static).JPG]] | ||
Revision as of 12:49, 2 November 2016
Ad Manager allows users to set up Rate Cards for each advertising opportunity. A Rate Card is assigned to a Rate Schedule, and Rate Schedules are assigned to Faces. You can have as many Rate Cards as necessary in the system, and multiple advertising opportunities can be set to have the same Rate Schedule.
Once you have assigned a Rate Schedule to a Face, updating the Rate Card for all Faces with that Rate Schedule is easy - you add the new Rate Card and Save it. All the Faces with that Rate Schedule will automatically inherit the new Rate Card as of the Starting On date.
Adding a Rate Card (Static)
To add rates for static advertising opportunities, go to the Rates Folder in Tree View and click All Rate Schedules(Static). Go to the File menu and click New, Rate Schedule (Static), or right click in the Detail View and select New.
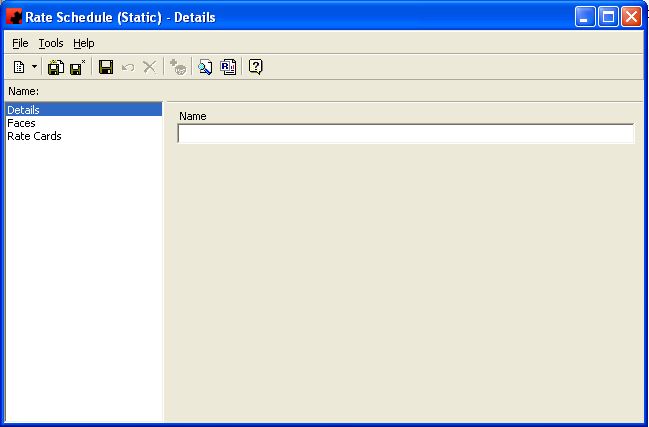
On the Details tab you can specify the Name for this particular Rate Schedule. Once you have done this, click the Save ()button so you can add Rate Cards to it.
Go to the Rate Cards tab for this schedule and click the New button ().
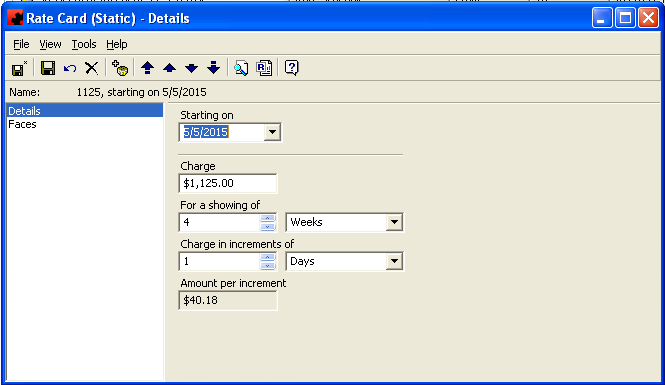
To add a new Rate, click the New button (). The Starting On combo box is where you can identify the date that the Rate Card will take effect for this Face.
In the Charge text box, specify the rate that you wish to enter for this particular Rate Card. In the For a showing of portion of the screen, enter the duration that the above charge is for. You can then identify the minimum increment to charge a client for, and Ad Manager will show you what the Amount per increment will be. For example, if you charge $1000 for a 4 week showing, you can specify that you will charge in 1 week increments, meaning a 31 day showing, or a 5 week showing would both be charged at 5 weeks ($1000 for 4 weeks, plus $250 for the 1 week increment).
When you are finished entering the information for this Rate Card, click Save ().
Adding a Rate Schedule to a Face
Once you have created the Rate Card, the Rate Schedule can then be assigned to 1 or more Faces. To assign a Rate Schedule to Faces, create a Finder by using the Find Tool () and look for Faces. Enter the criteria you wish to use to narrow the list of Faces and click Find (
). Highlight the Face(s) you wish to assign this Rate Schedule to. Right click and choose Update. Click the Rate Schedule check box on the General tab and select the desired Rate Schedule from the list and click OK.

