Difference between revisions of "Bill definition"
(→Notes) |
(→Recurrence) |
||
| Line 158: | Line 158: | ||
== Recurrence == | == Recurrence == | ||
| − | The Recurrence Page allows you to identify how often and for how long you wish to invoice this Contract | + | The Recurrence Page allows you to identify how often and for how long you wish to invoice this Contract. The page will change according to the Recurrence pattern you select. |
[[File:New_Bill_Definition_Recurrence_weekly.JPG]] | [[File:New_Bill_Definition_Recurrence_weekly.JPG]] | ||
Revision as of 10:37, 25 July 2013
Page for Bill Definitions
Contents |
Applies To
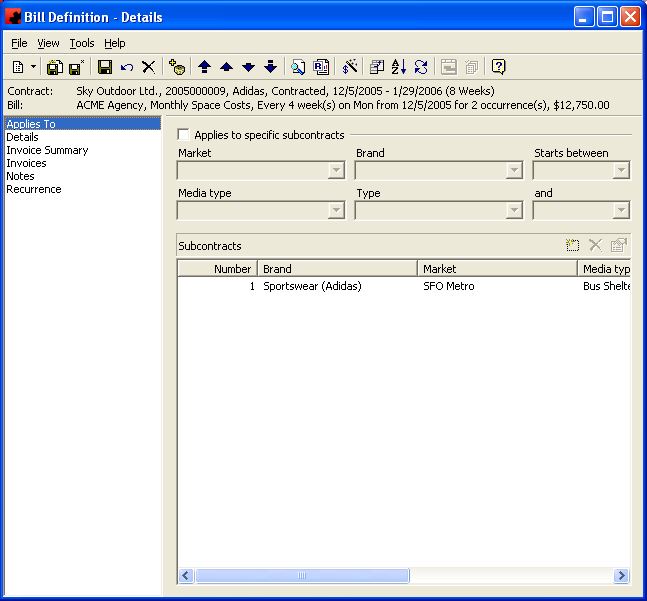
The Applies To Page allows for the identification of whether the Bill Definition applies to a particular subset of Subcontracts. You might use this page if you have a single Contract with Subcontracts set up representing different Media Types or Markets and the invoicing will happen on different dates; or another example might be that you have Bonus Subcontracts set up on your Contract and you don't want to send out an Invoice for these.
For information on the buttons that appear at the top of the window, click here. For information on the menu items that appear under the Tools menu, click here.
To use this page, click on the box beside the "Applies to specific subcontracts" and then enter the criteria for the particular Subcontracts to which this Bill Definition will apply.
Tool buttons found at the top of the Bill Definition - Details Screen when you are on the Applies To Page:
- Customize Current View allows you to select the columns to display and the order to display them in.
- Order allows you to sort the Subcontracts in the desired order.
- The Refresh button will reload the list of Subcontracts, in the event changes to the Subcontracts have occured since you visited this page.
- The Chart button allows you to chart (schedule) Faces to the highlighted Subcontract.
- The Update button allows you to select one or more Subcontracts and update information for them. All highlighted Subcontracts will be changed to reflect the items selected.
Tool buttons found on top of the Subcontracts listing:
- Add a new Subcontract for this Contract . The Subcontract window will appear where you can enter information for the Subcontract.
- Delete the highlighted Subcontract from this Contract. Highlight the item and click the Delete button.
- Opens the Subcontract window to allow you to review or change any properties related to the Subcontract.
Fields
Brand: The brand information can be entered for an Advertiser with a number of different product lines. For example, Advertiser Ford would have brands such as Mustang, Probe, Explorer, Taurus and Windstar.
Market: The Market is what sales definition has been sold.
Media Type: The Media Type for this Subcontract.
Starts between... and ...: This is the date range you are searching for Subcontracts to match the Bill. You can enter the date or select the date from the dropdown calendar.
Subcontracts: This is a listing of the Subcontracts the Bill Definition will apply to. What you enter as your criteria will determine this list.
Type: The Subcontract Type for this Subcontract. There are four possible choices; Sold, Bonus, Trade, and Public Service.
Details
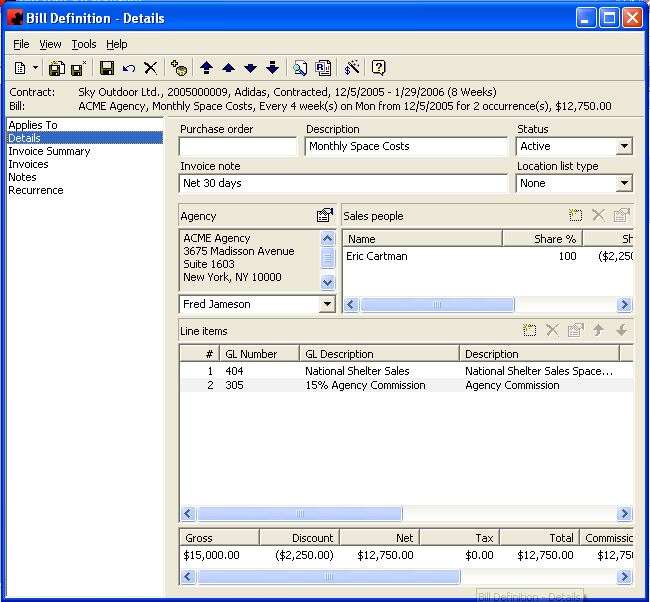
The Details Page is where information about the Bill Definition is displayed. Information on the status of the Bill, on who you are invoicing, and what the line items for this Bill are can be found on this page.
For information on the buttons that appear at the top of the window, click here. For information on the menu items that appear under the Tools menu, click here.
Fill in the appropriate information for each field. Select the appropriate item from any of the drop down lists (in the boxes) or type in the information if it is not present.
The Line items pane shows a listing of all Line Items that are assigned to this Bill Definition. The functions available through the buttons immediately above the pane are:
- Add a new Line Item to the Bill Definition. Click on this button and the Bill Line Item screen will open where you enter in a description for the Line item, as well as the GL Code to which this Line item is assigned.
- Delete the highlighted Line item from the Bill Definition.
- Edit the information for the highlighted Line item.
- Move the highlighted Line item up in the list of Line items.
- Move the highlighted Line item down in the list of Line items.
Fields
Agency: This is the person(s) or company that will be invoiced for this Bill Definition. You can select the appropriate Agency contact from the list or add them in by typing the appropriate name in the field. Ad Manager will default to the Agency that has been input on the Details page of the Contract.
Description: This is a quick description of what this Bill Definition pertains to. This description is for internal use only so that a user can identify this particular Bill on a listing of Bill Definitions.
Invoice Note: This is an additional line of information that you may want to appear on your Invoices. This note should apply to all invoices of this Definition. If it does not, enter the note individually on each Invoice once they have been created.
Line Items: This is a listing of items that are included on this Bill Definition. For information on how to enter line items to a Bill Definition, click here.
Location List Type: If you wish to have a location list appear on your Invoice, choose the format of the list by selecting it from this dropdown list. This does not automatically happen, but will need to be programmed to appear in the required format.
Purchase Order: This field will populate from the Contract Details page, if you have entered a purchase order number there.
Sales people: This field will populate from the Contract Details page, if you have entered the sales person(s) there. Otherwise, you can click on the New button above the pane and select a name from the list.
Status: The status determines if the Invoices of this Bill Definition can be exported. Only "Active" and "Force" statuses can be part of an Invoice Export file.
At the bottom of the page, you can view a summary identifying all billing to be collected on this Bill Definition.
Invoice Summary
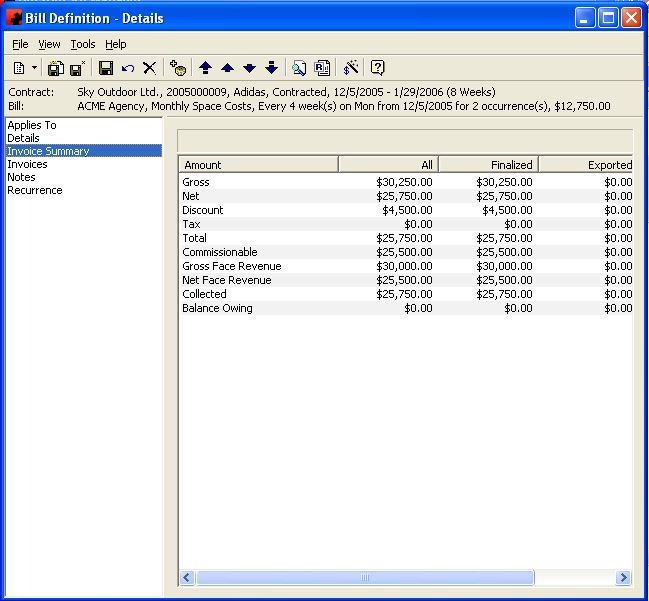
The Invoice Summary Page allows you to identify how well you have reached your Invoicing requirements. From this screen you can see how much money has been Invoiced, Finalized, Exported, Sent, Collected and the Current Balance Owing for this Bill Definition. As well as how much money is Commissionable and Discounted.
For information on the buttons that appear at the top of the window, click here. For information on the menu items that appear under the Tools menu, click here.
Invoices
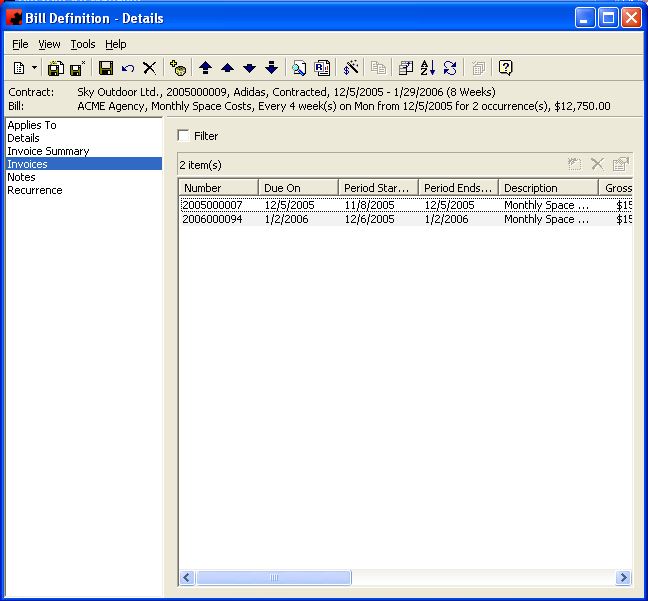
The Invoices Page allows you to review and verify when Invoices are scheduled as well as provide you with a listing of all Invoices created as a result of the Bill Definition.
For information on the buttons that appear at the top of the window, click here. For information on the menu items that appear under the Tools menu, click here.
Tool buttons found at the top of the Bill Definition - Details screen when you are on the Invoices Page:
![]() - This tool allows you to allocate the revenue from the Bill Definition to the appropriate Faces.
- This tool allows you to allocate the revenue from the Bill Definition to the appropriate Faces.
- Customize Current View allows you to select the columns to display and the order to display them in.
- Order allows you to sort the Invoices in the desired order.
- The Refresh button will reload the list of Invoices, in the event changes to the Invoices have occurred since you visited this page.
- The Update button allows you to select one or more Invoices and change information on them. All highlighted Invoices will be changed to reflect the items selected.
The functions available through the buttons immediately above the Invoices pane are:
- Add a new Invoice for this Bill Definition. The Invoice-Detail window will appear where you can enter information related to the Invoice.
- Delete the highlighted Invoice from this Bill Definition. Highlight the item and click the Delete button.
- Opens the Invoice-Details window to allow you to review or change any information related to the Invoice.
Right Click
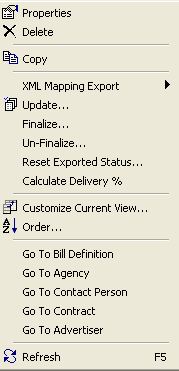
- Right clicking on the list of Invoices will display this menu. From here you can change the due date of an Invoice, the status of an Invoice as well as any line items by using the Update option, as well as, finalize, un-finalize, reset the exported status, and calculate the delivery percentage of an Invoice or group of highlighted Invoices.
To change the information being viewed in the list, simply right click in the list, and choose Customize Current View. To change the sort order, simply right click in the list, and choose Order.
Update - The Update menu item allows you to to modify a property (or properties) for one or more highlighted Invoices.
Finalize - Finalizing an Invoice will prevent you from making additional changes to it. This can be done manually prior to an Invoice Export, by using this tool, or it will automatically occur during the Export. If you wish to finalize invoices using this tool, highlight them first, then right-click to get this menu option. Once finalized, the Invoice is marked so and will display a unique Transaction ID as well as an Invoice Number.
Un-Finalize - If an Invoice has incorrectly been marked as Finalized, this tool allows you to un-finalize it. Ad Manager will remove the Finalized status of the Invoice, but will still show a unique Transaction ID, indicating this Invoice was Finalized at one time.
Reset Exported Status - If an Invoice has been Exported incorrectly, this tool allows you to mark it as un-exported, so that you may Export it again at a later date.
Calculate Delivery % - This tool will tell you the percent of completed Posting Tasks vs. Scheduled Postings for the period of the selected Invoice(s). This will allow you to determine if enough postings have been completed so that the Invoice can be Finalized and Exported.
Go To - The Go To feature allows you to open a window for the appropriate item for the highlighted record.
The Filter check box allows you to filter the listing of Invoices to show only those that meet a certain criteria. When selected, a filter screen will appear, allowing you to choose to see Invoices that are due on a certain date, finalized or exported on a certain date, etc. When a filter is active, a check mark will appear in the Filter box. To clear the filter and see all records, click on Filter, then the Clear button the Filter screen, followed by the OK button.
Notes
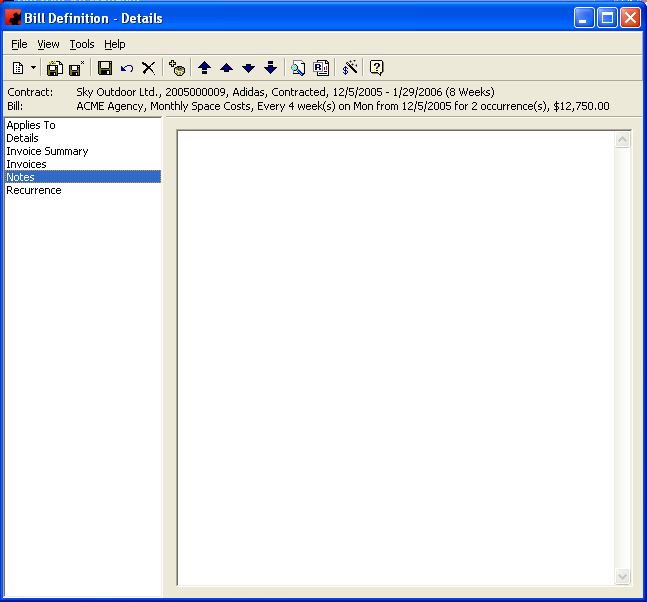
The Notes Page allows you to store general notes about the Bill Definition. This page can be used to enter information concerning the Bills that is not contained in the data already entered on the Details or Recurrence pages.
For information on the buttons that appear at the top of the window, click here. For information on the menu items that appear under the Tools menu, click here.
Recurrence
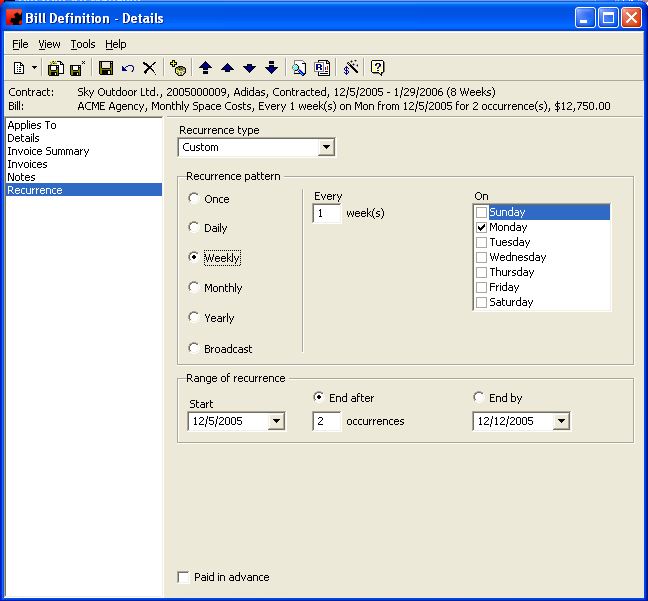
The Recurrence Page allows you to identify how often and for how long you wish to invoice this Contract. The page will change according to the Recurrence pattern you select.
For information on the buttons that appear at the top of the window, click here. For information on the menu items that appear under the Tools menu, click here.
Tool buttons found at the top of the Bill Definition - Details Screen when you are on the Recurrence Page:
![]() - This tool allows you to allocate the revenue from the Bill Definition to the appropriate Faces.
- This tool allows you to allocate the revenue from the Bill Definition to the appropriate Faces.
Fields
Paid in advance: This allows you to identify whether the Invoices are "Paid in Advance" (i.e. The Invoice is sent at the start of the display period) by leaving the check in the box or sent at the end of the display period by removing the check form the box. To remove the check from the box, click on the box.
Period: The display period for which the Invoice pertains.
Range of recurrence: The period during which time you wish Invoices to be generated.
Recurrence Pattern: This section allows you to identify how often and for how long you wish to invoice this Contract. You can select to either invoice once, daily, weekly, monthly, yearly or using the Broadcast calendar. The fields available to you will change depending on which pattern you choose.
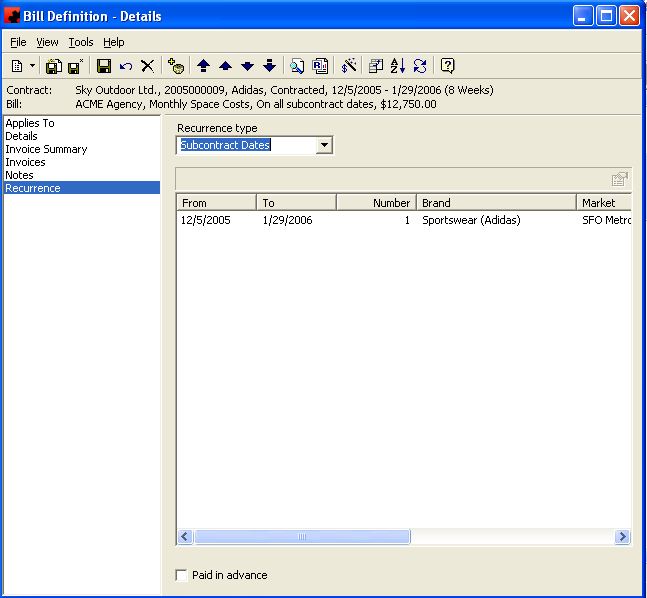
Recurrence Type: This allows you to identify how you wish to invoice for this Contract. You have two choices, custom and by subcontract dates. Custom allows you set up your recurrence pattern by date and number of occurrences whereas subcontract dates will set up your invoicing based on the start date of each of the Subcontracts on this Contract.
Ad Manager will automatically set up the number of Invoices which correspond to these dates and display them on the Invoices page for you to verify.
The Recurrence page will change according the Recurrence Type and Recurrence Pattern you select. Selecting Recurrence Type "Subcontract Dates" would give you the following screen.
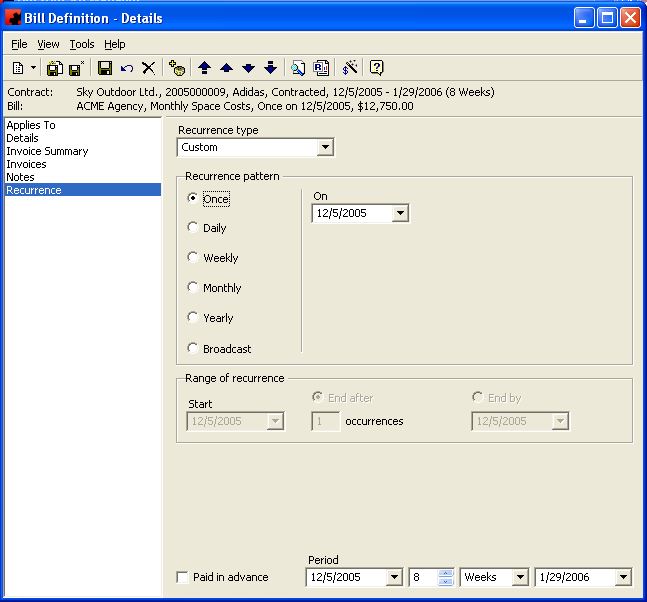
If you used the Recurrence Type "Custom" and Recurrence Pattern "Once", you would get the following page:
In this instance, you would choose the date for which to invoice.
If you used the Recurrence Type "Custom" and Recurrence Pattern "weekly", you would get the following page:
In this instance, you would need to select how often and on which day of the week you wish to invoice.
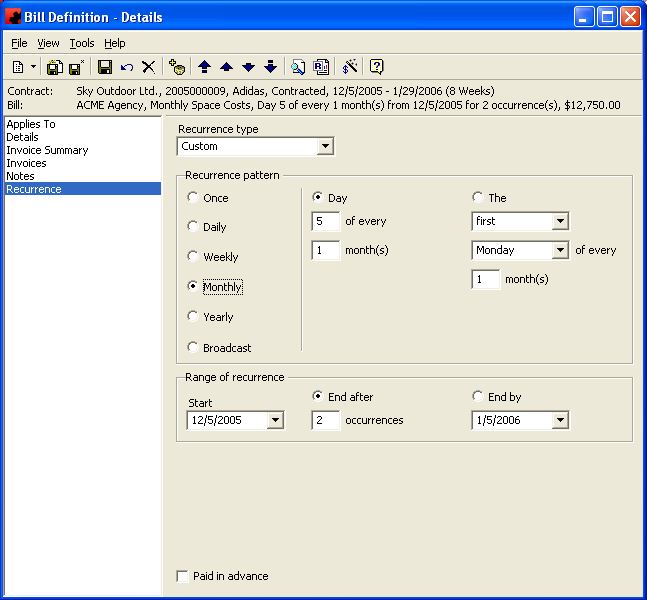
If you used the Recurrence Type "Custom" and Recurrence Pattern "Monthly", you would get the following page:
