Difference between revisions of "Ad Manager Data Warehouse: Setup and configuration"
(→External links) |
|||
| (One intermediate revision by one user not shown) | |||
| Line 197: | Line 197: | ||
Snapshots with a given cut-off date will tend to get larger as time goes on and new data accumulates in Ad Manager. | Snapshots with a given cut-off date will tend to get larger as time goes on and new data accumulates in Ad Manager. | ||
| + | |||
| + | == External links == | ||
| + | |||
| + | [https://docs.microsoft.com/en-us/sql/relational-databases/security/authentication-access/managing-logins-users-and-schemas-how-to-topics?view=sql-server-2017 Managing Logins, Users, and Schemas] | ||
| + | |||
| + | [https://docs.microsoft.com/en-us/sql/relational-databases/databases/create-a-database?view=sql-server-2017 Create a Database] | ||
| + | |||
| + | [https://notepad-plus-plus.org/ Notepad++] | ||
Latest revision as of 15:30, 3 August 2018
Contents |
Prerequisites
A SQL Server instance for the data warehouse
The server needs to be provisioned with adequate disk space for data and transaction logs. The data disk space requirements depend on the size of the snapshots and the number of snapshots that will be retained. The transaction log disk space requirements depend on the size of each snapshot. The size of the snapshots in turn depends on the number and size of the source Ad Manager databases and the cut-off date of the snapshot.
Since it's hard to know the disk space requirements in advance it would be best to use dynamic disks that can be expanded as required.
Ideally the SQL server machine will have a dedicated partition for data and a dedicated partition for transaction logs.
A Windows machine to run the data pump on
The data pump is a Windows executable and requires network access to both the source Ad Manager database server(s) and the data warehouse server.
This could be the data warehouse server itself.
SQL Server database users with read access in each Ad Manager database
On each SQL Server hosting an Ad Manager database, create a login for the data pump and map it to the Ad Manager database with the db_datareader role. (See Managing Logins, Users, and Schemas.)
SQL Server Management Studio and admin access to the data warehouse SQL Server
Install the data pump
Run the provided installer (AnalyticsDataPump-r####.msi) and follow the prompts.
The installer will create a Start menu folder named "Dot2Dot Analytics Data Pump".
Create the data warehouse database
Create the SQL Server database
Use SQL Server Management Studio to create a new database on the data warehouse SQL Server.
We suggest the name "amdw".
If you have provisioned a dedicated transaction log partition, change the path of the database log file (General page).
Set the recovery model of the database to "Simple" and enable the "Auto Shrink" Automatic option (Options page).
Create the database tables and views
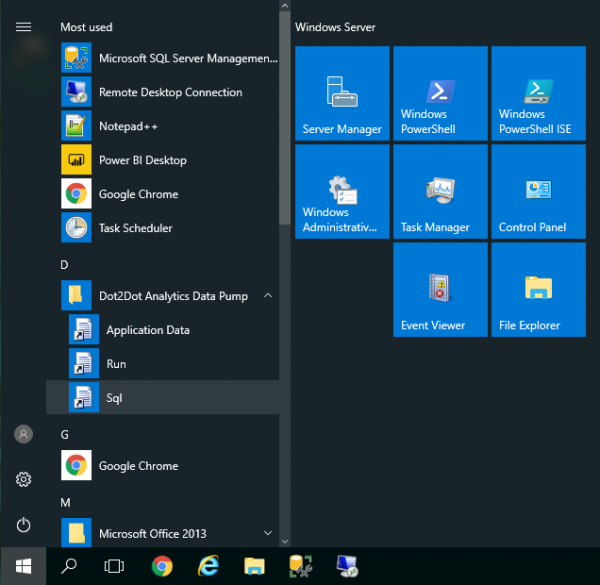
Open the folder containing the data pump SQL scripts in Windows explorer (Start : Dot2Dot Analytics Data Pump : Sql).
Drag the file named "create-tables.sql" into SQL Server Management Studio and execute it against the data warehouse database.
Drag the file named "create-views.sql" into SQL Server Management Studio and execute it against the data warehouse database.
Create a database user with write access to the database
Create a login for the data pump and map it to the data warehouse database with the db_datawriter role.
Configure the data pump
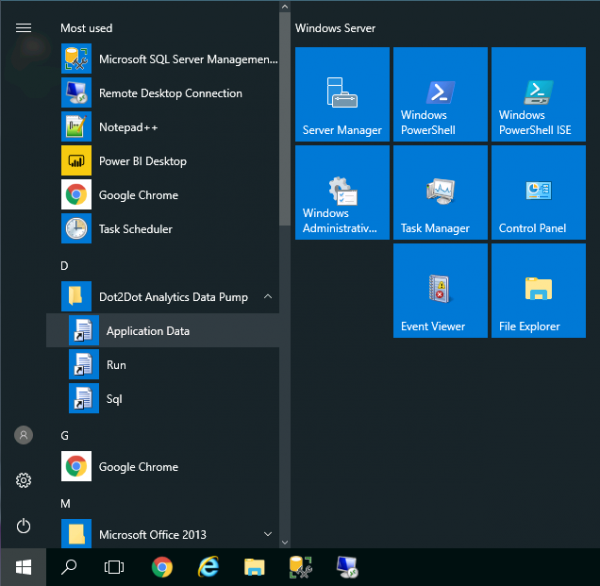
Open the data pump's application data folder (Start : Dot2Dot Analytics Data Pump : Application Data) and edit the "AnalyticsDataPump.xml" in a text editor (we suggest Notepad++).
Data warehouse connection
 ...
 <targets>
   <target>
     <connection>ODBC connection string</connection>
     ...
Example (login using Windows authentication):
<connection>Provider=MSDASQL;Driver={SQL Server};Server=tcp:localhost;Database=amdw;Trusted_Connection=Yes</connection>
Example (login using SQL Server authentication):
<connection>Provider=MSDASQL;Driver={SQL Server};Server=tcp:localhost;Database=amdw;Uid=user;Pwd=secret</connection>
Snapshot cut-off date
 ...
 <targets>
   <target>
     ...
     < !-- Ignore bookings and contracts that end before the cut-off date -->
     <cut-off>yyyy-mm-dd</cut-off>
     ...
Snapshot retention duration
 ...
 <targets>
   <target>
     ...
     < !-- The snapshot retention period (optional); unit: weeks, months, years -->
     <snapshot-retention-period>
       <length>N</length>
       <unit>weeks or months or years</unit>
     </snapshot-retention-period>
     ...
Delete batch size
When purging old snapshots, the data pump has to delete large numbers of records. This can result in the transaction log file growing to very large sizes. To avoid running out of disk space, the data pump can perform the deletions in batches. The larger the batch size, the larger the transaction log can grow. Set this value to a few hundred thousand records.
 ...
 <targets>
   <target>
     ...
     < !-- The maximum number of records to delete at a time when purging data; 0 - no limit -->
     <delete-batch-size>500000</delete-batch-size>
     ...
User fields to extract
 ...
 <targets>
   <target>
     ...
     <user-fields>
       < !-- Classes:
         cpcore_contract, cpcore_site, cpcore_lease,
         cpdm2_location, cpdm2_subcontract,
         cpsm_face, cpsm_subcontract. -->
       <user-field class="class" name="name">new name (optional)</user-field>
     </user-fields>
     ...
For example, extract the Contract user field named "ntnl" and name it "National" in the data warehouse, and extract the site user field "own" and name it "Own Property" in the data warehouse:
       <user-field class="cpcore_contract" name="ntnl">National</user-field>
       <user-field class="cpcore_site" name="own">Own Property</user-field>
Source Ad Manager databases
 ...
 <targets>
   <target>
     ...
     <sources>
       <source id="id01" code="01" name="Name 1" company="co">
         <connection>Provider=MSDASQL;Driver={SQL Server};Server=tcp:host;Database=amdb1;Trusted_Connection=Yes</connection>
       </source>
       <source id="id02" code="02" name="Name 2" company="co">
         <connection>Provider=MSDASQL;Driver={SQL Server};Server=tcp:host;Database=amdb2;Uid=user;Pwd=password</connection>
       </source>
     </sources>
     ...
Schedule the execution of the data pump
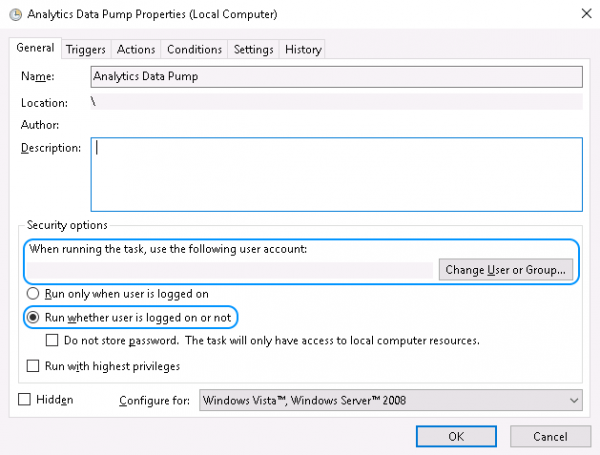
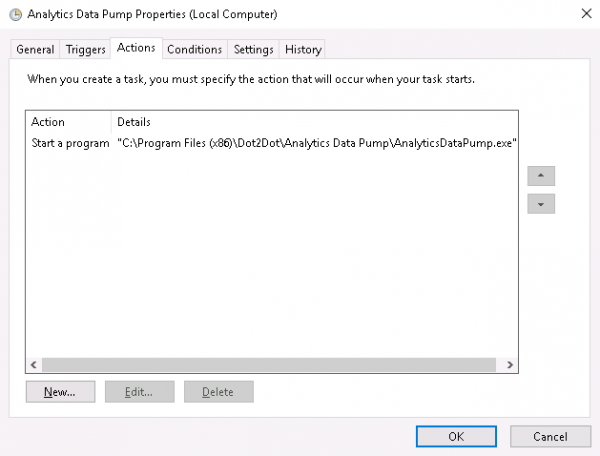
Use Windows Task Scheduler to schedule the periodic execution of the data pump.
If the data pump will use Windows authentication to connect to any databases, make sure the scheduled task uses that user account when running.
Make sure the task can run even if the user is not logged on.
The data pump does not require elevated privileges.
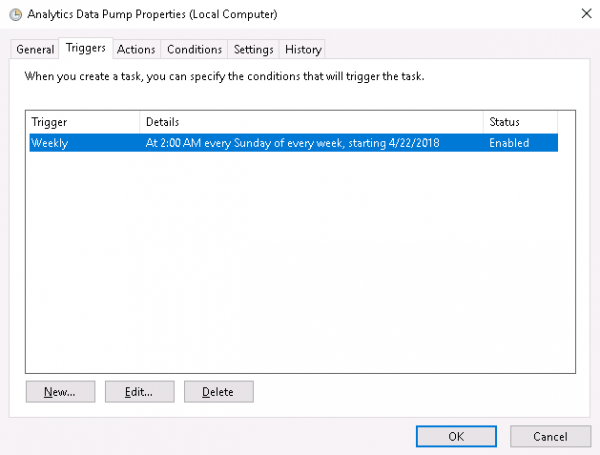
Set up the times that will trigger the task execution.
Set up starting the "AnalyticsDataPump.exe" program (located in "C:\Program Files (x86)\Dot2Dot\Analytics Data Pump" by default) as the action of the task.
Monitor the data warehouse
Examine the data pump logs
Open the data pump's application data folder (Start : Dot2Dot Analytics Data Pump : Application Data) and navigate to the "Logs" sub-folder. Sort it by Name in a descending order.
The data pump writes its log entries in files named "AnalyticsDataPump-yyyy-mm-dd.log" where "yyyy-mm-dd" is the date of the entry. If a run happens to continue after midnight, its log entries will span two log files.
Open the log file in a text editor. Scroll to the bottom - a successful run will have these entries:
08:44:24 INFO    Worker: Processing target: finished.
08:44:24 INFO    App: Finished.
Errors will be reported in ERROR log entries.
Examine the data
Latest snapshot
select * from dim_latest
Snapshot list
select * from dim_as_of
order by date desc
Monitor disk space
After each run of the data pump it's a good idea to check how much the database has grown. This can help estimate the size of a snapshot and how much room for the database to grow there is.
Snapshots with a given cut-off date will tend to get larger as time goes on and new data accumulates in Ad Manager.
