Difference between revisions of "How To Set Up Publishing To Content Manager"
Pat.wilkin (Talk | contribs) |
|||
| (16 intermediate revisions by 4 users not shown) | |||
| Line 1: | Line 1: | ||
| − | This section will detail how to set up Ad Manager to publish to Content Manager. This set up is required with Ad Manager's New Digital Module (Digital 2) in order to publish from Ad Manager to Content Manager. | + | This section will detail how to set up Ad Manager to publish to Content Manager. This set up is required with Ad Manager's New Digital Module (Digital 2) in order to publish from Ad Manager to Content Manager as well as retrieve the Proof of Play from Content Manager. |
Please note that it is preferable that Content Manager is controlled by one Ad Manager. Also it is prefereable that this set up be completed by the company's IT personnel on the SQL Server. | Please note that it is preferable that Content Manager is controlled by one Ad Manager. Also it is prefereable that this set up be completed by the company's IT personnel on the SQL Server. | ||
| − | == | + | == Installing the Synchronization Services == |
| − | Install AmCmSync on the computer by running the AmCmSync. | + | Install AmCmSync on the computer by running the AmCmSync.msi installer. |
| + | |||
| + | [[File:AmCmSync.msi Installer.jpg]] | ||
When prompted to set the service login, enter the Windows login account information for the computer, including the network domain name. If it is a local user (there is no domain name), enter ".\" instead of the domain. As well, enter and confirm the password for the login specified. | When prompted to set the service login, enter the Windows login account information for the computer, including the network domain name. If it is a local user (there is no domain name), enter ".\" instead of the domain. As well, enter and confirm the password for the login specified. | ||
If the login credentials provided are not correct, the installation will notify that there is an issue with the information that has been entered. If this occurs, close the installer and restart the installation of the AmCmSync program again. | If the login credentials provided are not correct, the installation will notify that there is an issue with the information that has been entered. If this occurs, close the installer and restart the installation of the AmCmSync program again. | ||
| − | Once the log in details have been successfully entered, the Synchronization Service will be successfully installed. | + | Once the log in details have been successfully entered, the Synchronization Service will be successfully installed. |
| + | |||
| + | [[File:Set Service Login.jpg]] | ||
When successfully installed, there will be two new services that will now run on the computer - "Dot2Dot Ad Manager CM Playback Count Service" and "Dot2Dot Ad Manager CM Publishing Service". | When successfully installed, there will be two new services that will now run on the computer - "Dot2Dot Ad Manager CM Playback Count Service" and "Dot2Dot Ad Manager CM Publishing Service". | ||
These services are set to manual by default. | These services are set to manual by default. | ||
| − | They can be set to start automatically by going to (My) Computer - (right click)>Manage - Services and Applications - Services. Select each service and change it to "Automatic". | + | They can be set to start automatically by going to (My) Computer - (right click)>Manage - Services and Applications - Services. Select each service and change it to "Automatic". |
| + | [[File:Computer Management.jpg]] | ||
| − | == | + | == Configuring the Synchronization Services == |
Go to the Start Menu - All Programs - Dot2Dot Ad Manager CM Synchronization Services. | Go to the Start Menu - All Programs - Dot2Dot Ad Manager CM Synchronization Services. | ||
| Line 23: | Line 28: | ||
Choose Configure from the list. | Choose Configure from the list. | ||
| − | == Ad Manager Connection == | + | [[File:Launch Configure.jpg]] |
| + | |||
| + | === Ad Manager Connection === | ||
This page is used to enter login details for Ad Manager. | This page is used to enter login details for Ad Manager. | ||
| − | === Fields === | + | [[File:Ad Manager Connection.jpg]] |
| + | |||
| + | ==== Fields ==== | ||
Server - Enter the Server name for Ad Manager | Server - Enter the Server name for Ad Manager | ||
| − | Database - Enter the | + | |
| + | Database - Enter the Database name for Ad Manager | ||
| + | |||
User ID - Enter the User ID (NOTE: If using Windows Authentication, this field will be blank) | User ID - Enter the User ID (NOTE: If using Windows Authentication, this field will be blank) | ||
| + | |||
Password - Enter the Password for the User ID entered above. (NOTE: If using Windows Authentication, this field will be blank) | Password - Enter the Password for the User ID entered above. (NOTE: If using Windows Authentication, this field will be blank) | ||
| − | To test if the details entered are correct, click the <Test> button. Ad Manager will notify you if the test was successful. If not, revise the | + | To test if the details entered are correct, click the <Test> button. Ad Manager will notify you if the test was successful. If not, revise the information and test again. |
| − | == Advanced == | + | === Advanced === |
This page is used to change the default settings for the synchronization service. | This page is used to change the default settings for the synchronization service. | ||
| − | === Fields === | + | [[File:Advanced.jpg]] |
| + | |||
| + | ==== Fields ==== | ||
Logging level - Select the desired level of logging from the dropdown list. The choices (in order from most detailed/verbose to least detailed) are: | Logging level - Select the desired level of logging from the dropdown list. The choices (in order from most detailed/verbose to least detailed) are: | ||
- TRACE | - TRACE | ||
| Line 45: | Line 59: | ||
- ERROR | - ERROR | ||
- FATAL | - FATAL | ||
| + | |||
Poll interval - Specify how frequently the synchronization service is to check for new activity that needs to be published to Content Manager. | Poll interval - Specify how frequently the synchronization service is to check for new activity that needs to be published to Content Manager. | ||
| + | |||
Recovery interval - Specify how long to wait before trying to reconnect, if a connection to Ad Manager is lost. | Recovery interval - Specify how long to wait before trying to reconnect, if a connection to Ad Manager is lost. | ||
The Logs can be viewed by going to Start-All Programs - Dot2Dot Ad Manager CM Synchronization Services and selecting Logs. This will display a daily list of logs. Please note that logs in this folder are not automatically deleted. | The Logs can be viewed by going to Start-All Programs - Dot2Dot Ad Manager CM Synchronization Services and selecting Logs. This will display a daily list of logs. Please note that logs in this folder are not automatically deleted. | ||
| − | + | == Starting/Stopping the Services == | |
| − | ==Starting/Stopping the | + | |
To set the Synchronization Service to run automatically, see the third point of the installation for information on how to change the service to start automatically. | To set the Synchronization Service to run automatically, see the third point of the installation for information on how to change the service to start automatically. | ||
To manually start or stop both services, go to the Start menu - All Programs - Dot2Dot Ad Manager CM Synchronization Services, and selecting "Start "or "Stop" as appropriate. This will start/stop both the synchronization and publishing services. | To manually start or stop both services, go to the Start menu - All Programs - Dot2Dot Ad Manager CM Synchronization Services, and selecting "Start "or "Stop" as appropriate. This will start/stop both the synchronization and publishing services. | ||
| + | |||
| + | [[File:Dot2Dot CM Playback.jpg]] | ||
== Advanced Testing == | == Advanced Testing == | ||
| Line 63: | Line 80: | ||
In order to do this, the synchronization service must be stopped prior to proceeding (see above section). Once the service is stopped, go to the "Program Files\Dot2Dot\Ad Manager CM Sync Services" folder on the computer and double click "CpDm2Cm.exe". | In order to do this, the synchronization service must be stopped prior to proceeding (see above section). Once the service is stopped, go to the "Program Files\Dot2Dot\Ad Manager CM Sync Services" folder on the computer and double click "CpDm2Cm.exe". | ||
| − | Once the Dot2Dot Ad Manager CM Synchronization Console has opened, go to the Log Level menu item and select the type of desired logging to be run. Next, go to the Service menu item and select which service to start running. The console will display the logging details as they | + | [[File:CpDM2Cm exe.jpg]] |
| + | |||
| + | Once the Dot2Dot Ad Manager CM Synchronization Console has opened, go to the Log Level menu item and select the type of desired logging to be run. Next, go to the Service menu item and select which service to start running. The console will display the logging details as they occur. | ||
| + | |||
| + | [[File:Log Level.jpg]] | ||
| + | |||
| + | When the testing is finished, go to the Service menu item and select Stop to safely exit the program. | ||
| − | + | == See Also == | |
| − | + | * [[How to configure the Content Manager synchronization services to handle multiple Ad Manager databases|Handle multiple Ad Manager databases]] | |
Latest revision as of 08:54, 14 May 2015
This section will detail how to set up Ad Manager to publish to Content Manager. This set up is required with Ad Manager's New Digital Module (Digital 2) in order to publish from Ad Manager to Content Manager as well as retrieve the Proof of Play from Content Manager.
Please note that it is preferable that Content Manager is controlled by one Ad Manager. Also it is prefereable that this set up be completed by the company's IT personnel on the SQL Server.
Contents |
Installing the Synchronization Services
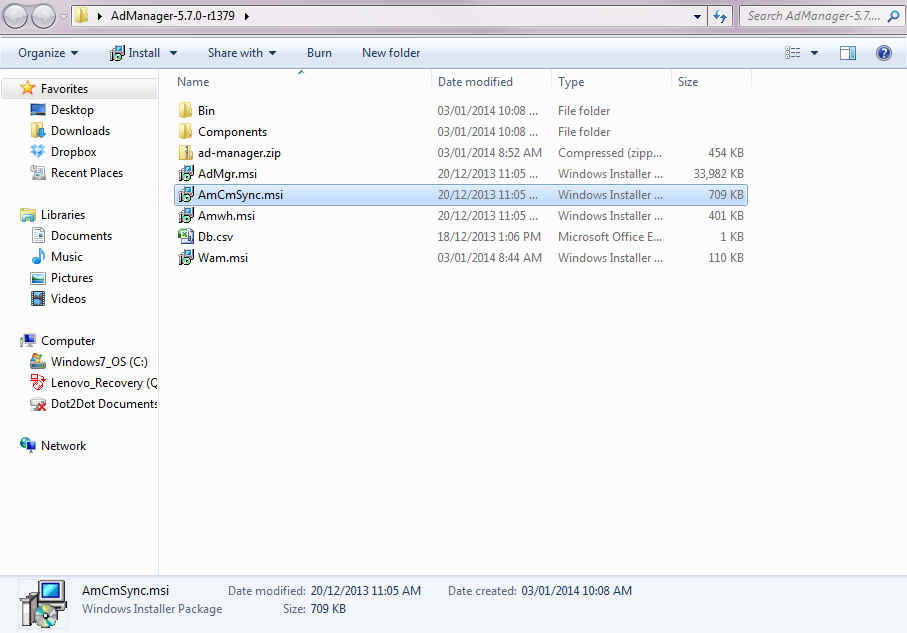
Install AmCmSync on the computer by running the AmCmSync.msi installer.
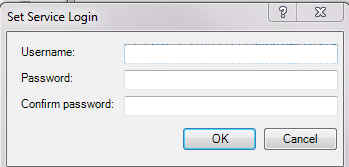
When prompted to set the service login, enter the Windows login account information for the computer, including the network domain name. If it is a local user (there is no domain name), enter ".\" instead of the domain. As well, enter and confirm the password for the login specified. If the login credentials provided are not correct, the installation will notify that there is an issue with the information that has been entered. If this occurs, close the installer and restart the installation of the AmCmSync program again. Once the log in details have been successfully entered, the Synchronization Service will be successfully installed.
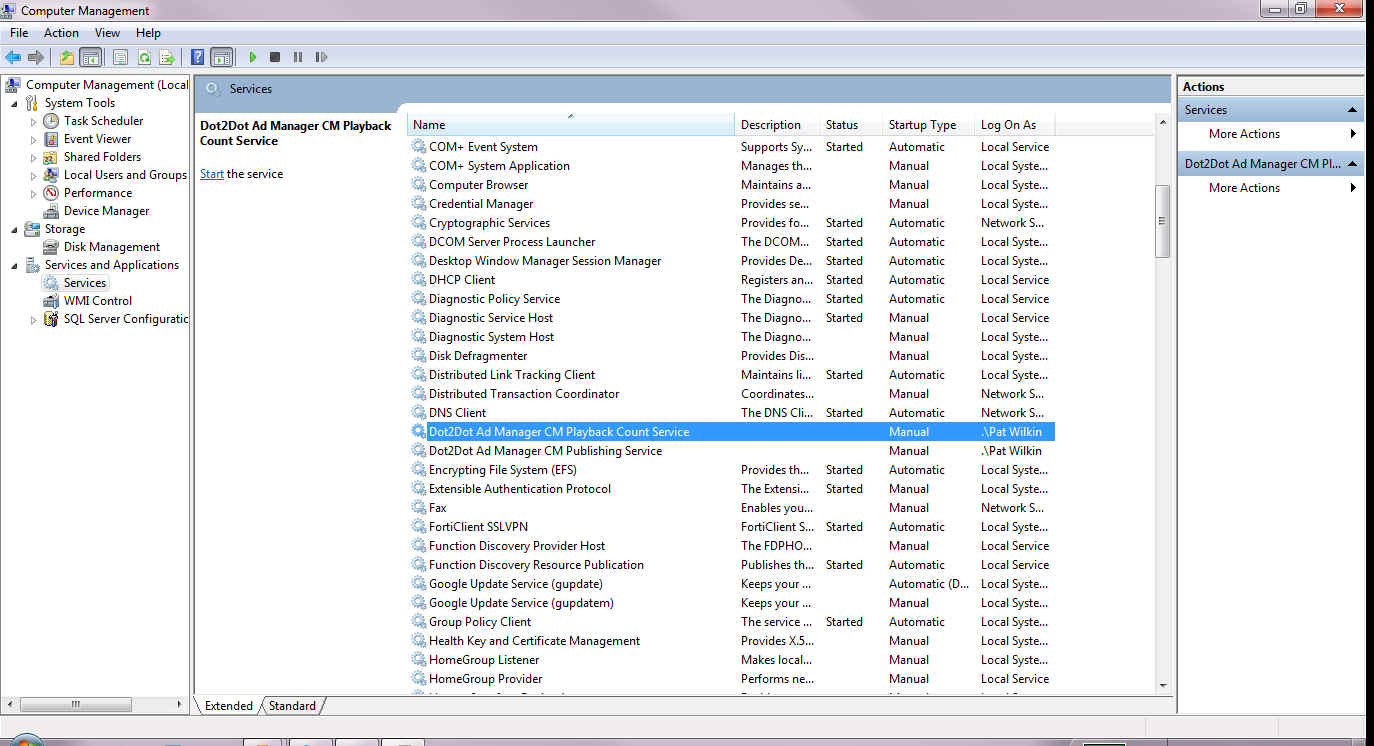
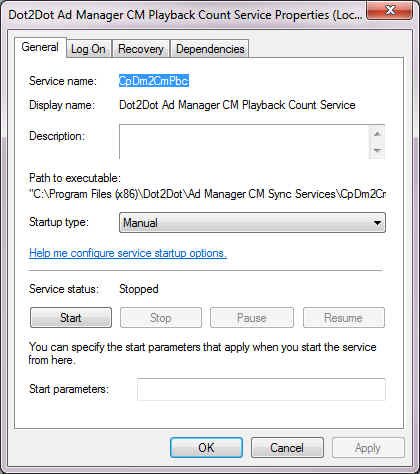
When successfully installed, there will be two new services that will now run on the computer - "Dot2Dot Ad Manager CM Playback Count Service" and "Dot2Dot Ad Manager CM Publishing Service". These services are set to manual by default. They can be set to start automatically by going to (My) Computer - (right click)>Manage - Services and Applications - Services. Select each service and change it to "Automatic".
Configuring the Synchronization Services
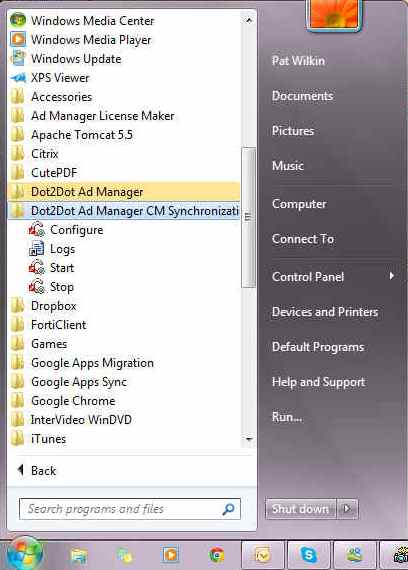
Go to the Start Menu - All Programs - Dot2Dot Ad Manager CM Synchronization Services.
Choose Configure from the list.
Ad Manager Connection
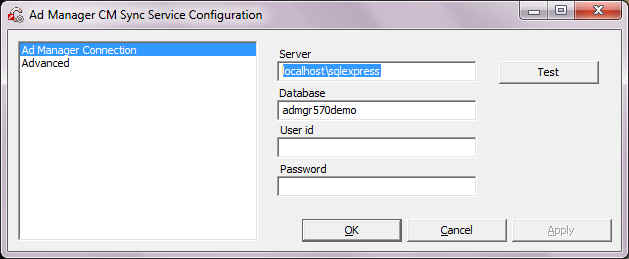
This page is used to enter login details for Ad Manager.
Fields
Server - Enter the Server name for Ad Manager
Database - Enter the Database name for Ad Manager
User ID - Enter the User ID (NOTE: If using Windows Authentication, this field will be blank)
Password - Enter the Password for the User ID entered above. (NOTE: If using Windows Authentication, this field will be blank)
To test if the details entered are correct, click the <Test> button. Ad Manager will notify you if the test was successful. If not, revise the information and test again.
Advanced
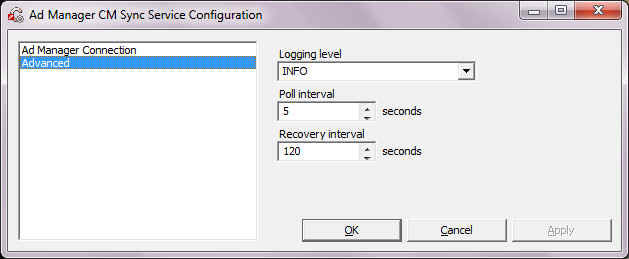
This page is used to change the default settings for the synchronization service.
Fields
Logging level - Select the desired level of logging from the dropdown list. The choices (in order from most detailed/verbose to least detailed) are: - TRACE - DEBUG - INFO - WARNING - ERROR - FATAL
Poll interval - Specify how frequently the synchronization service is to check for new activity that needs to be published to Content Manager.
Recovery interval - Specify how long to wait before trying to reconnect, if a connection to Ad Manager is lost.
The Logs can be viewed by going to Start-All Programs - Dot2Dot Ad Manager CM Synchronization Services and selecting Logs. This will display a daily list of logs. Please note that logs in this folder are not automatically deleted.
Starting/Stopping the Services
To set the Synchronization Service to run automatically, see the third point of the installation for information on how to change the service to start automatically.
To manually start or stop both services, go to the Start menu - All Programs - Dot2Dot Ad Manager CM Synchronization Services, and selecting "Start "or "Stop" as appropriate. This will start/stop both the synchronization and publishing services.
Advanced Testing
To undertake advanced testing of the connection, this can be done through a real time view of the logging.
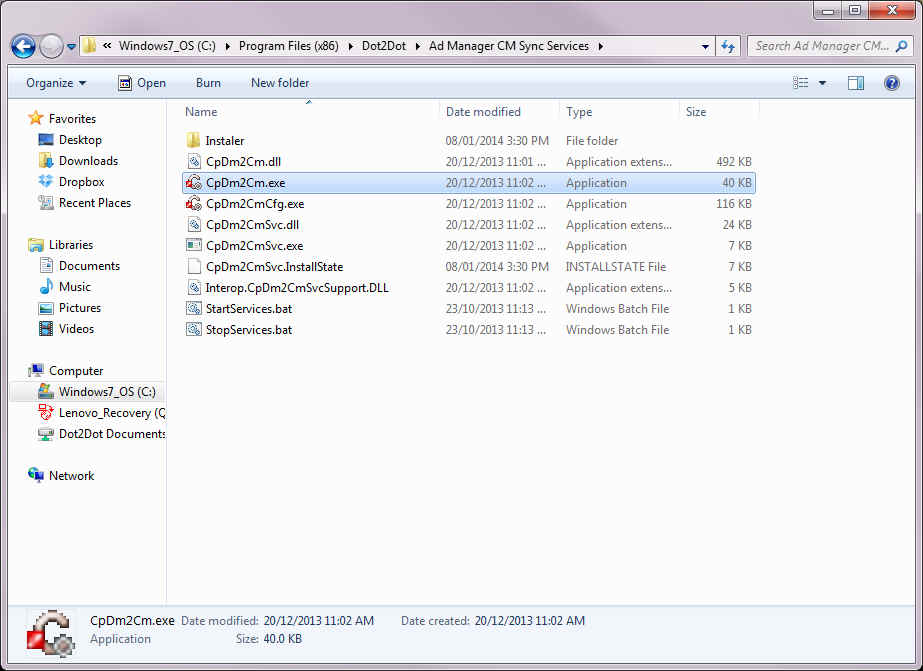
In order to do this, the synchronization service must be stopped prior to proceeding (see above section). Once the service is stopped, go to the "Program Files\Dot2Dot\Ad Manager CM Sync Services" folder on the computer and double click "CpDm2Cm.exe".
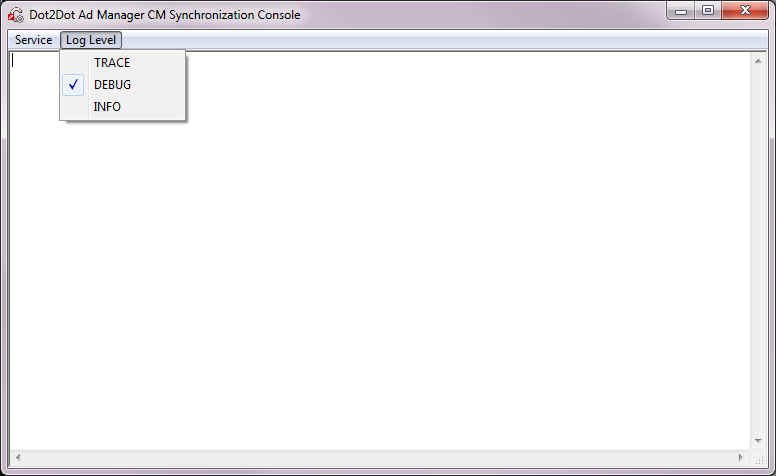
Once the Dot2Dot Ad Manager CM Synchronization Console has opened, go to the Log Level menu item and select the type of desired logging to be run. Next, go to the Service menu item and select which service to start running. The console will display the logging details as they occur.
When the testing is finished, go to the Service menu item and select Stop to safely exit the program.
