Difference between revisions of "Contract How To"
(→Bills Page) |
(→Face Characteristics) |
||
| (7 intermediate revisions by one user not shown) | |||
| Line 104: | Line 104: | ||
=== Details Page === | === Details Page === | ||
| − | In the Subcontract window, enter in the appropriate information related to this particular Subcontract. For more information on each item, see the Subcontract - Details Page. | + | In the Subcontract window, enter in the appropriate information related to this particular Subcontract. For more information on each item, see the [[Subcontract#Details|Subcontract - Details Page]]. |
| Line 110: | Line 110: | ||
=== Counts Page === | === Counts Page === | ||
| − | The Counts Page is used to identify the number of Faces that are to be scheduled on this Subcontract. For more information on how to enter details for the Counts Page, click here. | + | The Counts Page is used to identify the number of Faces that are to be scheduled on this Subcontract. For more information on how to enter details for the Counts Page, [[Subcontract#Counts|click here]]. |
| Line 116: | Line 116: | ||
=== Template Page === | === Template Page === | ||
| − | The Template Page allows you to specify any special conditions or requirements that you want Faces to be scheduled on this Subcontract to meet. For more information, see Setting Targeting Requirements. | + | The Template Page allows you to specify any special conditions or requirements that you want Faces to be scheduled on this Subcontract to meet. For more information, see [[Charting How To#Setting Targeting Requirements|Setting Targeting Requirements]]. |
=== Distribution Page === | === Distribution Page === | ||
| − | The Distribution Page provides a powerful way to select the percentage of Faces to be scheduled in each area, or to schedule to Faces based on their Custom Classification Factors. For more information, click here. | + | The Distribution Page provides a powerful way to select the percentage of Faces to be scheduled in each area, or to schedule to Faces based on their [[Contract How To#Custom Classification Factors|Custom Classification Factors]]. For more information, [[Subcontract#Distribution|click here]]. |
| Line 127: | Line 127: | ||
=== Designs Page === | === Designs Page === | ||
| − | The Designs Page allows you to identify which Designs you want to use on a Subcontract. For more information, see Selecting Designs. | + | The Designs Page allows you to identify which Designs you want to use on a Subcontract. For more information, see [[Subcontract#Designs|Selecting Designs]]. |
| Line 134: | Line 134: | ||
The Assigned Page can be used to see all the Faces scheduled to a particular Subcontract. Users can choose to see all the Faces on the Subcontract by selecting "Entire Subcontract", or can choose to see only those Faces that are in a particular Flight of the Subcontract. | The Assigned Page can be used to see all the Faces scheduled to a particular Subcontract. Users can choose to see all the Faces on the Subcontract by selecting "Entire Subcontract", or can choose to see only those Faces that are in a particular Flight of the Subcontract. | ||
| − | Faces can be added to the Subcontract or Flight by clicking on the New ([[File:New_add_button.JPG]]) button. For more information on scheduling Faces to the Subcontract or Flight, see Manually Assign Faces, or | + | Faces can be added to the Subcontract or Flight by clicking on the New ([[File:New_add_button.JPG]]) button. For more information on scheduling Faces to the Subcontract or Flight, see [[Charting How To#Manually Assigning Face|Manually Assign Faces]], or [[Charting How To#Scheduling Design Changes on a Face|Automatic Scheduling]]. |
Faces can be removed from a showing by highlighting the Face and selecting the Delete ([[File:New_delete_button.JPG]]) button. | Faces can be removed from a showing by highlighting the Face and selecting the Delete ([[File:New_delete_button.JPG]]) button. | ||
| Line 140: | Line 140: | ||
If you are interested in finding out more information about a Face, you can select the Properties ([[File:New_properties_button.JPG]]) button. | If you are interested in finding out more information about a Face, you can select the Properties ([[File:New_properties_button.JPG]]) button. | ||
| − | For more information on features available from this page, see Assigned Page. | + | For more information on features available from this page, see [[Subcontract#Assigned|Assigned Page]]. |
=== Summary Page === | === Summary Page === | ||
| Line 146: | Line 146: | ||
The Summary Page provides information about the status of the Subcontract. Users can review the number of Faces scheduled, sold and posted by type, and review the circulation provided and the percentage distribution. | The Summary Page provides information about the status of the Subcontract. Users can review the number of Faces scheduled, sold and posted by type, and review the circulation provided and the percentage distribution. | ||
| − | For more information, see the Summary Page. | + | For more information, see the [[Subcontract#Summary|Summary Page]]. |
| Line 154: | Line 154: | ||
The Posting Tasks Page provides information about when postings are scheduled for this Subcontract. Users can also identify completion information. | The Posting Tasks Page provides information about when postings are scheduled for this Subcontract. Users can also identify completion information. | ||
| − | For more information, see the Posting | + | For more information, see the [[Subcontract#Posting Task|Posting Task Page]]. |
| − | + | ||
| − | + | ||
=== Production Page === | === Production Page === | ||
| Line 162: | Line 160: | ||
The Subcontract Production Page provides users with the ability to track all production related information that is to be undertaken for this Subcontract. | The Subcontract Production Page provides users with the ability to track all production related information that is to be undertaken for this Subcontract. | ||
| − | For more information, see the Production Page. | + | For more information, see the [[Subcontract#Production|Production Page]]. |
| Line 170: | Line 168: | ||
The Value Page allows you to enter cost information for the Subcontract. Rate Card, Gross and Net Values for this Subcontract can be entered. All Subcontracts are automatically totalled at the Contract. | The Value Page allows you to enter cost information for the Subcontract. Rate Card, Gross and Net Values for this Subcontract can be entered. All Subcontracts are automatically totalled at the Contract. | ||
| − | For more information, see Value Page. | + | For more information, see [[Subcontract#Value|Value Page]]. |
| Line 187: | Line 185: | ||
To create a User field, click the New button. Ad Manager will then prompt you for the name of the User field. Once this is saved, the new User field will appear. To enter data relating to the User field, click on the User field you wish to add information for, then double click in the Value field and begin typing. To save your data entry, hit the Enter key on your keyboard. | To create a User field, click the New button. Ad Manager will then prompt you for the name of the User field. Once this is saved, the new User field will appear. To enter data relating to the User field, click on the User field you wish to add information for, then double click in the Value field and begin typing. To save your data entry, hit the Enter key on your keyboard. | ||
| − | For more information on User fields see | + | For more information on User fields see [[Subcontract#User Fields|User Fields]]. |
| Line 195: | Line 193: | ||
The Attachments Page is where documents can be stored pertaining to the Subcontract. You can create a document library showing different files or documents, of any file type (TXT, DOC, XLS, PDF), with each Subcontract. | The Attachments Page is where documents can be stored pertaining to the Subcontract. You can create a document library showing different files or documents, of any file type (TXT, DOC, XLS, PDF), with each Subcontract. | ||
| − | For information on adding Attachments to a Subcontract, click here. | + | For information on adding Attachments to a Subcontract, [[Subcontract#Attachments|click here]]. |
=== Map View Page === | === Map View Page === | ||
| Line 201: | Line 199: | ||
The Subcontract Map Views Page allows users to retrieve previously saved maps of their Subcontracts. | The Subcontract Map Views Page allows users to retrieve previously saved maps of their Subcontracts. | ||
| − | For more information on the Map View page, click here. | + | For more information on the Map View page, [[Subcontract#Map Views|click here]]. |
| − | + | ||
== Adding Flights == | == Adding Flights == | ||
| Line 320: | Line 317: | ||
To change the status of a Contract, go to the Details page for the desired Contract. Click on the Status dropdown combo box and change the status to the desired type. Click the Save button ([[File:New_save_button.JPG]]) to save the change. | To change the status of a Contract, go to the Details page for the desired Contract. Click on the Status dropdown combo box and change the status to the desired type. Click the Save button ([[File:New_save_button.JPG]]) to save the change. | ||
| − | For details on the different status types tracked in Ad Manager, see Contract Status Definitions. | + | For details on the different status types tracked in Ad Manager, see [[Contract How To#Contract Status Definitions|Contract Status Definitions]]. |
== Change Subcontract Status == | == Change Subcontract Status == | ||
| Line 493: | Line 490: | ||
Select the order by which you wish to number your Subcontracts by moving up or down the list of columns, or adding new ones to order by. For example, if you wish to number your Subcontracts by Media type, then Market then the From date, you would order them as shown above. Once you have selected your order, click on the OK button. Your Subcontracts will now be numbered accordingly. | Select the order by which you wish to number your Subcontracts by moving up or down the list of columns, or adding new ones to order by. For example, if you wish to number your Subcontracts by Media type, then Market then the From date, you would order them as shown above. Once you have selected your order, click on the OK button. Your Subcontracts will now be numbered accordingly. | ||
| − | For more instructions on ordering, click here. | + | For more instructions on ordering, [[FAQ and General Info#How do I...|click here]]. |
== Rotary Contracts == | == Rotary Contracts == | ||
| Line 500: | Line 497: | ||
== Setting Distributions == | == Setting Distributions == | ||
| − | Ad Manager allows you to specify different distributions of Faces to be met while scheduling. You can create a geographic distribution of Faces using your areas, or you can create your own | + | Ad Manager allows you to specify different distributions of Faces to be met while scheduling. You can create a geographic distribution of Faces using your areas, or you can create your own [[Custom classifications]], and distribute Faces based on these items. |
To set a distribution, go to the desired Subcontract and click on the Distribution Page. From this screen you can add a distribution factor by clicking on the New button ([[File:New_add_button.JPG]]) in the Factors pane of the window and selecting the desired item. | To set a distribution, go to the desired Subcontract and click on the Distribution Page. From this screen you can add a distribution factor by clicking on the New button ([[File:New_add_button.JPG]]) in the Factors pane of the window and selecting the desired item. | ||
| Line 546: | Line 543: | ||
Note you can also change these distributions during the charting process by clicking on the Distribution Tab and modifying the numbers there. If you change it on the Charting screen it DOES NOT CHANGE the distribution numbers on the subcontract. | Note you can also change these distributions during the charting process by clicking on the Distribution Tab and modifying the numbers there. If you change it on the Charting screen it DOES NOT CHANGE the distribution numbers on the subcontract. | ||
| − | For more information | + | For more information [[Charting How To#Comparing Your Progress to Your Scheduling Requirements|click here]]. |
=== Distribution by Classification Factor === | === Distribution by Classification Factor === | ||
| Line 556: | Line 553: | ||
Note you can also change these distributions during the charting process by clicking on the Distribution Tab and modifying the numbers there. If you change it on the Charting screen it DOES NOT CHANGE the distribution numbers on the subcontract. | Note you can also change these distributions during the charting process by clicking on the Distribution Tab and modifying the numbers there. If you change it on the Charting screen it DOES NOT CHANGE the distribution numbers on the subcontract. | ||
| − | For more information see Classification Factors. | + | For more information see [[Contract How To#Custom Classification Factors|Custom Classification Factors]]. |
=== Site Characteristics === | === Site Characteristics === | ||
| − | Each site can be described as having location specific characteristics that make the site particularly good for a specific advertising group, advertiser or a user defined "characteristic" such as being part of McDonald's preapproved pool of locations as shown in the example below. For more information on the setup and use of site characteristics see Site Categories. | + | Each site can be described as having location specific characteristics that make the site particularly good for a specific advertising group, advertiser or a user defined "characteristic" such as being part of McDonald's preapproved pool of locations as shown in the example below. For more information on the setup and use of site characteristics see [[Site#Categories|Site Categories]]. |
Characteristics can be entered for any site indicating that a site is ideal or restricted for a specific Advertiser or advertiser Category. On the Subcontract you have the option on the Template Tab to indicate which advertisers are to be targeted. | Characteristics can be entered for any site indicating that a site is ideal or restricted for a specific Advertiser or advertiser Category. On the Subcontract you have the option on the Template Tab to indicate which advertisers are to be targeted. | ||
| Line 574: | Line 571: | ||
Characteristics can be entered for any face indicating that a face is ideal or restricted for a specific Advertiser or advertiser Category. Note that some of the Face Characteristics are inherited from the site and apply to all faces on a site. On the Subcontract you have the option on the Template Tab to indicate which advertisers are to be targeted. | Characteristics can be entered for any face indicating that a face is ideal or restricted for a specific Advertiser or advertiser Category. Note that some of the Face Characteristics are inherited from the site and apply to all faces on a site. On the Subcontract you have the option on the Template Tab to indicate which advertisers are to be targeted. | ||
| − | The criteria set in this window will determine which faces are considered for scheduling and which will not. It also sets up an order of importance in the selection criteria. For more information see Setting | + | The criteria set in this window will determine which faces are considered for scheduling and which will not. It also sets up an order of importance in the selection criteria. For more information see [[Charting How To#Setting Targeting Requirements|Face Properties]]. |
Note you can also change these criteria during the charting process by clicking on the Template Tab and modifying the criteria there. If you change it on the Charting screen it DOES NOT CHANGE the template setup on the subcontract. | Note you can also change these criteria during the charting process by clicking on the Template Tab and modifying the criteria there. If you change it on the Charting screen it DOES NOT CHANGE the template setup on the subcontract. | ||
| − | |||
== Targeting Conditions Explained == | == Targeting Conditions Explained == | ||
| Line 669: | Line 665: | ||
[[File:New_Subcontract_Details_static.JPG]] | [[File:New_Subcontract_Details_static.JPG]] | ||
| − | To move between Contracts and Subcontracts, see Navigating Contracts and Subcontracts. | + | To move between Contracts and Subcontracts, see [[Contract How To#Navigating Contracts and Subcontracts|Navigating Contracts and Subcontracts]]. |
== Wiping a Contract Subcontract == | == Wiping a Contract Subcontract == | ||
Latest revision as of 15:22, 29 July 2013
How To Page for Contracts.
Add Multiple SubContracts
Ad Manager allows users to enter multiple Subcontracts at the same time. This can be done when Subcontracts are of equal length and have the same characteristics (media type, market, # faces, etc.).
To create multiple Subcontracts at the same time, go to the Contract you wish to create multiple Subcontracts for, go to the Tools menu, and select "Define Subcontracts".
From this screen you can identify how you wish to create the Subcontracts. This can be done by creating Subcontracts that are a certain duration, by creating a specified number of Subcontracts that are the same length, or by creating Subcontracts according to a recurrence pattern. This is done by selecting the appropriate item on the screen and entering the desired information.
Details for each Subcontract are entered on this screen as well. A Media Type, (Subcontract) Type and a Market must be entered. The number of Faces and Circulation targets for each Subcontract are entered into the Counts Tab, and information related to the Value of each Subcontract is entered on the Value Tab. You can also enter production information, select distribution patterns, specify template criteria, record common notes, and fill in user fields.
Note that any information entered will apply to ALL Subcontracts. If there is a difference between various Subcontracts, create the Subcontracts with the most common value in each field, and go to the individual Subcontracts to change the appropriate information after the Subcontracts have been created. Alternately, you can leave most information items blank (except those identified above) and fill them in as needed on each Subcontract.
Once you have entered the necessary information, click OK.
Adding a Contract
Ad Manager is designed to allow you to enter Contract information into the system in an efficient manner. Contracts are entered any time you wish to undertake scheduling of Faces; Contracts can be Proposals (this status allows you to undertake scheduling without affecting the number of Faces available and is usually used for preliminary requests from clients), Limited Holds (Ad Manager allows you to hold (reserve) Faces for a Contract for a default of 72 hours - this will affect your list of available Faces), Unlimited Holds (Faces are reserved, and will remain unavailable until they are removed from the Hold, or the status of the Contract changes), or Contracted (the approval has been given to proceed). For more information, see Contract Status Definitions.
All Contracts are broken down into a Contract component and a Subcontract component. The Contract component deals with details that relate to the entire duration of the Contract, whereas the Subcontract deals with a specific portion of the Contract.
Adding a Contract
To add a Contract into the system, go to FILE - NEW - CONTRACT. Ad Manager will open a new Contract window. Enter in the desired information and click the Save () button when you have finished.
Details Page
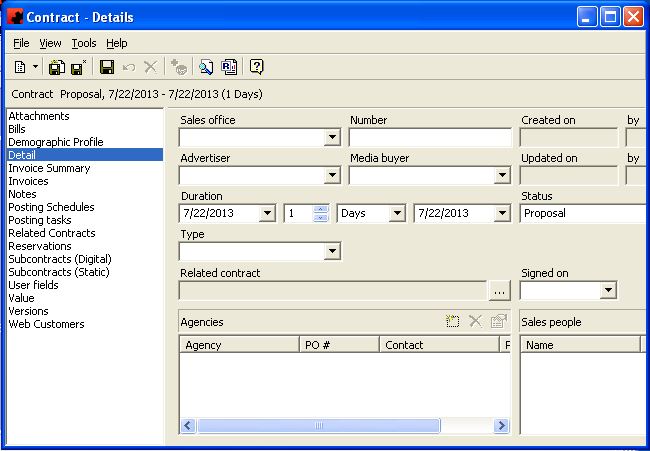
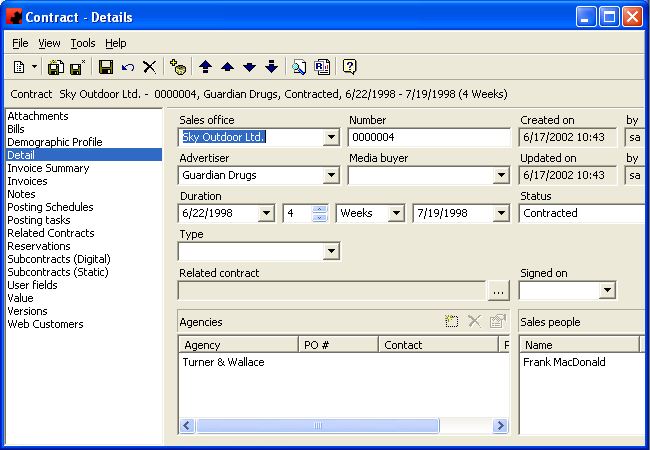
On the Contract - Details Page, enter in the appropriate information related to this particular Contract. For more information on each item, see the Contract - Details Page.
Subcontracts Page
The Subcontracts page provides information on each Subcontract associated with this Contract. This includes the Brand, the Start and End Dates, Market, Media type and other Subcontract information. To assign Subcontracts to a Contract, you can either go to the Subcontracts page, or add the Subcontracts later. If you wish to add a Subcontract at this time, select the New button () and the Subcontracts - Details window will appear.
For information on adding Subcontracts to a Contract, see Adding a Subcontract.
Related Contracts Page
Ad Manager allows you to associate this Contract to a listing of all other Contracts related to it through the Related Contracts Page.
To associate a Contract to this one, go to the Contract - Details page, and click on the Ellipsis button () for the Related Contracts field and pick the "Select" option. The "Specify A Contract" screen will appear where you can find and select the related Contract.
To associate a new Contract to this one, click on the New button () on the Related Contracts Page, and an empty Contract - Details screen will open for you to fill out with the new Contract information.
Notes Page
The Notes Page allows you to store notes for use on Posting Cards/Instructions, along with general notes about the Contract.
To add notes, simply click on the Notes page and start typing the information you want to add for this Contract. When finished, click the Save button ().
User fields Page
The User Fields page allows you to create and maintain your own fields of information. You can store and use additional information not contained elsewhere in Ad Manager about every Contract in your inventory.
Creating a User field
To create a new User field, click the New button. Ad Manager will then prompt you for the name of the User field. Once this is saved, the new User field will appear. To enter data relating to the User field, click on the User field you wish to add information for, then double click in the Value field and begin typing. To save your data entry, hit the Enter key on your keyboard.
For more information on User fields, see User Fields.
Attachments Page
The Attachments Page is where documents can be stored pertaining to the Contract. You can create a document library showing different files or documents, of any file type (TXT, DOC, XLS, PDF), with each Contract. Signed Contracts and Proposals are a couple of examples of what can be saved here.
For information on adding Attachments to a Contract, click here.
Bills Page
The Bills page allows you to enter the planned Bill Definitions for the Contract.
For information on adding a new Bill Definition to the Contract, see Adding A Bill Definition.
Adding a Subcontract
Each Contract is divided into Subcontracts. A new Subcontract needs to be created for each change to the Media, Market, Subcontract Type, Brand or Date.
Adding a Subcontract
To add a Subcontract, go to the appropriate Contract and select the Subcontracts Page. Click on the New Button (), and the Subcontract window appears. On the Subcontract window, enter the appropriate information.
Details Page
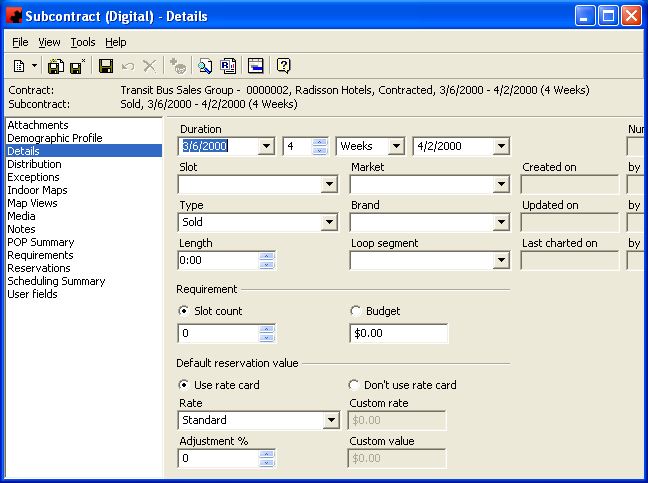
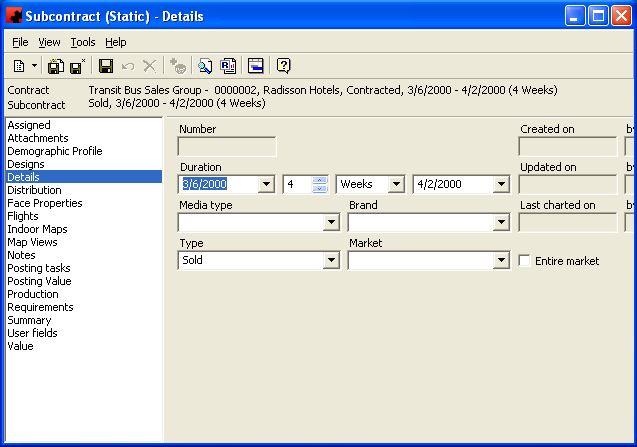
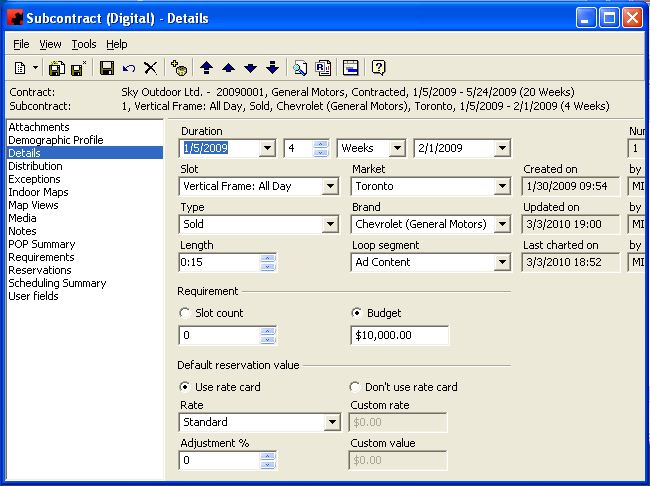
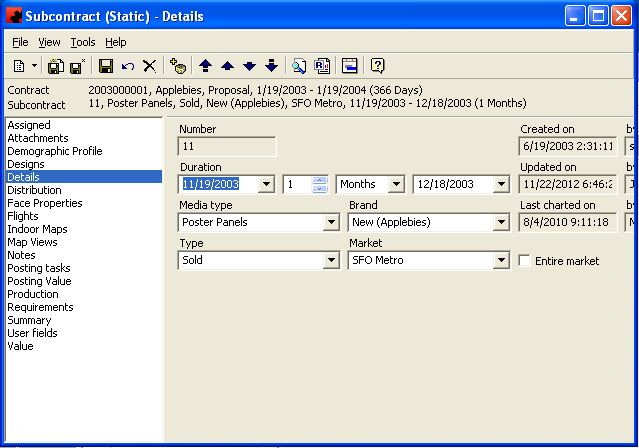
In the Subcontract window, enter in the appropriate information related to this particular Subcontract. For more information on each item, see the Subcontract - Details Page.
Counts Page
The Counts Page is used to identify the number of Faces that are to be scheduled on this Subcontract. For more information on how to enter details for the Counts Page, click here.
Template Page
The Template Page allows you to specify any special conditions or requirements that you want Faces to be scheduled on this Subcontract to meet. For more information, see Setting Targeting Requirements.
Distribution Page
The Distribution Page provides a powerful way to select the percentage of Faces to be scheduled in each area, or to schedule to Faces based on their Custom Classification Factors. For more information, click here.
Designs Page
The Designs Page allows you to identify which Designs you want to use on a Subcontract. For more information, see Selecting Designs.
Assigned Page
The Assigned Page can be used to see all the Faces scheduled to a particular Subcontract. Users can choose to see all the Faces on the Subcontract by selecting "Entire Subcontract", or can choose to see only those Faces that are in a particular Flight of the Subcontract.
Faces can be added to the Subcontract or Flight by clicking on the New () button. For more information on scheduling Faces to the Subcontract or Flight, see Manually Assign Faces, or Automatic Scheduling.
Faces can be removed from a showing by highlighting the Face and selecting the Delete () button.
If you are interested in finding out more information about a Face, you can select the Properties () button.
For more information on features available from this page, see Assigned Page.
Summary Page
The Summary Page provides information about the status of the Subcontract. Users can review the number of Faces scheduled, sold and posted by type, and review the circulation provided and the percentage distribution.
For more information, see the Summary Page.
Posting Tasks Page
The Posting Tasks Page provides information about when postings are scheduled for this Subcontract. Users can also identify completion information.
For more information, see the Posting Task Page.
Production Page
The Subcontract Production Page provides users with the ability to track all production related information that is to be undertaken for this Subcontract.
For more information, see the Production Page.
Value Page
The Value Page allows you to enter cost information for the Subcontract. Rate Card, Gross and Net Values for this Subcontract can be entered. All Subcontracts are automatically totalled at the Contract.
For more information, see Value Page.
Notes Page
The Notes page allows you to store information specific to the Subcontract. Information entered into the Posting Card Notes field will appear on a posting card every time a card is printed for that Subcontract. The Notes section allows you to store notes that are not printed on any reports.
User fields Page
The User fields page allows you to create and maintain your own fields of information. You can store and use additional information not contained elsewhere in Ad Manager about every Subcontract in your inventory.
Creating a User field
To create a User field, click the New button. Ad Manager will then prompt you for the name of the User field. Once this is saved, the new User field will appear. To enter data relating to the User field, click on the User field you wish to add information for, then double click in the Value field and begin typing. To save your data entry, hit the Enter key on your keyboard.
For more information on User fields see User Fields.
Attachments Page
The Attachments Page is where documents can be stored pertaining to the Subcontract. You can create a document library showing different files or documents, of any file type (TXT, DOC, XLS, PDF), with each Subcontract.
For information on adding Attachments to a Subcontract, click here.
Map View Page
The Subcontract Map Views Page allows users to retrieve previously saved maps of their Subcontracts.
For more information on the Map View page, click here.
Adding Flights
Ad Manager allows you to enter multiple flight dates for each Subcontract. Scheduling in Ad Manager is done at the flight level. This provides you with more flexibility.
When to Add a Flight
Flights can be added into Ad Manager any time you have a change in which Faces are posted during a campaign, or any time there is a copy change for existing Faces. Ad Manager has been designed to allow the user to manage changes in designs or Faces as part of one flight or multiple flights, as desired by the user.
If you want to use flights to organize your Subcontract information, the general rule of thumb is that any time you need to visit a Face to put up a design (whether it is for the currently posted Contract or a new one), a new flight is involved.
Adding a Flight
To add a flight to a Subcontract, you must first select the appropriate Subcontract and click on the Details page. From the Flights box, click on the New Button (). A window will appear where flight information can be entered.
Adding Multiple Flights
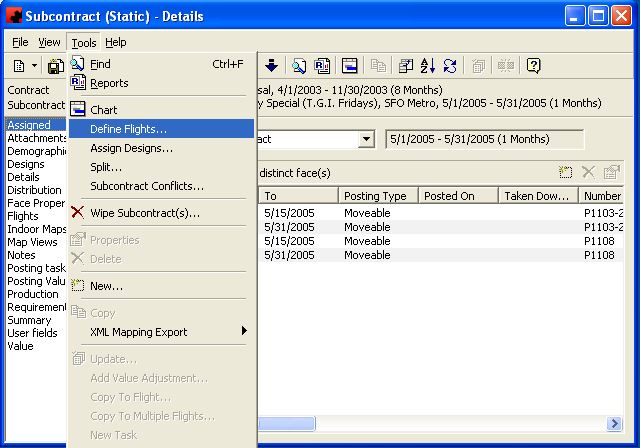
To add multiple flights, click on the Tools Menu and select Define Flights.
From this screen you can identify how you want your flights created. Ad Manager can automatically create flights of the same length, or a specified number of flights. Once you have made your desired selection, click OK. Ad Manager will allow you to preview the flights to be created.
If you want to modify any information for the flights created, you can double click the affected flight, or right click and choose Properties. A screen will appear where you can make the necessary changes.
To delete a flight(s) from the list, use CTRL+click or SHIFT+click to highlight the affected flight(s) and click the Delete button().
Once you have made all your desired changes, close the window by clicking on the "X" in the top right corner.
Editing a Flight
To edit a flight on a Subcontract, you must first select the appropriate Subcontract and click on the Details page. From the Flights box, click on the Properties button (). A window will appear where flight information can be modified.
Deleting a Flight
To delete a flight from a Subcontract, you must first select the appropriate Subcontract and click on the Details page. From the Flights box, highlight the desired flight for deletion and click on the Delete button (). You cannot delete a flight if there has been charting done for the flight. All scheduling must be removed from the flight first.
Adding Production Information
Type topic text here.
Adding a Design to a Face
Each Face in a Subcontract can be assigned a Design. Assigning a Design allows you to inform everybody from the billposter/subcontractor to the client which Design is to be installed on the Face.
Assign a Design to One Face
To assign a Design to one Face, go to the Assigned Page on the Subcontract and click to highlight the desired Face and time frame. Right click on the item and select Design. From the dropdown combo box, select the Design you wish to assign to the Face and click OK. Ad Manager will not take into account any Design targeting properties you may have set when assigning a Design to a particular Face.
Assign a Design to Multiple Faces
To assign a Design to multiple Faces, go to the Assigned Page on the Subcontract and click to highlight the desired Faces for the desired time frame(s). Right click on the selection and select Design. From the dropdown combo box, select the Design you wish to assign to the selected items and click OK. Ad Manager will not take into account any Design targeting properties you may have set when assigning a Design to multiple Faces.
Assigning Multiple Designs
Ad Manager allows you to assign more than one Design at a time. All Designs can be assigned randomly or sequentially.
Assigning Multiple Designs at Once
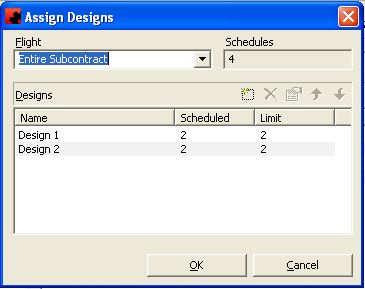
To randomly assign Designs to all Face schedules that do not yet have assigned Designs, go to the Assigned page on the Subcontract and click on the Tools Menu-Assign Designs. This screen will allow you to identify which flight of the Subcontract you wish to schedule Designs for, and how many schedules exist in that flight.
From this screen you can click on a Design and:
- Add new Designs to the list of Designs to assign using the New button ().
- Remove the Design from this list of Designs to assign using the Delete button (). This will not remove the Design from the Subcontract.
- Change the properties of the Design for assignment using the Properties button (). You can change the maximum number of the Design to use, the Face filter properties for Design assignment and the Inventory Design.
- Move the Design up () or down (
) the Design list. The order the list is in will be the order that Ad Manager will do the Design assignment.
It is suggested that items which have filters set should be put at or near the top of the list to ensure they are given the opportunity to consider all Faces. Altering the order of the assigned Faces on the Assigned Page will also change the order of Design assignment.
When you are ready to have the Designs assigned, click OK.
Assigning Designs Sequentially
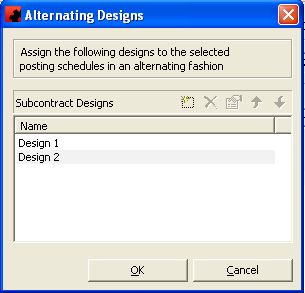
In addition to randomly assigning Designs, Ad Manager provides the ability to assign Designs in a repeating sequential order.
On the Assigned Page of the desired Subcontract, use CTRL+click and SHIFT+click to select the Face assignments you wish to assign sequentially. Once you have selected these Face assignments, right click and select Alternating Designs.
From this screen you can click on a Design and:
- Add new Designs to the list of Designs to assign using the New button ().
- Remove the Design from this list of Designs to assign using the Delete button (). This will not remove the Design from the Subcontract.
- Change the properties of the Design for assignment using the Properties button (). You can change the maximum number of the Design to use, and the Inventory Design.
- Move the Design up () or down (
) the Design list. The order the list is in will be the order that Ad Manager will do the Design assignment. Altering the order of the assigned Faces on the Assigned Page will also change the order of Design assignment.
Once you have determined your assignment order, click OK.
Autonumber Contracts
In Ad Manager you have the option to either to enter Contract and proposal numbers into the system or have Ad Manager automatically number them for you.
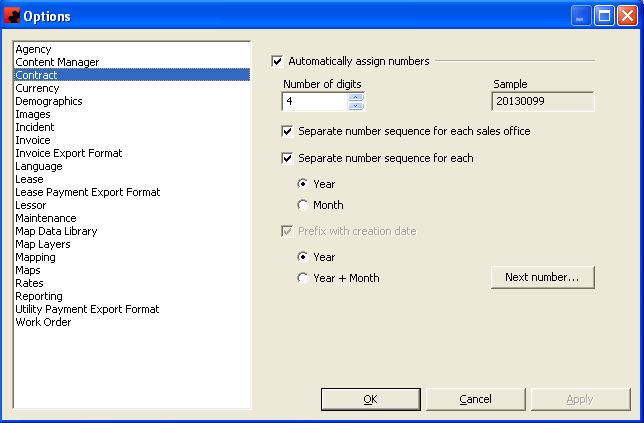
To set up the format to be used when auto numbering Contracts, click on the Tools menu from the Ad Manager Explorer window and select Options. From the Contract Page you can identify your desired numbering format.
If you want Ad Manager to assign a Contract number when no number is entered, click the Automatically assign numbers check box. At this point you can select the number of digits to use in the Contract number, whether each sales office uses the same numbering sequence, whether to start new numbering sequences for each year or month, and whether to prefix the Contract number with date information. Ad Manager shows a sample of the Contract number as each item is changed to provide you with a guideline on how the Contract number will appear.
If you wish to select the next number to use, click the Next Number button, and enter the appropriate information. If you have selected the Sales Office option, you can specify the starting number for each Sales Office.
Once you have made the desired changes, click OK.
Once this is done, a Contract can be entered without a Contract number; Ad Manager will automatically assign a number when you click the Save button ().
To turn Auto numbering off, click on the Tools menu from the Ad Manager Explorer window and select Options. From the Contract page you can click the Automatically assign numbers check box off. Once this is done, Ad Manager will not allow you to save a Contract if you leave the Contract number blank.
Change Contract Status
Throughout the life of a Contract, its status may change from Proposal to Hold to Contracted. These changes need to be reflected in Ad Manager.
To change the status of a Contract, go to the Details page for the desired Contract. Click on the Status dropdown combo box and change the status to the desired type. Click the Save button () to save the change.
For details on the different status types tracked in Ad Manager, see Contract Status Definitions.
Change Subcontract Status
The Subcontract level of a Contract is where you can specify the characteristics of the Faces on a Subcontract. There are four types of Subcontracts; Sold, Bonus, Public Service, and Trade. If you wish to change how a Subcontract is being reported, go to the Subcontract, and on the Details Page, click on the Type and change it. After you have changed the type, click the Save button ().
Contract Status Definitions
Ad Manager has 5 different types of Contract Status. Each allows you to manage your information better.
Proposal
A Contract marked as a Proposal allows you to assign Faces without affecting the availability status of the Faces. Proposals are typically used to provide a client with an initial location list, to give them a sense of what Faces they may eventually buy.
Dead Proposal
A Dead Proposal is a Proposal where no further interest from the prospective client has been received. Marking a Proposal as a Dead Proposal allows you to keep your listing of active Proposals current, while also providing you with information about what Proposals did not generate interest. This information can be valuable in the analysis of sales.
Limited Hold
A Limited Hold Contract allows you to assign Faces and mark them as unavailable during the desired dates for a temporary period of time. The user can specify that the Faces assigned to any Subcontract on this Contract will be considered reserved until a certain date and time. At that point, if the status has not been changed to Contracted (or Unlimited Hold, or the Hold Expiry date extended), the system will recognized that the deadline has passed and treat the Faces as being available again.
Unlimited Hold
Faces assigned to an Unlimited Hold Contract are considered unavailable during the desired dates. They will continue to be considered as unavailable until such time as the status is either downgraded (to a Proposal or an expired Limited Hold) or upgraded to Contracted, where the Faces will not be available for other clients anyway.
Contracted
Faces on Contracted showings are those that have been purchased by the client. These Faces are considered unavailable during the desired dates.
Contract Types
The CONTRACT TYPES database can be used to refer to special conditions concerning the Contract itself. For example, you can use it to mark the Contract as "New", "Renewal", "Out-for-Signature", "Cancelled", etc.
Adding a New Contract Type
To add a new Contract Type, click on the arrow beside the New icon () for a list of items you can add. Select OTHER, and then select Contract Type. The Contract Type Details Window will appear, and a new Contract Type can be entered.
Modifying A Contract Type
To modify a Contract Type, simply click the database from the OTHER folder, then double click the desired item and make the change(s) necessary. Once you have finished, click the Save () button.
Deleting a Contract Type
To delete a Contract Type, simply click the database from the OTHER folder, then highlight the item you wish to delete. Click the Delete icon (). Ad Manager will not allow you to delete a Contract Type if it is already in use.
Copying Scheduling to Another Flight
Copy Scheduling to One Flight
If you wish to copy scheduling from one flight of the Subcontract to another flight on this or another Subcontract, this can be done using the Copy to Flight feature.
Go to the Subcontract where you are copying from and click on the Assigned Page. If you are copying while in the Chart Window, go to the Assigned button and click Find Now (). Select the flight you wish to copy faces from. Using CTRL+click and SHIFT+click, highlight the Faces you wish to copy to a different flight. Right click, or go to the Tools menu and select Copy to Flight.
If the flight you wish to copy to is on a different Subcontract, click the ellipsis () (this step is not necessary if the flight is on the same Subcontract). A window will appear where you can enter information to help find the desired Subcontract. Once you have entered in the details, click OK to see a list of Subcontracts meeting that criteria, and double click the Subcontract to copy flight information to.
Once you have the desired Subcontract listed in the window, select the flight you wish to copy the Faces to and click OK. Ad Manager will attempt to assign these Faces to the selected flight on the specified Subcontract. If there are any Faces Ad Manager cannot schedule, it will inform you there are Faces that generate conflicts. If you wish to see the list, click Yes, and if you wish to continue without these Faces, click No.
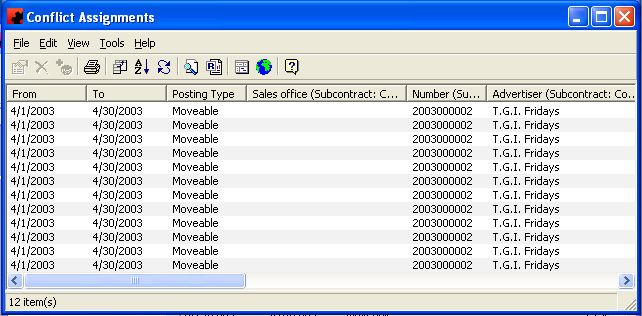
If you click Yes, the following screen will appear:
From this screen you can double click any Face and the details regarding the conflict generated will appear. If you wish to override the warning and copy the Face to the flight, click Accept. If you don't wish to copy the Face to the flight, click Cancel. Any Face that remains on the Conflicts window when you click Close will not be copied to the new flight.
Copying Scheduling to Multiple Flights
If you wish to copy scheduling from one flight of the Subcontract to multiple flights on this or another Subcontract, this can be done using the Copy to Multiple Flights feature.
Go to the Subcontract where you are copying from and click on the Assigned Page. If you are copying while in the Chart Window, go to the Assigned button and click Find Now (). Select the flight you wish to copy Faces from. Using CTRL+click and SHIFT+click, highlight the Faces you wish to copy to a different flight. Right click, or go to the Tools menu and select Copy to Multiple Flights.
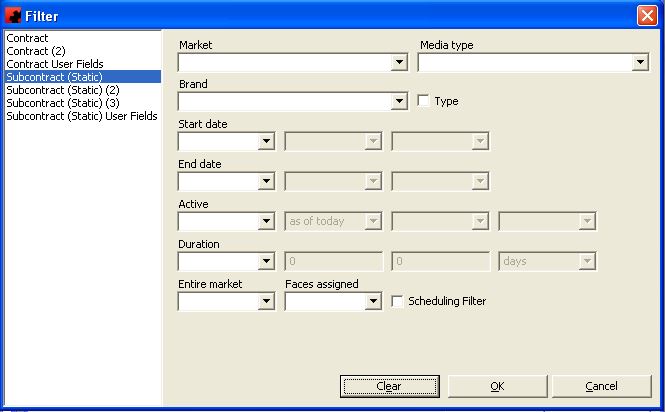
From the following screen you can choose to Add or Delete any flights from this list. To Add flights, click on the Add () Button. A Filter screen will appear to allow you to specify what criteria you wish to use to find the flights to copy scheduling to.
Once you have idenified your criteria, click OK. Ad Manager will list all Subcontract flights that meet the criteria. From this list you can click, CTRL+click or SHIFT+click flights you wish to copy the scheduling to. Once you have selected the desired flights, click OK. Ad Manager will list all flights that the scheduling is to be copied to in the"Copy Posting Schedules to Selected Flights" window. If you wish to remove a flight from the list, click on the Delete () button.
Once you have the desired listing of flights, click OK to undertake the scheduling of the Faces.
Custom Classification Factors
Classification factors are any "rating" or "classification" that can be applied to specific faces and used to help in the distribution of faces as part of the scheduling process. There are no limits to the number of Classification Factors a user can setup and use in Ad Manager.
Adding a New Classification
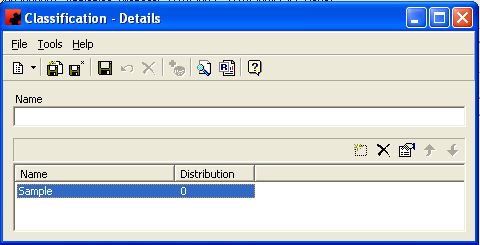
To add a new Classification, click on the arrow beside the New icon () for a list of items you can add. Select OTHER, and then select Classification. The Classification Details Window will appear, and a new Classification can be entered.
To enter the specific classification criteria and their distribution, click on the New button () and enter the name. Ad Manager will proportionally adjust the distribution if it does not equal 100%.
Modifying a Classification
To modify classifications and their distributions, click the item you wish to modify and select the properties button (). If you change the distribution, remember that Ad Manager will proportionally adjust the distribution if it does not equal 100%.
Deleting a Classification
To delete a classification criteria, highlight the item to delete in the Name/Distribution window and click on the Delete () Button above the Name/Distribution window.
To delete the entire classification item from the system, click on the Delete () button from the icon bar.
Deleting a Contract
To delete a Contract, go to the desired Contract and select the Delete () button. Ad Manager will confirm that you want to delete the Contract and, if there are no Subcontracts with charting, will delete it.
If you do have Subcontracts charted that you wish to delete (with no completed postings), go to Tools - Wipe. Ad Manager will first warn you that you are about to delete the Contract, all Subcontracts related to this Contract, and all scheduling for the Subcontracts to be deleted. If this is what you wish to do, click "Yes".
Deleting a Subcontract
To delete a Subcontract, go to the desired Subcontract and select the Delete () button. Ad Manager will confirm that you want to delete the Subcontract and, if there is no charting, will delete it.
If you do have charting on a Subcontract you wish to delete (but no completed postings), use the Tools-Wipe command. Ad Manager will first warn you it is about to delete the Subcontract, related scheduling and design assignments. If you wish to do this, click OK to proceed.
Modifying a Contract or Subcontract
To edit information for a Contract or a Subcontract, find the Contract or Subcontract and double click it to display the Details window.
If you wish to change information, click on the appropriate page, and make the change in the appropriate field. Once you have finished making your changes, click on the Save icon (). This will save the changes you have made.
If you do not wish to save changes you have made, simply close the Details window and, when asked by Ad Manager if you wish to save the changes, select "No".
Sometimes it is necessary to view several different Contracts or Subcontracts, or view Subcontract detail for a Contract or even Contract detail for a Subcontract. Ad Manager has made it easy to navigate through Contracts and Subcontracts.
If you are trying to view information for several different Subcontracts or Contracts, Ad Manager allows you to do this with ease. If you wish to go to the next Subcontract or Contract, select the Next icon(). If you wish to go to the previous Subcontract or Contract, select the Previous icon (
). Ad Manager will then go to the next (or previous) item, based on the sort order you have selected in the List Window.
Showing the Related Contract
When you are reviewing information for a Subcontract and wish to find out Contract related details, it is necessary to go to the Contract Details screen for the Subcontract.
To do this, select VIEW from the menu bar, then GO TO CONTRACT. This will take you to the appropriate Contract.
Showing the Related Subcontract
When you are reviewing information for a Contract and wish to find out Subcontract related details, it is necessary to go to the Subcontract Details screen for the Contract.
To do this, go to the Subcontracts page, and double click the desired Subcontract to view.
Removing a Design Assignment
If you decide that the Design scheduled on a Face assignment is not what you want, you can either schedule a new Design on that Face assignment, or leave the Face assignment without any Design scheduled.
Changing the Design
To change a Design assignment, go to the Assigned Page of the Subcontract and highlight the Face assignment(s) you wish to change the Design for. Right click and select Design. From the dropdown combo box list, select the Design you wish to use. Any selected Face assignments will be changed to show the selected Design.
Removing Designs
If you wish to remove a Design assignment, go to the Assigned Page of the Subcontract and highlight the Face assignment(s) for which you wish to remove the Design. Right click and select Design. On the dropdown combo box list leave the dropdown combo box blank and select OK. The Designs for the selected Face assignments will be cleared.
Renumbering Subcontracts
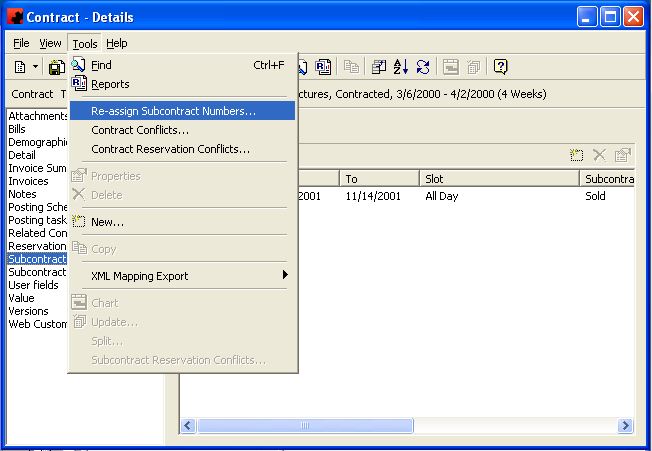
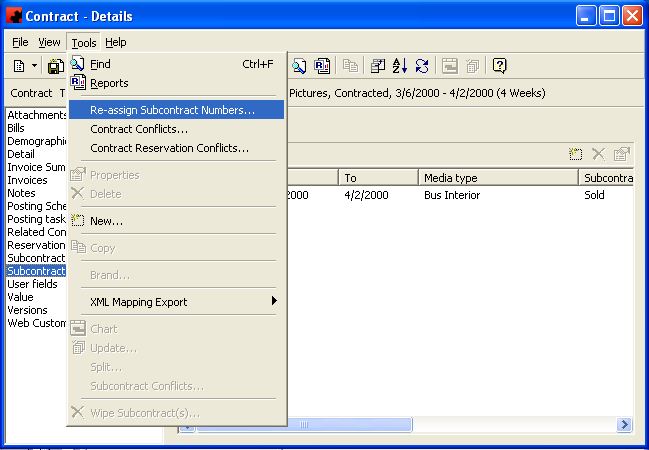
To renumber the Subcontracts belonging to a specific Contract, open the Contract and go to the Subcontracts page. Go to Tools - Re-assign Subcontract Numbers...
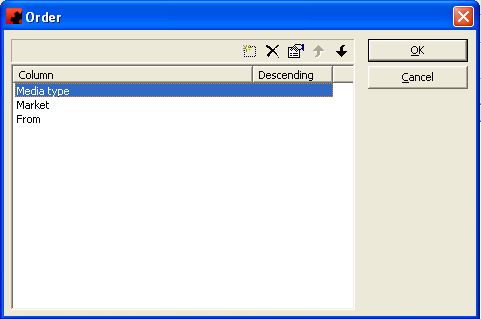
and the following Order dialog box will appear.
Select the order by which you wish to number your Subcontracts by moving up or down the list of columns, or adding new ones to order by. For example, if you wish to number your Subcontracts by Media type, then Market then the From date, you would order them as shown above. Once you have selected your order, click on the OK button. Your Subcontracts will now be numbered accordingly.
For more instructions on ordering, click here.
Rotary Contracts
Type topic text here.
Setting Distributions
Ad Manager allows you to specify different distributions of Faces to be met while scheduling. You can create a geographic distribution of Faces using your areas, or you can create your own Custom classifications, and distribute Faces based on these items.
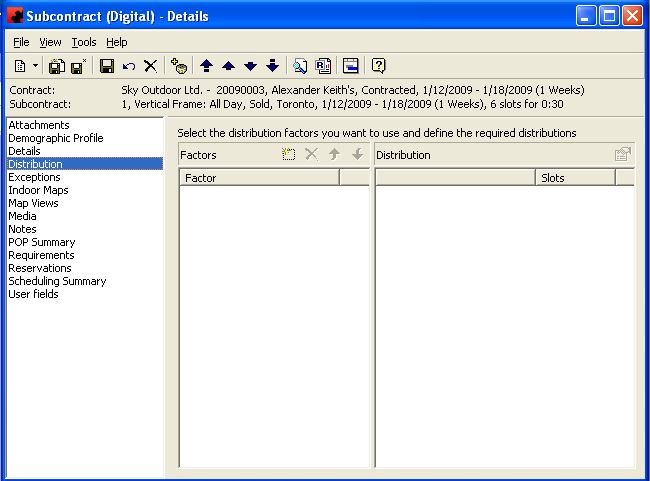
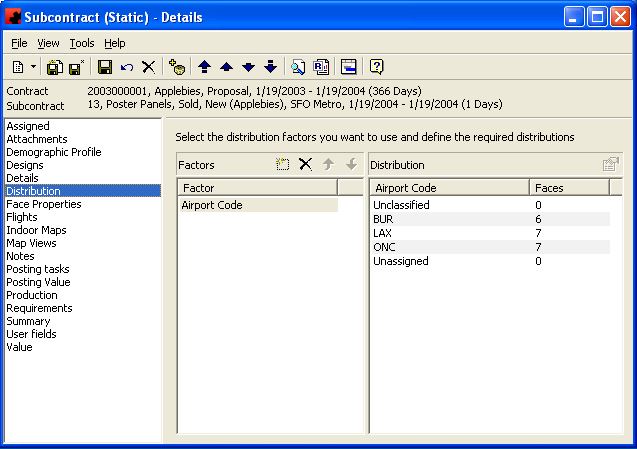
To set a distribution, go to the desired Subcontract and click on the Distribution Page. From this screen you can add a distribution factor by clicking on the New button () in the Factors pane of the window and selecting the desired item.
Once you select the distribution factor you wish to use, you can specify the distribution of Faces across the different criteria. Double click on the number of Faces next to one of the criteria you wish to use. Type in the number of Faces you want assigned to the Subcontract that meet this criteria. Press the Enter key on your keyboard to save it. Continue to make the desired adjustments to the distribution list until the number of "Unassigned" Faces equals 0. Ad Manager will not allow you to save the Subcontract if the number of "Unassigned" Faces is not 0. To save the Subcontract, click the Save button(). After you have completed your distributions for the first factor, you can add other factors by clicking the New button (
) again and repeating the process for the new factor.
Ad Manager also allows you to set the priority order for the meeting of distribution criteria. The most important distribution factor to meet should be listed at the top, followed by the second most important and so on. Ad Manager will attempt to meet the distributions set for higher priority factors over lower priority factors. To change the priority order, highlight a factor and move it using the Move Up button () and the Move Down button (
).
If you wish to change the distribution that has been set for a factor, highlight the Factor in the left pane, and the distributions will appear in the right pane. Make the desired changes and click the Save button () to save the Subcontract.
To remove a factor from the Subcontract, highlight the Factor in the left pane and click the delete button ().
Subcontract Status Definitions
There are four different types of Subcontract status allowed in Ad Manager. Categorizing your Subcontracts provide you with better management and control of your information. The four types are Sold, Bonus, Public Service and Trade. The status selected has no direct impact on how Ad Manager treats each of the Subcontracts. However, by following these status types, Ad Manager can provide you with more accurate information about each Subcontract. Ad Manager will also allow you to Take Over Faces assigned to different Subcontract types if needed.
Targeting Client Needs
Targeting, also commonly known as skewing, is one of the most powerful features of Ad Manager software's Inventory Management module. Targeting refers to the provision of a showing that is particularly well suited to reach the specific audience an advertiser desires (the audience they are targeting).
There are numerous tools in Ad Manager to assist the user in creating a showing custom built to meet the needs of their client. In addition to the tools identified here, users can also use third party demographic information through our Advanced Mapping Module.
Targeting can be undertaken in a variety of ways:
Distribution by area
Distribution by classification factor
Site characteristics
Face characteristics
Distribution by area
Each market is comprised of one or more areas. When a market is defined, part of the process involved identifying which areas make up the market and what percentage of faces located in the market are located in each area. For more information see the setup of area distribution factors for a market.
As part of the subcontract setup, users have the option of using the default area distribution for that market or can go to the Subcontract Distribution Tab to change the percentage of faces in an area for a specific subcontract.
To change the distribution for this subcontract, double click on the number of faces to the right of the area name you wish to change. Type in the desired number of faces for that area. You must account for all faces on the Subcontract. The Unassigned value at the bottom of the list will change as you add and remove faces from the different areas. The number of faces listed as "Unassigned" must be "0" to be able to save the subcontract.
Note you can also change these distributions during the charting process by clicking on the Distribution Tab and modifying the numbers there. If you change it on the Charting screen it DOES NOT CHANGE the distribution numbers on the subcontract.
For more information click here.
Distribution by Classification Factor
Ad Manager provides you with the opportunity to create and setup custom classification factors to further identify (classify) your faces to assist in the distribution of faces during the scheduling process. There is no limit to the number of custom Classification factors you can set up.
To change the distribution for this subcontract, double click on the number of faces to the right of the factor name you wish to change. Type in the desired number of faces for that factor. You must account for all faces on the Subcontract. The Unassigned value at the bottom of the list will change as you add and remove faces from the different factors. The number of faces listed as "Unassigned" must be "0" to be able to save the subcontract.
Note you can also change these distributions during the charting process by clicking on the Distribution Tab and modifying the numbers there. If you change it on the Charting screen it DOES NOT CHANGE the distribution numbers on the subcontract.
For more information see Custom Classification Factors.
Site Characteristics
Each site can be described as having location specific characteristics that make the site particularly good for a specific advertising group, advertiser or a user defined "characteristic" such as being part of McDonald's preapproved pool of locations as shown in the example below. For more information on the setup and use of site characteristics see Site Categories.
Characteristics can be entered for any site indicating that a site is ideal or restricted for a specific Advertiser or advertiser Category. On the Subcontract you have the option on the Template Tab to indicate which advertisers are to be targeted.
The criteria set in this window will determine which faces are considered for scheduling and which will not. It also sets up an order of importance in the selection criteria. For more information see Setting Targeting Requirements.
Note you can also change these criteria during the charting process by clicking on the Template Tab and modifying the criteria there. If you change it on the Charting screen it DOES NOT CHANGE the template setup on the subcontract.
Face Characteristics
Each face can be described as having locational characteristics that make that face particularly good for a specific advertising group, advertiser or a user defined "characteristic" such as being part of McDonald's preapproved pool of locations as shown in the example below. For more information on the setup and use of face characteristics see Site Categories.
Characteristics can be entered for any face indicating that a face is ideal or restricted for a specific Advertiser or advertiser Category. Note that some of the Face Characteristics are inherited from the site and apply to all faces on a site. On the Subcontract you have the option on the Template Tab to indicate which advertisers are to be targeted.
The criteria set in this window will determine which faces are considered for scheduling and which will not. It also sets up an order of importance in the selection criteria. For more information see Face Properties.
Note you can also change these criteria during the charting process by clicking on the Template Tab and modifying the criteria there. If you change it on the Charting screen it DOES NOT CHANGE the template setup on the subcontract.
Targeting Conditions Explained
Given the following three faces and their characteristics:
Depending upon the combination of Required/Preferred face characteristics and Excluded/avoided face characteristics you select during the charting procedure the following summarizes which face would be included in the list of available locations for the subcontract.
Select only faces that are "ideal" Condition for the Beer Category = Face 1 - see example
Select only faces that are restricted from placing a beer advertiser = Face 2 - see example.
Select only faces that do not have an "ideal" condition for a beer advertiser = Face 2 and Face 3 - see example.
Select only faces that are not restricted from placing a beer advertiser = Face 1 and Face 3 - see example.
Note that all of the above examples show the characteristics selected as mandatory. This would be required to select only those faces that met the criteria.
All of the examples would be the same if we were using a specific beer advertiser with the exception that the characteristics would be shown in the bottom left and bottom right areas of the screen.
Updating Information on Multiple Contracts
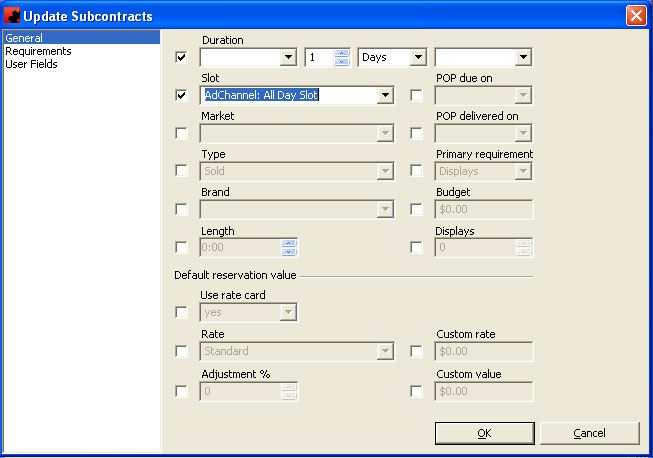
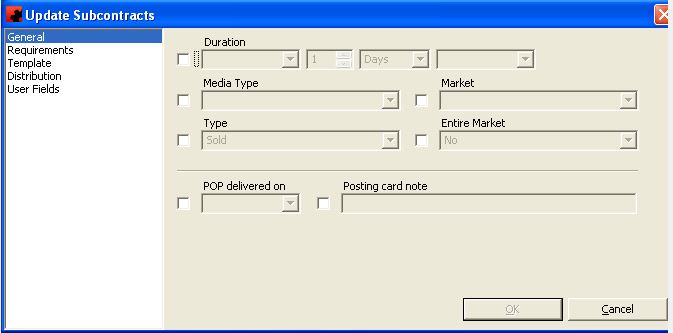
Ad Manager provides the ability to update information for multiple items (Faces, Sites, Contracts, Subcontracts, Designs, Advertisers, etc.) quickly and easily. For example, if there are several Contracts that need to be changed to Contracted, this can be done through the Update window one time, instead of having to change each Contract individually.
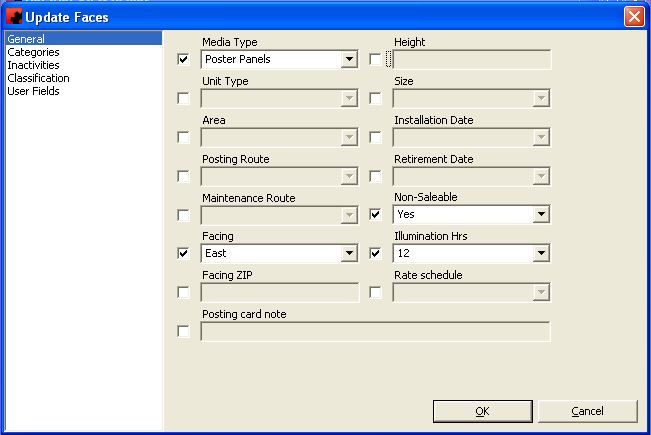
In the Ad Manager Explorer window or in a Filter, highlight all the Contracts you wish to update with the same information. You can highlight multiple Contracts by holding either the SHIFT key down (for all items in a range) or the CTRL key down (for specific items) while clicking with the mouse. Once all the desired items have been selected, go to TOOLS-UPDATE.
The screen that will appear allows users to set values for fields related to the items selected. By entering a value into one of these fields, Ad Manager will change each of the selected items to have that value in that field. To select a field, you must first activate it by putting a checkmark next to the field name. If you do not wish to update a field, make sure you "uncheck" the checkbox prior to running the tool.
Please Note: If you activate a field and leave it blank, the current values will be deleted and left blank for all selected items.
To run the tool, simply click OK.
Updating Information on Multiple Subcontracts
Ad Manager provides the ability to update information for multiple items (Faces, Sites, Contracts, Subcontracts, Designs, Advertisers, etc.) quickly and easily. For example, if there are several Subcontracts that need to be changed to sold, this can be done through the Update window one time, instead of having to change each Subcontract individually.
In the Ad Manager Explorer window or in a Filter, highlight all the Subcontracts you wish to update with the same information. You can highlight multiple Subcontracts by holding either the SHIFT key down (for all items in a range) or the CTRL key down (for specific items) while clicking with the mouse. Once all the desired items have been selected, go to TOOLS-UPDATE.
The screen that will appear allows users to set values for fields related to the items selected. By entering a value into one of these fields, Ad Manager will change each of the selected items to have that value in that field. To select a field, you must first activate it by putting a checkmark next to the field name. If you do not wish to update a field, make sure you "uncheck" the checkbox prior to running the tool.
Please Note: If you activate a field and leave it blank, the current values will be deleted and left blank for all selected items.
To run the tool, simply click OK.
View a Contract or Subcontract
Ad Manager contract data is broken down into Contract and Subcontract information. Each contains different items of information that provide you with a complete picture of the campaign.
To View a Contract
To view a Contract, you can call up a listing of Contracts in the List Window by selecting the desired filter or basket from the Shortcut Bar, or by selecting the desired item from the Folder List. A list of Contracts that meet the specified criteria will appear in the List Window. Double click on the desired Contract to see the Contract Details window.
To View a Subcontract
There are two ways you can view a Subcontract. To view a Subcontract, you can call up a listing of Subcontracts in the List Window by selecting the desired filter or basket from the Shortcut Bar, or by selecting the desired item from the Folder List. A list of Subcontracts that meet the specified criteria will appear in the List Window. Double Click on the desired Subcontract to see the Subcontract Details screen.
The second way of seeing Subcontract information is to select the desired Subcontract from the Contract. To select a Subcontract associated with a Contract, click on the Subcontracts page and a listing of all Subcontracts associated with that Contract will appear. Double click the desired Subcontract to see the Subcontract Details window.
To move between Contracts and Subcontracts, see Navigating Contracts and Subcontracts.
Wiping a Contract Subcontract
If a Contract or a Subcontract needs to be deleted from Ad Manager, all additional items that are created through a Contract/Subcontract must be deleted first. For example, to delete a Subcontract, the scheduling must be removed prior to deleting the Subcontract. If a user tries to delete a Subcontract using the Delete () button and there is scheduling on the Subcontract, Ad Manager will not delete the Subcontract.
Ad Manager has a feature that allows users to delete a Contract or Subcontract regardless of any associated items called "Wipe". The Wipe feature will remove all items created through the Contract/Subcontract as well as the specified Contract/Subcontract. Note that Contracts with at least one completed posting will not be deleted.
To Wipe a Contract or a Subcontract, go to the specified Contract/Subcontract, or highlight it in a listing of Contracts/Subcontracts. From the Tools menu, click Wipe. Ad Manager will ask for confirmation that this Contract/Subcontract and all associated items are to be removed. Selecting Yes will delete the Contract/Subcontract and its associated items.

